Mega block Editor Tool Reference
Note
This tool is only available in versions >= 4003.
You can use the editor tool only after importing the com.easyar.mega package.
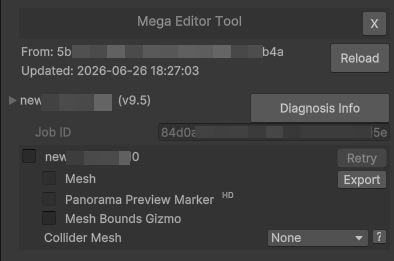
A screenshot of the tool under default conditions after it is successfully created.
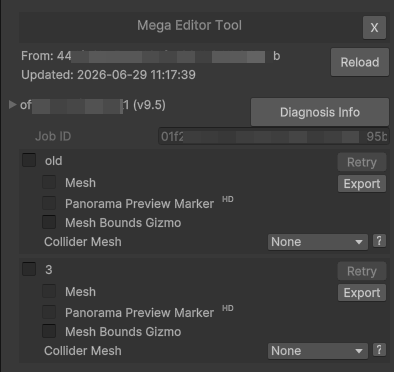
A screenshot of the tool when a block has multiple groups of meshes.
Tip
A block may contain multiple groups of meshes. Blocks created using the Large Space Fusion or Incremental Update features may contain multiple groups of meshes. Each group of meshes can be loaded and unloaded independently. The overlapping areas of the boundaries of each group of meshes will not overlap perfectly. You can choose which mesh groups to load according to your actual needs.
| Name | Description |
|---|---|
| X | Delete the editor tool. |
| From | The App ID of the currently connected service. |
| Updated | The time of service connection. |
| Reload | Reconnect to the service. If the block ID is specified and the block exists in the service, the Mega block editor tool interface will be displayed. Otherwise, the error interface will continue to be displayed. |
| Mega Go[*] | Only valid for Mega Go. Mega Go information. When collapsed, the abbreviated information is displayed. |
| Trial | Only valid for Mega Go. Whether it is trial data. |
| Expire Date | Only valid for Mega Go. The expiration date. Trial data cannot be used after expiration. Non-trial data can no longer connect to the service to obtain editor data after expiration, but other functions are not affected. |
| [block name] (v) | Display the block name and version. Click the left button to expand/collapse the detailed block information. |
| Diagnosis Info | Export diagnostic information. |
| Block ID | The block ID. |
| Job ID | The mapping task ID of the block. |
| [mesh group name] | Display the mesh group name. Click the checkbox to load/unload mesh data. |
| Retry | When mesh loading fails, click this button to reload. |
| Mesh | Show/hide the block mesh. |
| Export | Export the block mesh. |
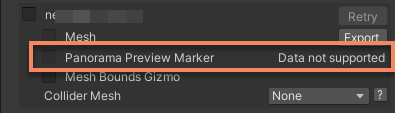
| Panorama Preview Marker | Show/hide the panorama preview marker points. |
| Mesh Bounds Gizmo | Show/hide the mesh boundary gizmo. |
| Collider Mesh | Collision detection mesh configuration. Options: None: Does not support ray detection and loads the fastest.Min LOD: Low-precision LOD (only for ray detection), and the LOD switch is not stuck.Match LOD: Matches the current LOD, and there may be slight stuttering when switching LODs.
|
Scene Nodes
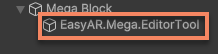
The data of the editor tool is stored under the EasyAR.Mega.EditorTool node. Deleting this node is equivalent to deleting the data of the editor tool.
Caution
You cannot directly modify the content of the EasyAR.Mega.EditorTool node, especially the Transform of this node. Otherwise, the editor tool may not work properly or the content display position may be incorrect during tracking.
Basic Information
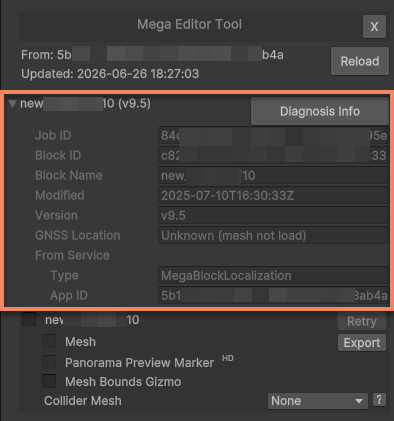
| Name | Description |
|---|---|
| Block ID | The block ID. |
| Job ID | The mapping task ID of the block. |
| Block Name | The block name. |
| Modified | The block modification time. |
| Version | The block mapping version. |
| GNSS Location | GNSS (GPS, Beidou, etc.) coordinates. The correct values are only displayed after the block mesh is loaded. |
| Latitude | The GNSS latitude coordinate. Only displayed when the GNSS coordinates are generated in the block mapping data. |
| Longitude | The GNSS longitude coordinate. Only displayed when the GNSS coordinates are generated in the block mapping data. |
| Altitude | The GNSS altitude coordinate. Only displayed when the GNSS coordinates are generated in the block mapping data. |
| From Service | The service information used when obtaining the block. |
| Type | The service type. |
| App ID | The service App ID. |
Mesh
The block mesh is aligned with the block tracking target space, and 3D content can be directly placed on the model.
The block mesh data is stored under the tool node and only exists in the editor mode. It will not be packaged into the final application.
Loading
Click the selection box next to the mesh group name, which will start the loading process of this group of data. After loading, you can see the mesh of the current group in the Scene window.
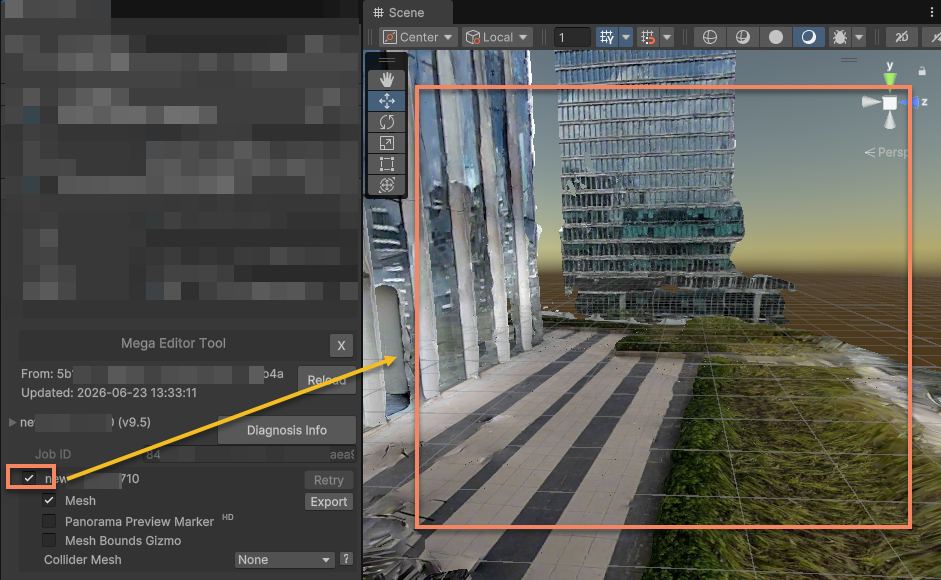
Deselecting the box will unload this group of data.
During the loading process, a loading animation will be displayed in the lower left corner of the Scene window.
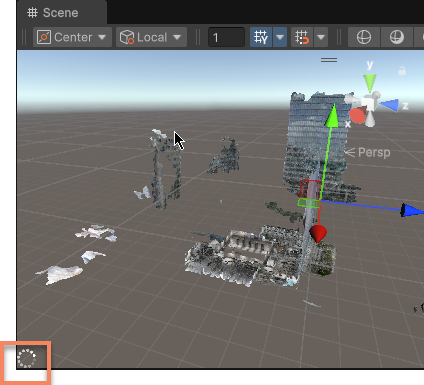
The block mesh will switch LODs according to the camera position. You need to stay connected to the network during use to avoid LOD switching failures.
When the loading or LOD switching fails, the boundaries of the meshes that failed to load successfully in the Scene window will display warm-colored gizmos. Detailed error information will be displayed in the Console window.
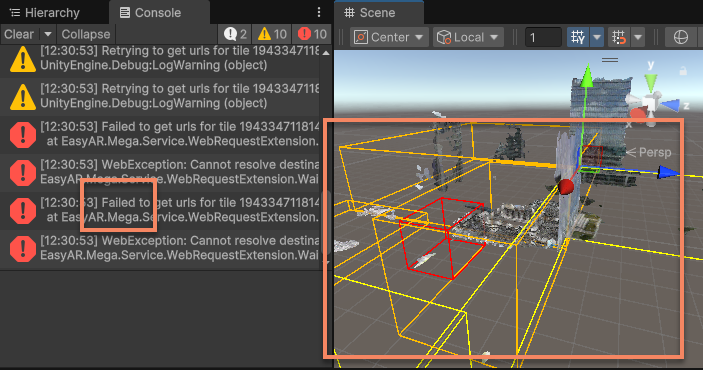
After solving the problem, you can click the Retry button to reload.
After the mesh is loaded, it will be cached locally. The cache path is:
var cachePath = Path.Combine(Application.persistentDataPath, "MegaStudio/cache")
Show/Hide
Click the Mesh checkbox to show/hide the mesh of the current group. This option is selected by default after the mesh is loaded.
Showing/hiding the mesh does not affect the rendering position of the 3D content or the state of the block node.
Boundary Gizmo
Click the Mesh Bounds Gizmo checkbox to show/hide the mesh boundary gizmo of the current group. This option is disabled by default.
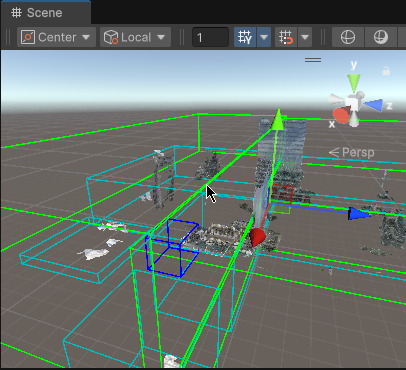
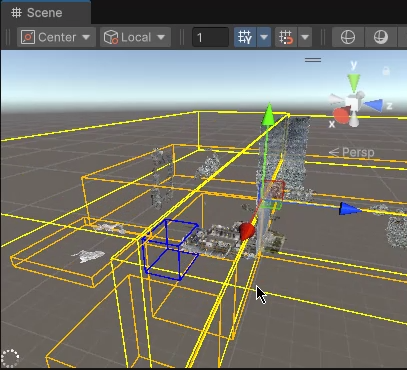
Gizmos of different colors represent different LODs. Cold colors represent meshes that have been loaded, and warm colors represent meshes that are not fully loaded (including failed loading).
Collision Detection
If you need to use ray detection to interact with the mesh, you need to configure the Collider Mesh option. This option is set to None by default, which means ray detection is not supported.
Export
Click the Export button to export the mesh data of the current group.
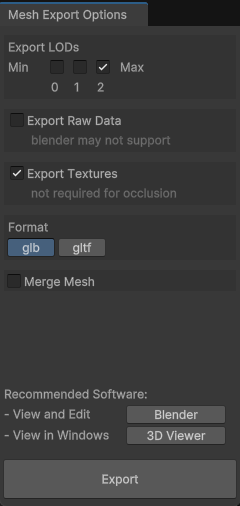
| Name | Description |
|---|---|
| Export LODs | Select the LOD precision of the model to be exported. The smaller the number, the lower the clarity. Multiple selections are available when Merge mesh is not checked. Only single selection is available when Merge mesh is checked. |
| Export Raw Data | Whether to export the raw data. The raw data may not be loaded in some software (such as blender) because these software do not support some gltf extensions. |
| Export Textures | Whether to export the textures. If you only need to export the model for occlusion or collision detection, you can choose not to export the textures. |
| Format | Whether the format of the exported single file is glb or gltf. |
| Merge mesh | Whether to merge all meshes into one file for export. Only available when a single LOD is selected. The merging process and the merged mesh require more video memory. |
| Export | Click to start the export. |
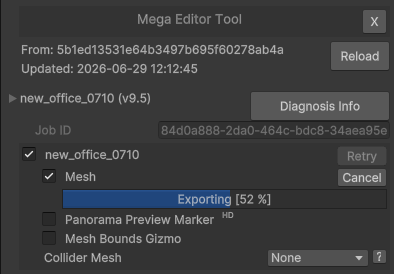
A progress bar will be displayed below the Mesh checkbox during the export process.
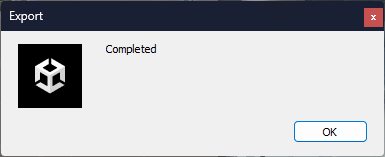
After the export is completed, you will see a pop-up window prompt of Completed.
Panorama
The panorama markers and panorama data are stored under the tool node and only exist in the editor mode. They will not be packaged into the final application.
Basic Information
Some data does not support panoramas. In this case, Data not supported will be displayed next to the Panorama Preview Marker.
Marker Points
Click the Panorama Preview Marker checkbox to show/hide the panorama preview marker points. This option is disabled by default after the mesh is loaded.
The panorama preview marker points will be displayed in the Scene window.
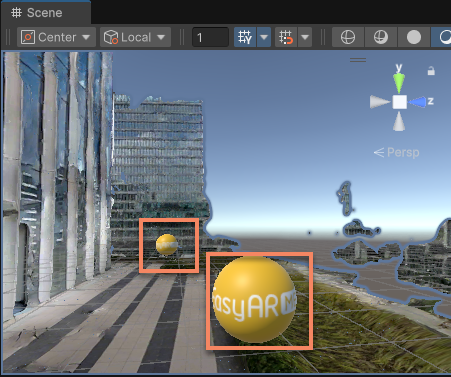
After clicking a marker point, the MegaPanorama window will open. After clicking different marker points, the content of the MegaPanorama window will immediately switch to the corresponding panorama.
Panorama Window
After clicking a marker point, the MegaPanorama window will open and display the panorama corresponding to this marker point.
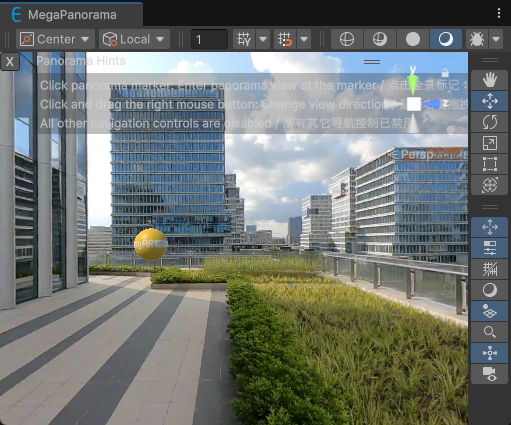
The MegaPanorama window is also a type of Scene window. You can use the right mouse button to drag and rotate the view in it. Other controls such as zooming and moving are disabled in this window.
When the Mesh is open, the display effect of the MegaPanorama window will maintain the occlusion based on the mesh's spatial model.
Tip
- This function is still available after the editor enters the play mode, but the accuracy of the occlusion based on the mesh's spatial model is affected by the disabled LOD switching.
You can also click other marker points in the MegaPanorama window, and the content will immediately switch to the corresponding panorama.
Diagnostic Information
Click the Diagnosis Info button to export diagnostic information. The diagnostic information includes the basic information of the current block, the service information where the block is located, etc.
Important
When submitting a problem to EasyAR, it is recommended to attach the diagnostic information to quickly locate the problem.