Using the Session Verification Tool
This article describes how to use the session verification tool to quickly verify the session workflow in the editor and perform simulated runs using EIF files.
Before You Start
The simulated run uses an EIF file as input. Therefore, you need to record an EIF file before you start:
- Refer to Recording an EIF File to record an EIF file.
In addition, you need to understand:
- The basic concepts of Recording an EIF File for Simulated Runs.
- The basic concepts, components, and workflow of AR Session.
Session Verification Tool
The session verification tool helps developers quickly verify the session workflow in the Unity editor and perform simulated runs using EIF files.
By default, you can see the session verification tool in the Inspector window of the AR Session (EasyAR) object. It is part of the DiagnosticsController editor:
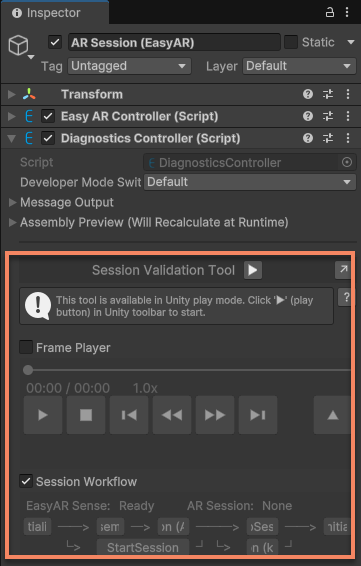
Click the ↗ button in the upper-right corner of the tool to pop it out as an independent window for easy viewing and operation. After the window is closed or the ↘ button is pressed, the tool will be displayed in the Inspector window again.
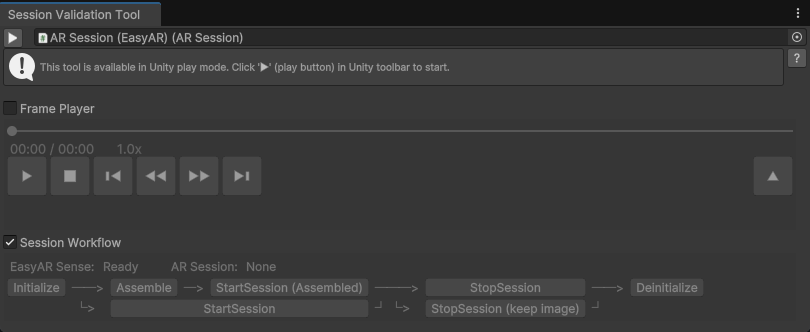
The effect of the tool during operation is shown in the following video:
This video shows the usage effect of the session verification tool, recorded in Unity's play mode. In the upper part of the video, the
Hierarchyview is on the left, theSceneview is in the middle, and theGameview is on the right. The session verification tool is in the lower part of the video. The content in theGameview is the same as what users see on their mobile phones in the real world.The upper-left part of the tool shows the progress bar of EIF playback, which can be seen changing continuously as the playback progresses. The lower-left part of the tool shows the current state of the session. The right side of the tool shows the session components and available center modes.
In the scene, you can see three AR functions working simultaneously:
- Motion tracking: It is provided by the frame player. The blue sphere is the XR Origin, and the blue cone represents the user's position.
- Dense spatial mapping: You can see that a semi-transparent mesh model is continuously generated as the perspective moves.
- Sparse spatial tracking: In the video, a Christmas tree is being tracked, and the superimposed virtual object is a light blue point cloud.
Starting the Tool
Click the ▶ button at the top of the tool to start it. Pressing this button has the same effect as directly pressing the ▶ button on the Unity toolbar.
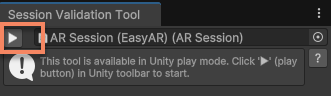
If the tool is already running, the button will change to ■. Click it to stop the tool.
When the tool is displayed as an independent window, the selection box to the right of the ▶ button allows you to select the session object used by the tool. If the session is lost due to window reset, you can reselect it here.
Controlling EIF Playback
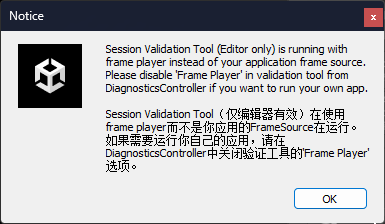
To use the EIF playback function of the tool, you need to check the Frame Player option in the tool before running. At this time, the tool will manage the selection of the frame source during the session assembly process. Regardless of the value set for AssembleOptions.FrameSource, the frame player component will be enabled.
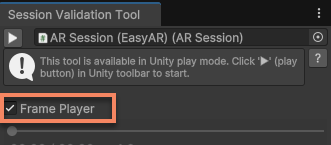
Therefore, a pop-up window will appear during runtime, indicating that the frame source used by the current session is managed by the tool:
Note
The tool only manages the selection of the frame source during the assembly process in the Unity editor. This option has no effect when the application is packaged and run.
During normal operation, the EIF playback control function will be displayed in the part framed in the figure above the tool:
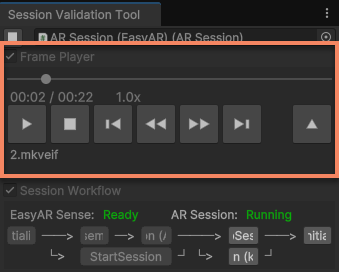
You can use these buttons to control the playback of the EIF file:
▶: Play, resume playback from the paused or stopped state.▮▮: Pause.■: Stop.▮◀: Jump back 5 seconds (if the file supports it).◀◀: Decrease the playback speed (if the file supports it).▶▶: Increase the playback speed (if the file supports it).▶▮: Jump forward 5 seconds (if the file supports it).▲: Open a file.- Progress bar: Click to jump to a specific playback position (if the file supports it).
You can adjust and optimize the content and interaction logic in the scene while playing, allowing you to perform most of the development work on your computer and see the effects intuitively.
Note
When playing new data or jumping to a different playback position, the original data in the scene will not be cleared. The state of the AR components will also not be reset. They will behave as if the camera data suddenly jumped from the previous frame to the new data.
Although this has little impact on some functions, for functions that rely on motion tracking (such as dense spatial maps and Mega), it may cause abnormal function states and affect the running effect.
Controlling the Session Workflow
To use the session workflow control function of the tool, you need to check the Session Workflow option in the tool before running. This option is checked by default.
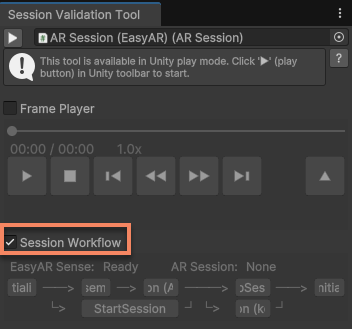
During normal operation, the session workflow control function will be displayed in the part framed in the figure below the playback control of the tool:
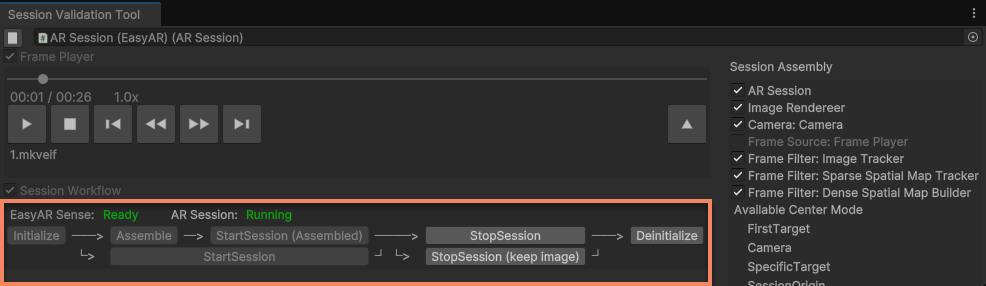
Above the entire area, two status messages, EasyARController.IsReady and ARSession.State, are displayed.
Below the entire area, these buttons are provided to control the session workflow:
Initialize: Initialize the session. You can choose to use the license key configured inProject Settingsor manually enter a license key.Assemble: Assemble but do not start the session.StartSession (Assembled): Start the assembled session.StartSession: Assemble and start the session.StopSession: Stop the session.StopSession (keep image): Stop the session but keep the image background.Deinitialize: Deinitialize the session.
Note
Since these control functions directly call the relevant methods of ARSession and EasyARController, you can use these buttons to verify the impact of session state changes on the content. However, you need to note that if similar methods are also called in the application script, the running process of the application may deviate from the application's expectations.
Controlling Session Components
To use the session component control function of the tool, you need to check the Session Workflow option in the tool before running. This option is checked by default.
During normal operation, the session component control will be displayed in the part framed in the figure below or to the right of the tool, depending on the width of the window:
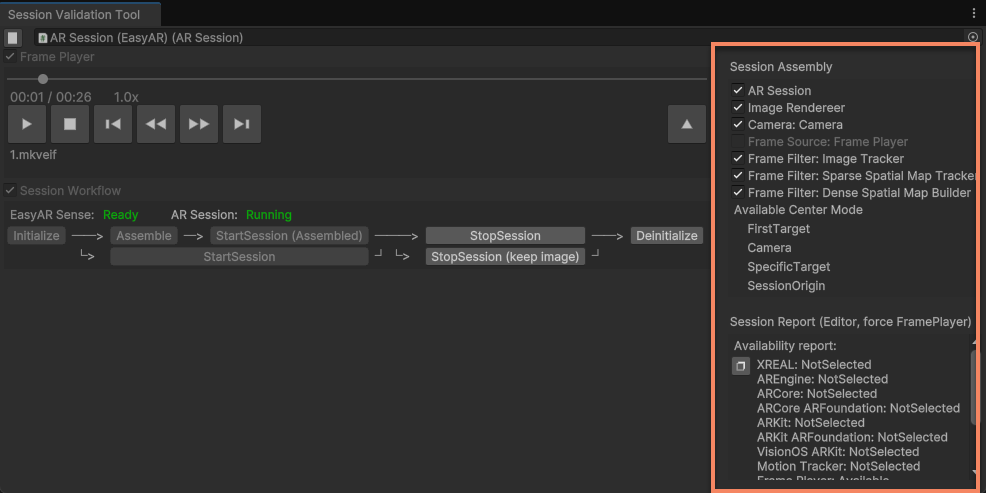
The content displayed in this area is related to the specific session. For example, the session used in the above figure includes three functional components: image tracking, dense spatial mapping, and sparse spatial tracking. Therefore, the control checkboxes for these three functions are displayed in the tool.
Generally, this area will display all available AR functional components in the session and provide control for enabling/disabling (enabled) these components, including:
- AR Session: Control the enabling/disabling of the session itself.
- Image Renderer: Control the enabling/disabling of physical camera image rendering.
- Camera: Control the enabling/disabling of the virtual camera.
- Frame Source: Control the enabling/disabling of the frame source. It can only be controlled when the frame player is not enabled. When the frame player is enabled, the function control is replaced by the EIF playback control section.
- Frame Filter: Control the enabling/disabling of specific AR functions.
- Frame Recorder: Control the enabling/disabling of the EIF recording component. It is only visible when the frame player is not enabled. When the frame player is enabled, this component will not be assembled into the session.
In addition, the available center modes of the session and the session report will also be displayed in this area.
Note
The available center modes and session report displayed in the tool are the results of running in the editor and will be different when running on an actual device.
When using the Mega function, the Mega function component control will be displayed in the tool.
Related Topics
- Try Simulated Runs Using EIF Files to control the playback of EIF files through scripts.
- Try to Control Session Execution in scripts.
- Try to Access AR Functional Components in scripts.
- Try to Obtain the Running Results of the Session in scripts.
- Try to Initialize in scripts.
- Try to Obtain the Session Report and Determine Device Support in scripts.
- Session Verification Tool Mega Control Reference