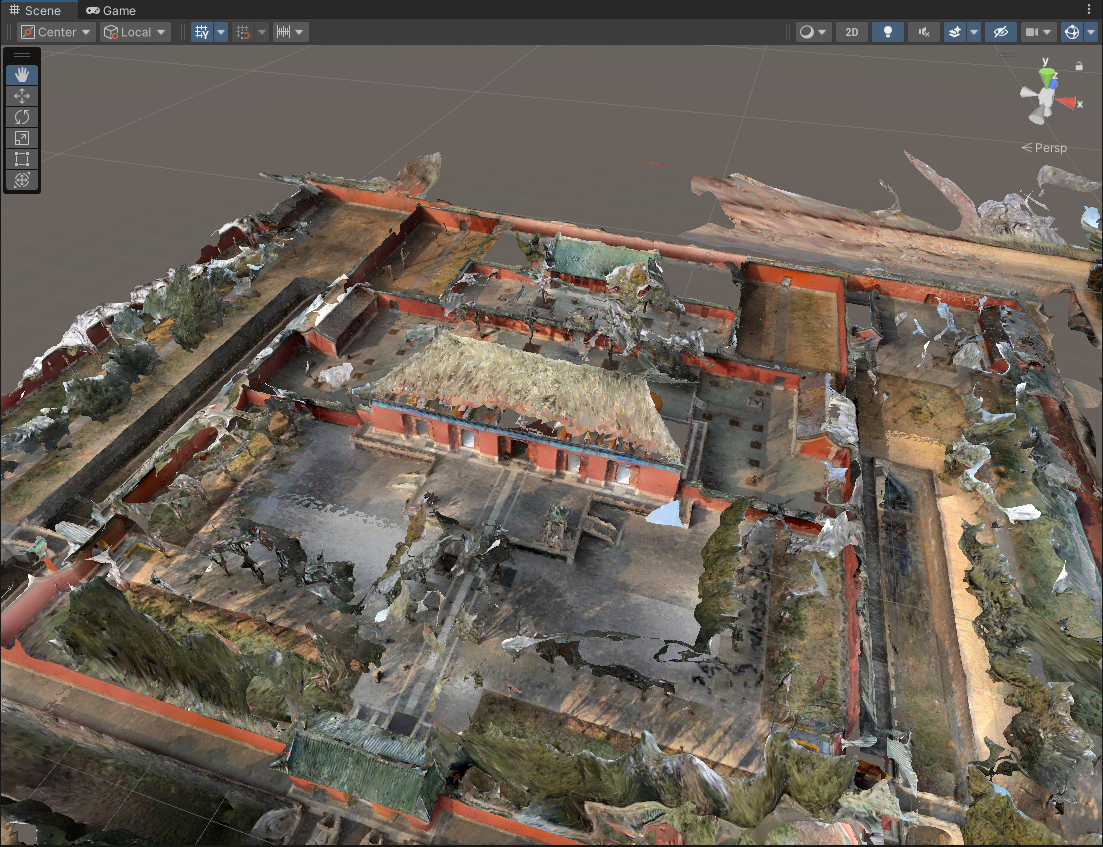
View 3D Real-World Mesh
This article details how to preview spatial models using Unity and the Mega plugin, including the complete process of Unity installation, plugin import, addition of the Block browsing tool, and loading of mapping results.
Note
This article is for non-Unity developers. Unity developers please refer to Add 3D Content Aligned with the Real World to load block mesh.
Before You Start
Before starting to preview the spatial model, you need to install Unity and import the Mega Studio plugin.
Install Unity
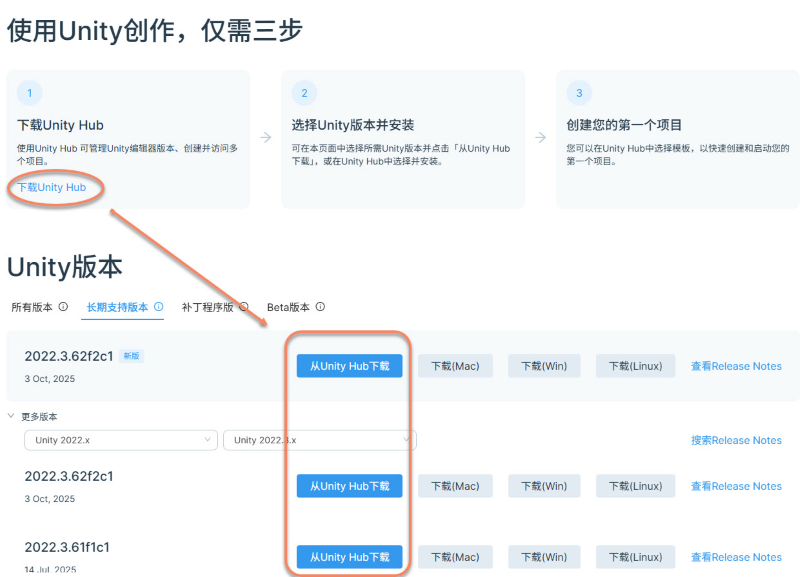
Install Unity Long-Term Support (LTS) version 2021.3.30 or higher. Download links:
- Mainland China: Download the installation package from the Unity Chinese page and follow the official instructions for installation.
- Other regions: Download the installation package from the Unity official website and follow the official instructions for installation.
First, download Unity Hub. Then you can select the Unity version on the web page and download it from the Hub, or select and install it in Unity Hub.
Log in/Register a Unity Account
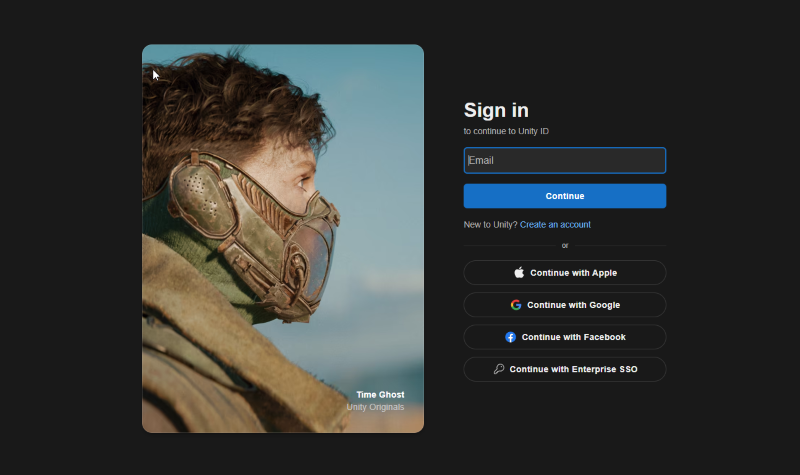
Open Unity Hub and log in to your Unity account (register if you don't have an account).
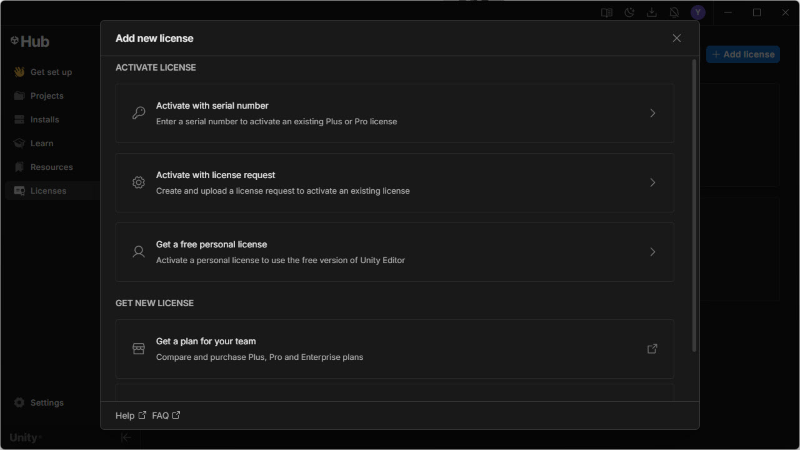
Activate the Unity License
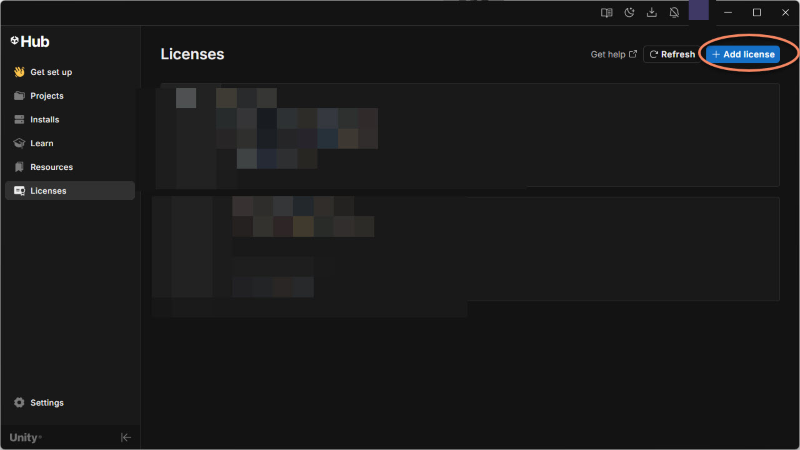
Select the corresponding license type for activation according to your actual needs. Note: Due to differences in Unity Hub versions or language settings, the interface may vary slightly, but the core activation process remains the same.
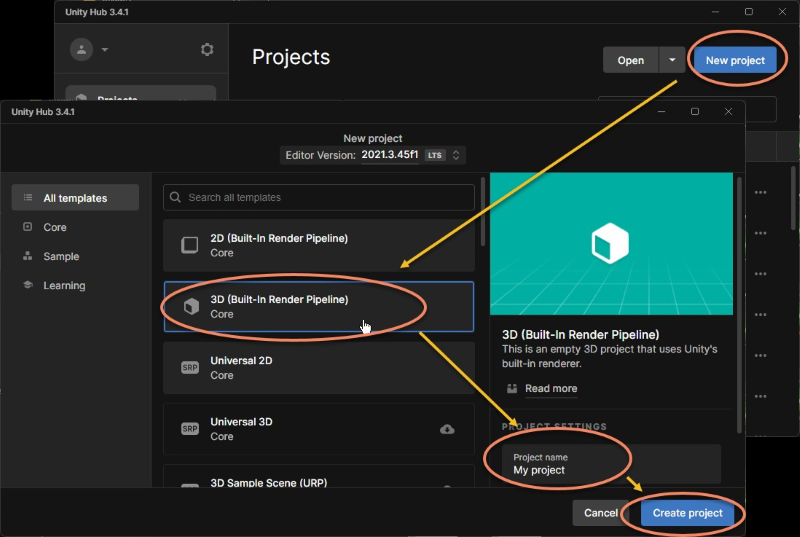
Create a New Unity Project
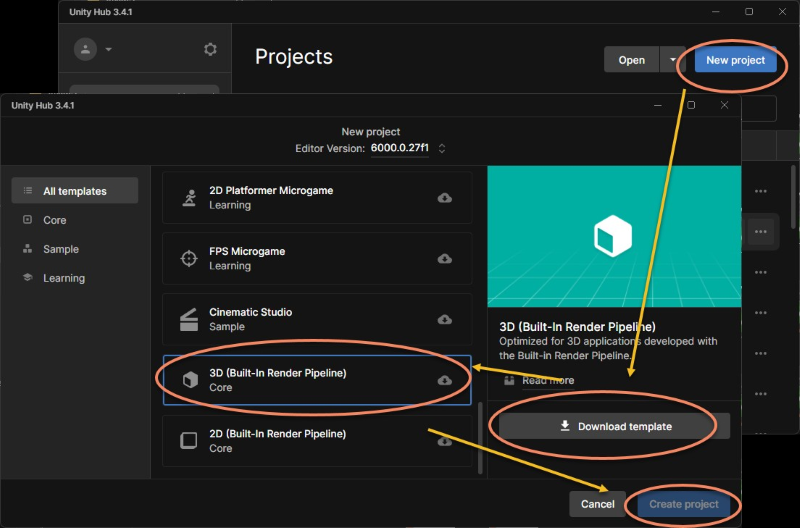
In some versions, such as Unity 6, you need to download the corresponding template first and then create a project.
Download the Mega Unity Plugin
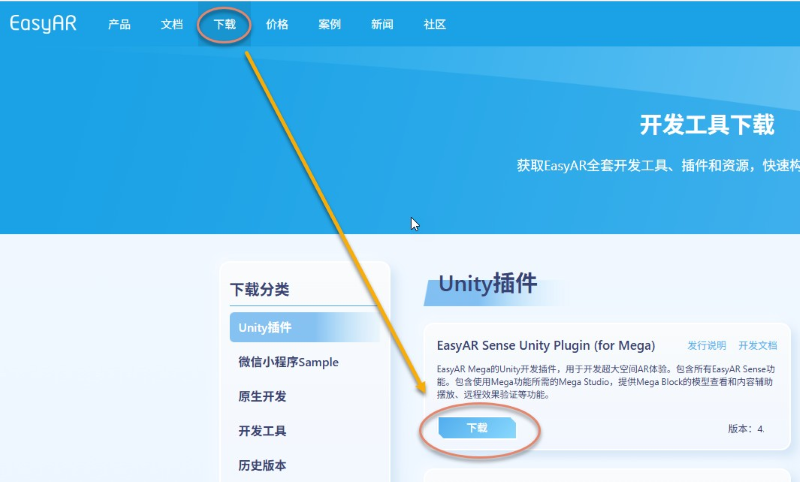
Log in to your EasyAR account and go to the download page.

Download the file pointed to by the arrow in the figure.
After unzipping the downloaded .zip file, you will get the following directory structure:
.
└── EasyARSenseUnityPluginForMega_**.zip          # Complete installation package
    ├── com.easyar.mega.studio-**.tgz             # Contains annotation tools
    ├── com.easyar.mega-**.tgz                    # Contains the EasyAR Mega support package
    ├── com.easyar.sense-**.tgz                   # Contains the EasyAR Sense core library and Unity plugin
    ├── readme.cn.txt                             # Chinese readme file
    └── readme.en.txt                             # English readme file
Important
Note: Do not unzip the .tgz files. These are Unity packages and need to be imported directly through the Unity Package Manager.
Version number explanation: ** in the file name represents the version number, in the format of Major.Minor.Patch + BuildNum.BuildHash. Please refer to the latest version officially released.
Import the Package (UPM Package) into the Project
Click Window -> Package Management -> Package Manager, click the + sign in the upper left corner of the pop-up window, and select Install package from tarball....
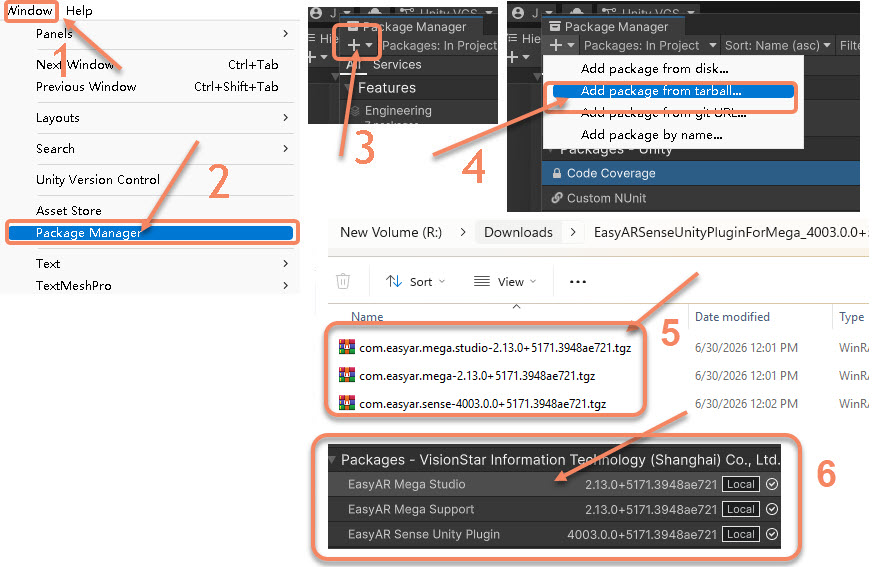
Import in sequence:
com.easyar.sense-**.tgz
com.easyar.mega-**.tgz
com.easyar.mega.studio-**.tgz
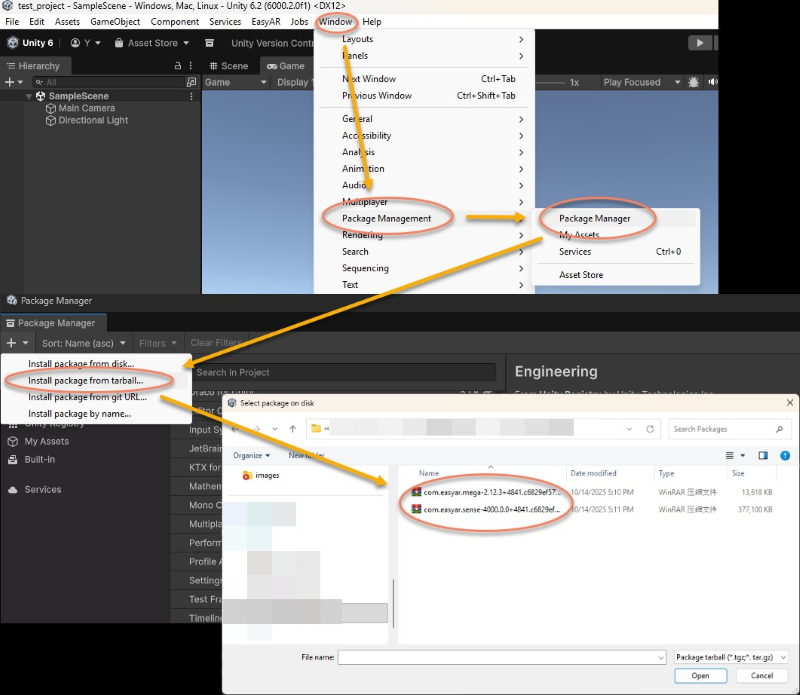
Note
Before importing, it is recommended to copy the .tgz files to your Unity project folder (for example, store them in the Packages directory).
Do not move or delete these .tgz source files after importing, otherwise Unity will not be able to load the corresponding packages.
Verify Whether the Plugin is Imported Successfully
Right-click in the Hierarchy panel. If you can see the component creation options for EasyAR Sense and EasyAR Mega, it means the plugin is imported successfully.
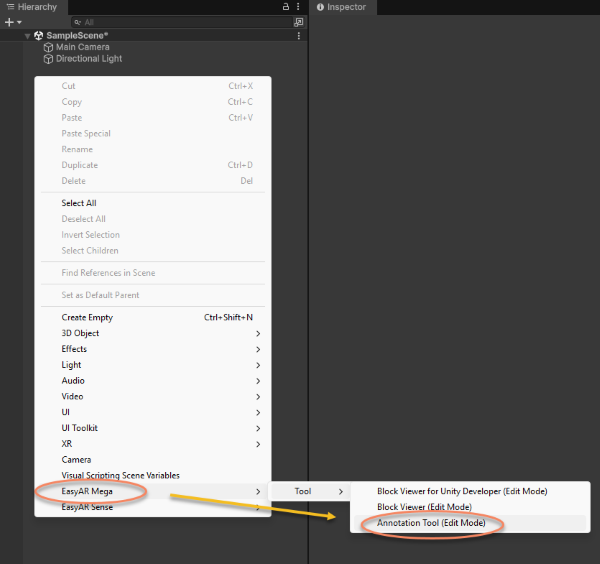
Add the Browsing Tool
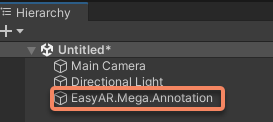
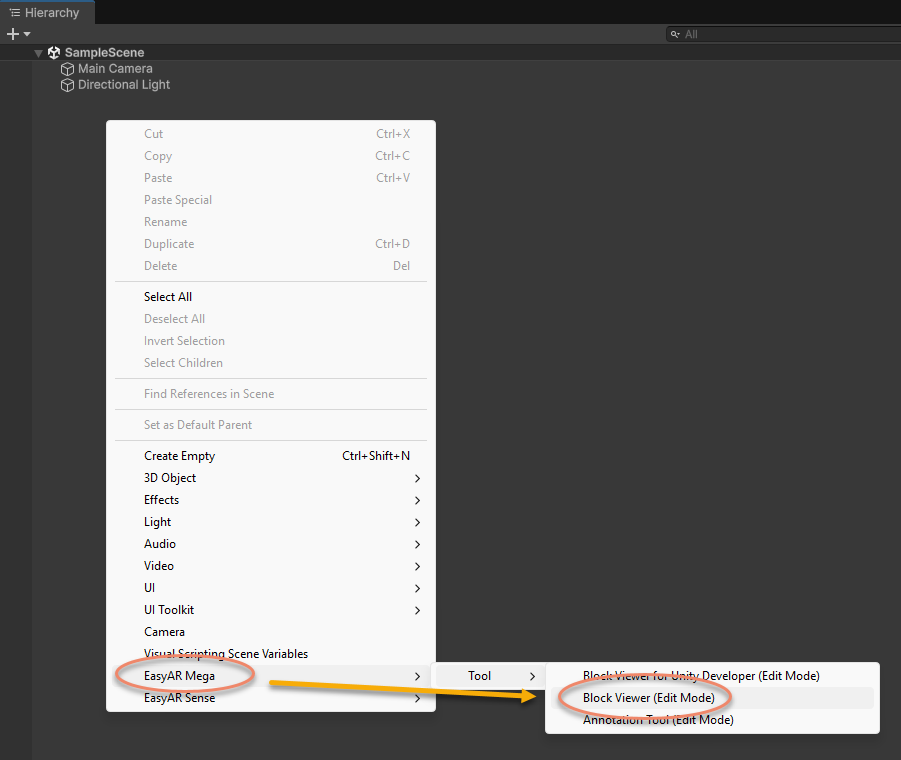
Right-click on the blank space in the Hierachy panel and select EasyAR Mega > Tool > Annotation Tool (Edit Mode).
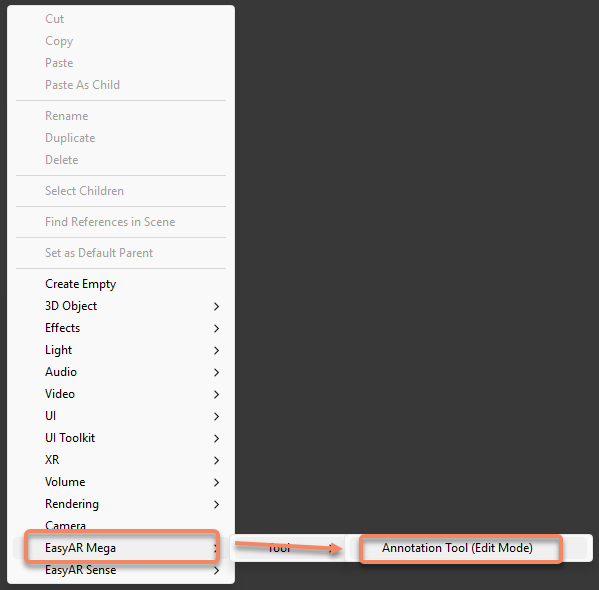
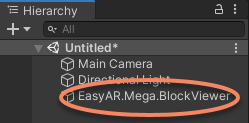
After adding, a new node will appear.
Load the Mapping Result Block
Log in to the EasyAR Account
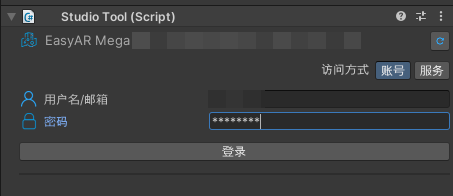
Click on the node added above and enter your EasyAR account username and password in the toolbar.
Select the Corresponding Cloud Service and Repository
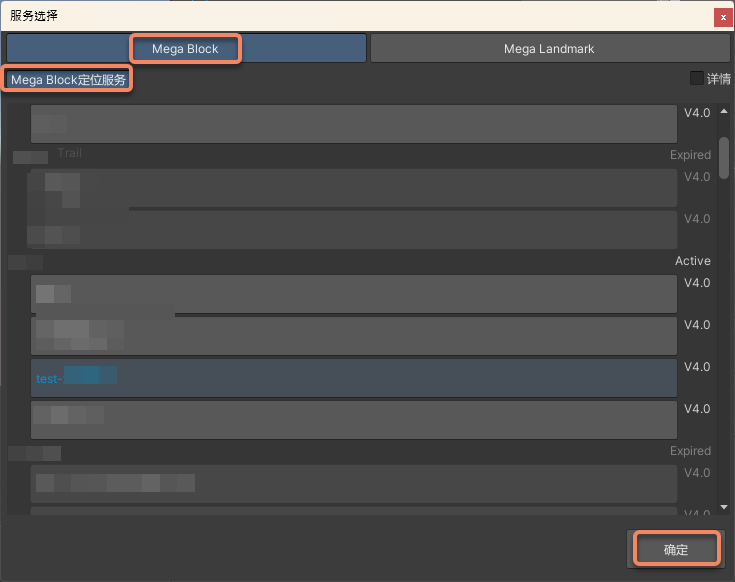
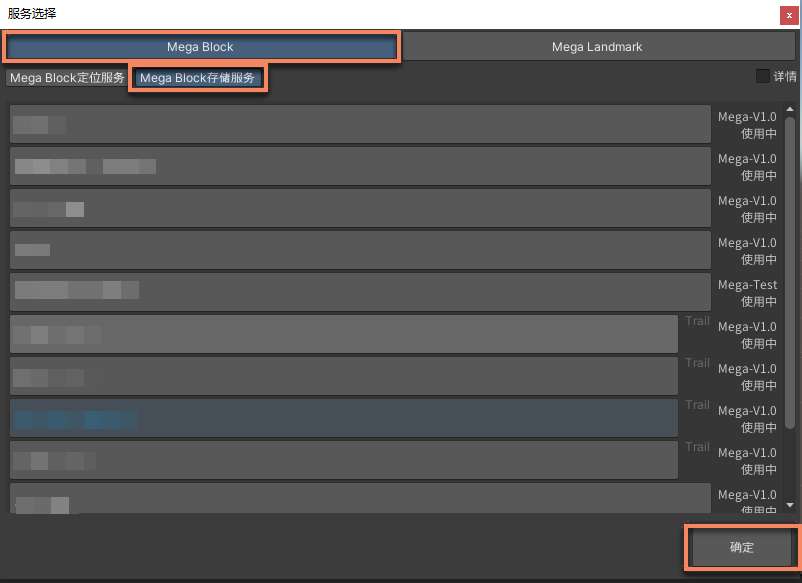
Click the button in the upper right corner of the cloud service component. In the pop-up dialog box, select Mega Block -> Mega Block positioning service, then select the positioning library where the mapping result is located below, and finally click the "OK" button.

Load the Block
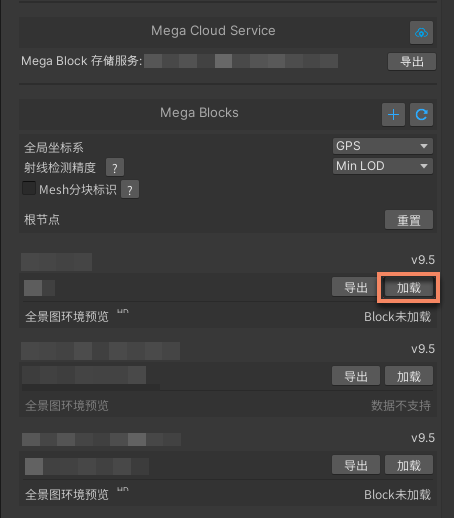
Select the mapping result Block and click the "Load" button to preview the spatial model in the scene.
If you are not familiar with Unity operations, you can refer to the Unity Getting Started Tutorial.
The preview effect of the Block is as follows: