Create 3D Content Precisely Aligned with the Real World
This document will introduce how to accurately place virtual objects at a specific position in the real - world space and precisely align them with the real - world space in an AR experience.
Before You Start
- Refer to the documentation Is My Localization Library Ready for Use? to confirm that the localization library has been correctly created and Mega Block has been added.
- Add a Mega Tracking Target to the scene.
- Prepare the 3D assets to be used in the Unity project.
Note
The following content and tools are only applicable to the process of developing Unity applications using EasyAR Mega.
If you are developing a mini-program, please refer to Create and Upload Annotations Using the Unity Editor (Mini-program Development).
If you are not developing a Unity application but want to view the Mega mapping results, please refer to Preview the 3D Real-world Mesh in the Mega User Guide.
If you are not developing a Unity application but need to simulate the operation to view the localization effect, please refer to Preview the Simulation Operation Effect in the Mega User Guide.
The content of this article requires the following Unity packages to have been imported into the project:
com.easyar.sensecom.easyar.mega
Block Real-world Data
In Mega development, various types of real-world data can be used to assist in placing 3D content:
Block mesh model
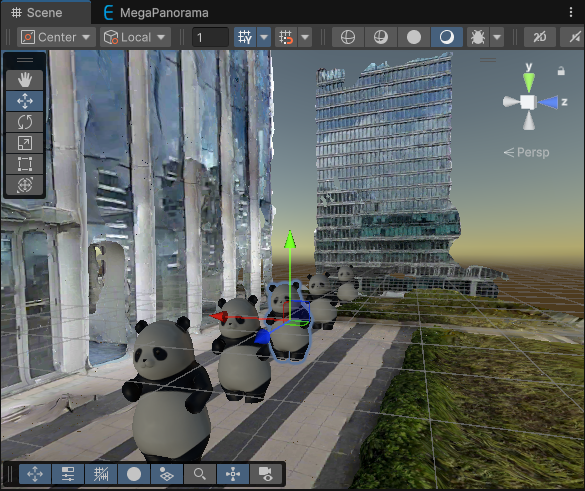
Panorama (including spatial model occlusion)
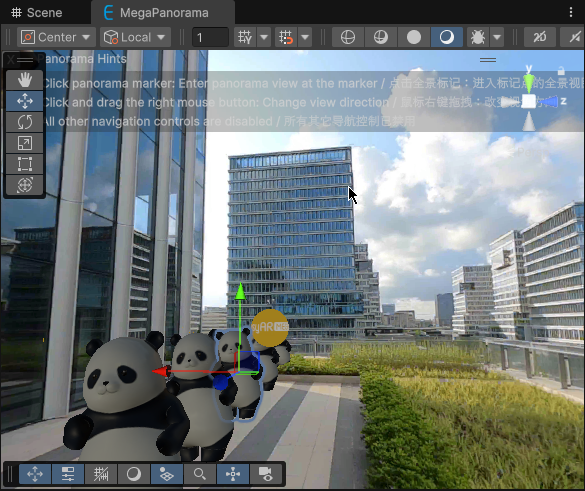
Note
Panoramas are not supported by some data.
LCC 3D Gaussian splatting
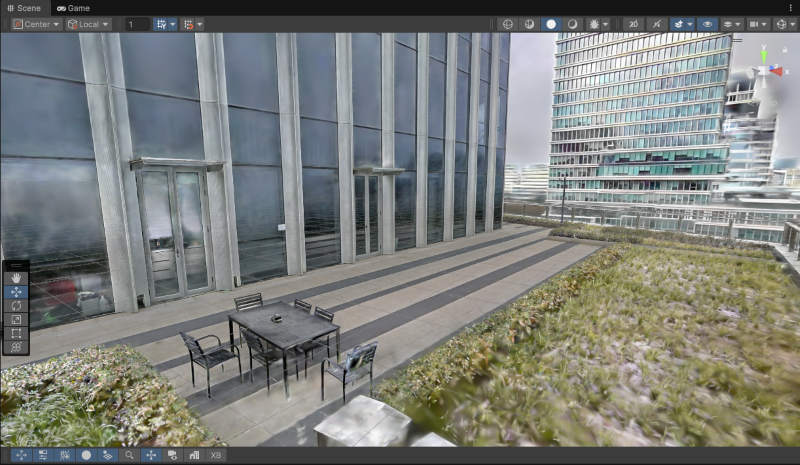
Note
LCC 3D Gaussian splatting data is only available in usage scenarios after being collected by its domain device and the mapping is completed.
Enable Editor Tool
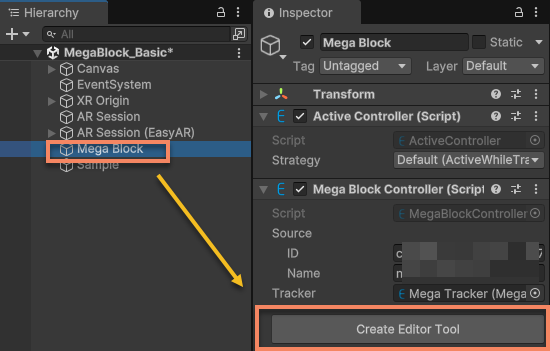
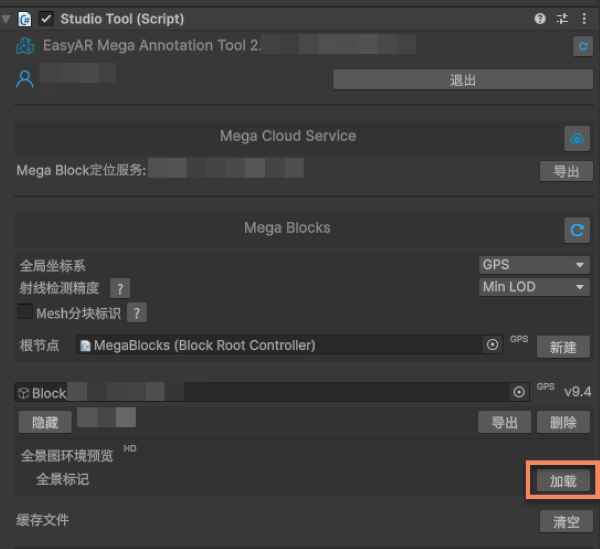
First, add a Mega tracking target in the editor, then select the tracking target and click the Create Editor Tool button.
Tip
If the application needs to create tracking targets in the script instead of in the editor, after placing them in the editor, record the tracking targets and/or their child objects. At runtime, configure the tracking targets through the script and mount the child objects under the tracking targets.
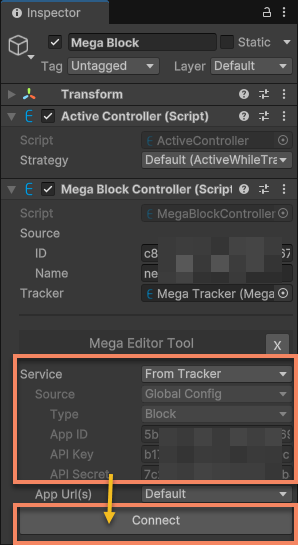
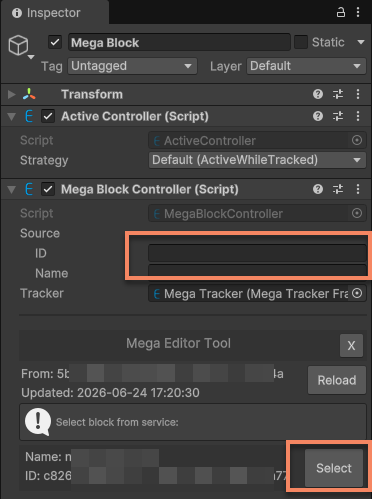
Check the service information and connect to the service.
Important
Check the permissions of the API Key before connecting.
- If the service type is
Block, ensure that the used API Key has permissions to access theMega Blockservice and theSpatialMapservice. - If the service type is
Landmark, ensure that the API Key has permissions to access theMega Landmarkservice.
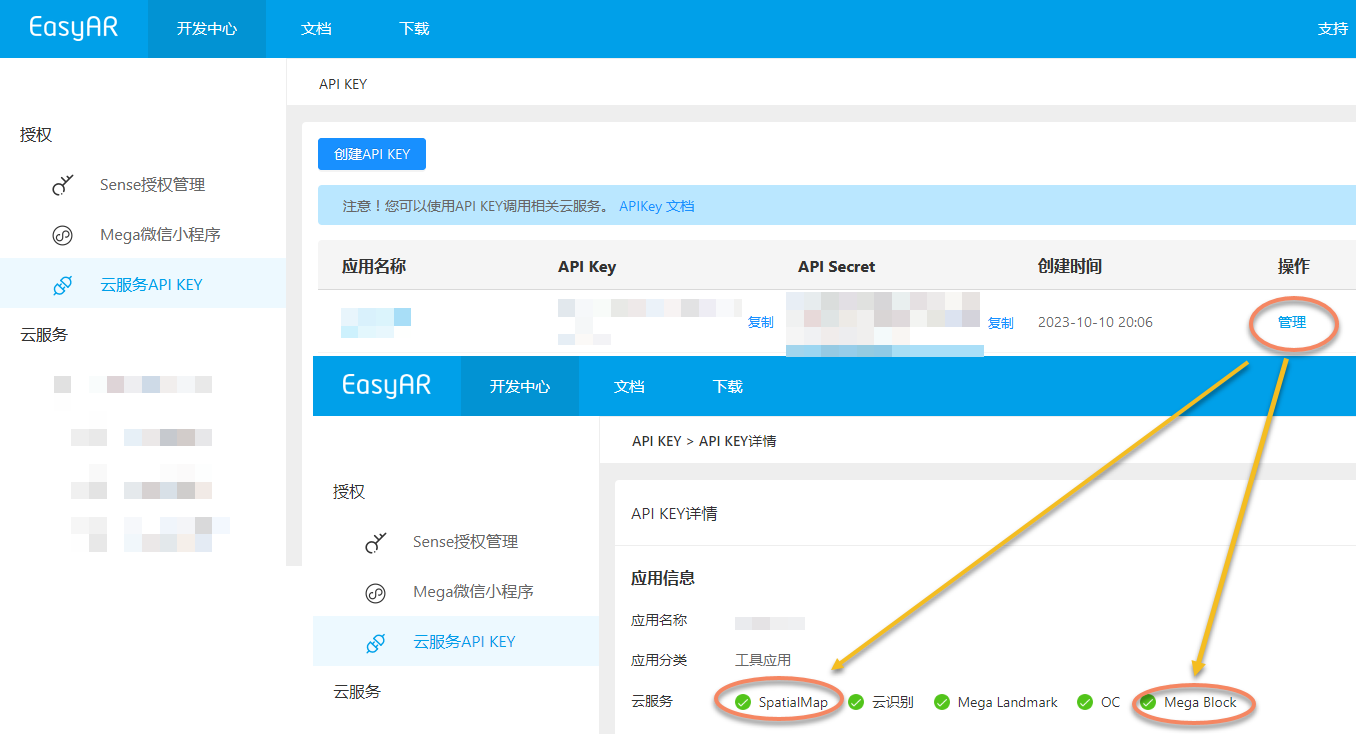
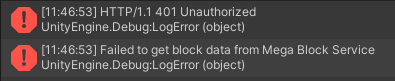
When the permissions are insufficient, you will see an error message indicating that the service connection verification failed.
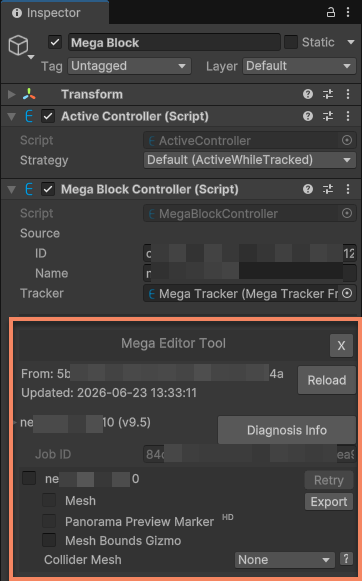
If the target data source has been correctly configured, after successfully connecting to the service, you can see the data update time and the control interface for the block editor data.
Tip
If the target data source is left blank, after successfully connecting to the service, you can see the list of block data in the service. After selecting the block you need to use, you can also enter the control interface for the block editor data, and the target data source will be automatically filled in.
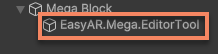
The data of the editor tool is stored under the EasyAR.Mega.EditorTool node. Deleting this node is equivalent to deleting the data of the editor tool.
Caution
Do not directly modify the content of the EasyAR.Mega.EditorTool node, especially do not modify the Transform of this node. Otherwise, the editor tool may not work properly or the content display position may be incorrect during tracking.
Load the block model
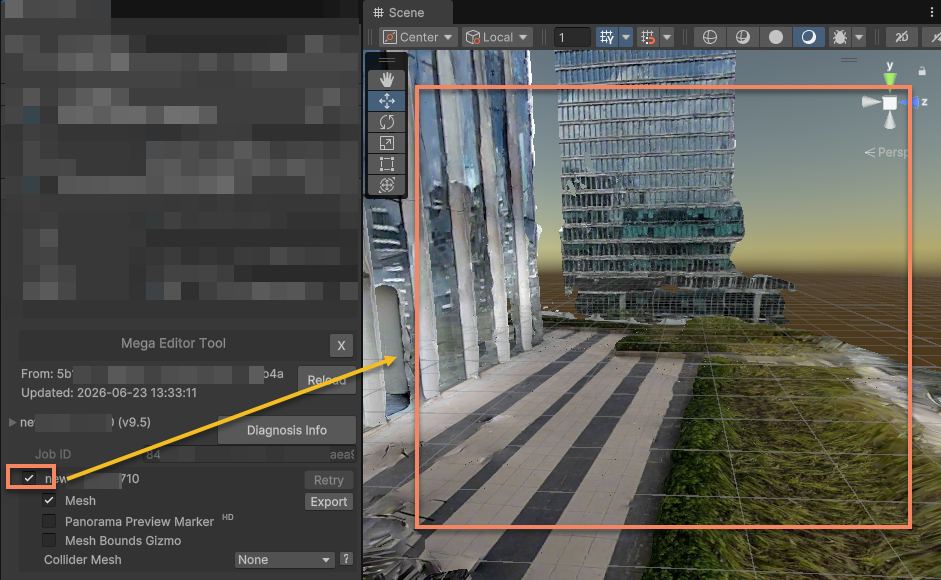
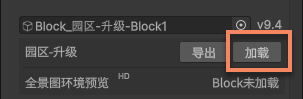
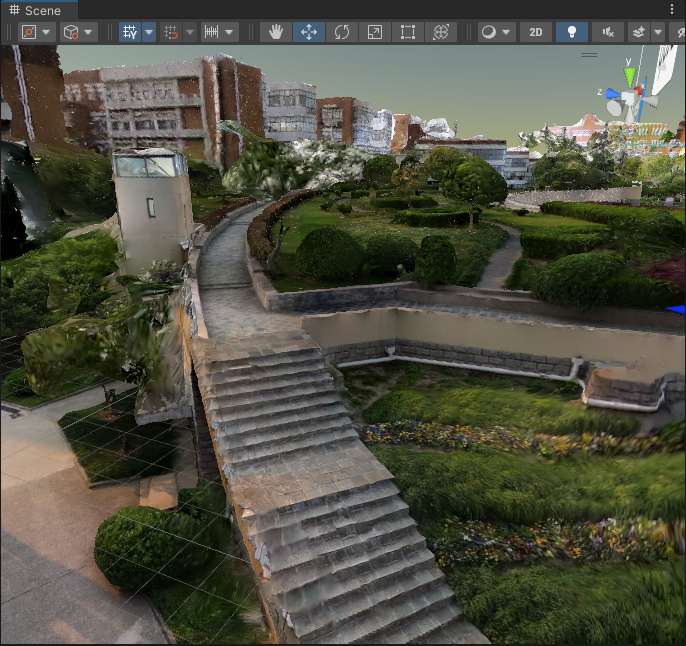
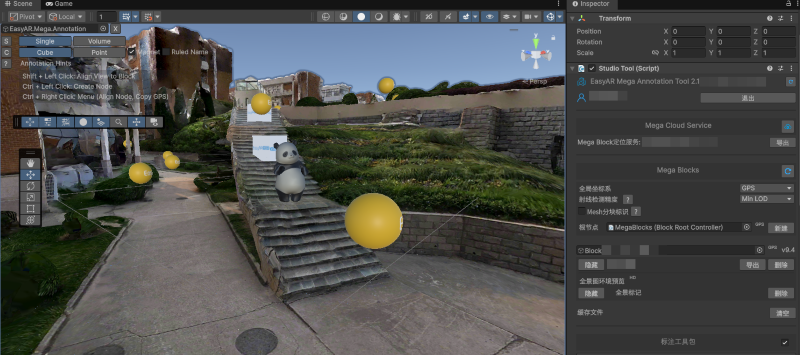
Click on the first selection box under the block data. This will initiate the loading process of the block editor data. After loading, you can see the mesh of the current block in the Scene window.
Tip
- The block mesh is spatially aligned with the block tracking target, allowing you to directly place 3D content on the model.
- The block mesh will switch LOD based on the camera position. Make sure to stay connected to the internet to avoid LOD switching failures.
- The block mesh is stored under the tool node and only exists in the editor mode. It will not be packaged into the final application.
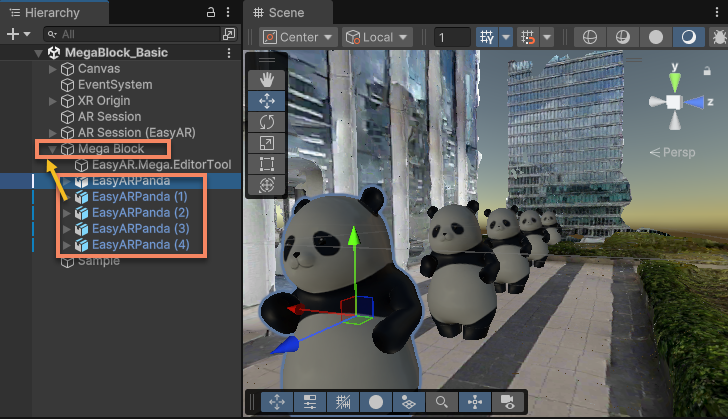
Mount 3D Content under the Block Node
After loading the block model, mount the 3D content under the Block node in the scene as its child node.
Caution
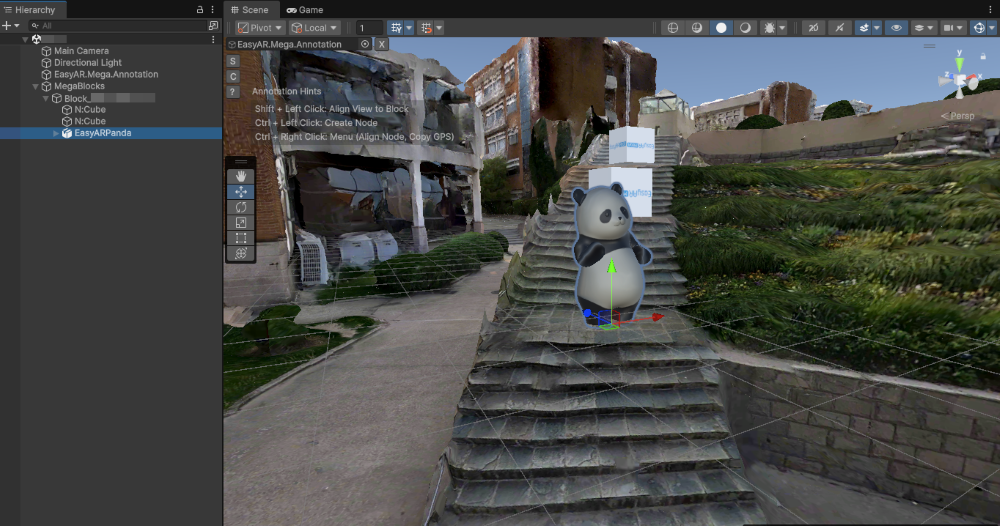
- The 3D object cannot be placed under the
EasyAR.Mega.EditorToolnode. This node is only used for editor tools and will be automatically deleted or rebuilt in some cases.
Important
- The 3D object must be placed under the block node to ensure that the rendering position of the virtual content is correct at runtime.
Precise Placement of 3D Content
You can accurately place virtual content in the real space by following these steps.
Placement according to the block grid model
In the scene, adjust the position and rotation of the 3D content relative to the block mesh to move it to the desired position and orientation.
Tip
- After the editor enters the play mode, the block mesh is still available, but the LOD will not be switched based on the camera position.
- The block mesh is stored under the tool node, exists only in the editor mode, and will not be packaged into the final application.
[Optional] Placement Based on Panoramas
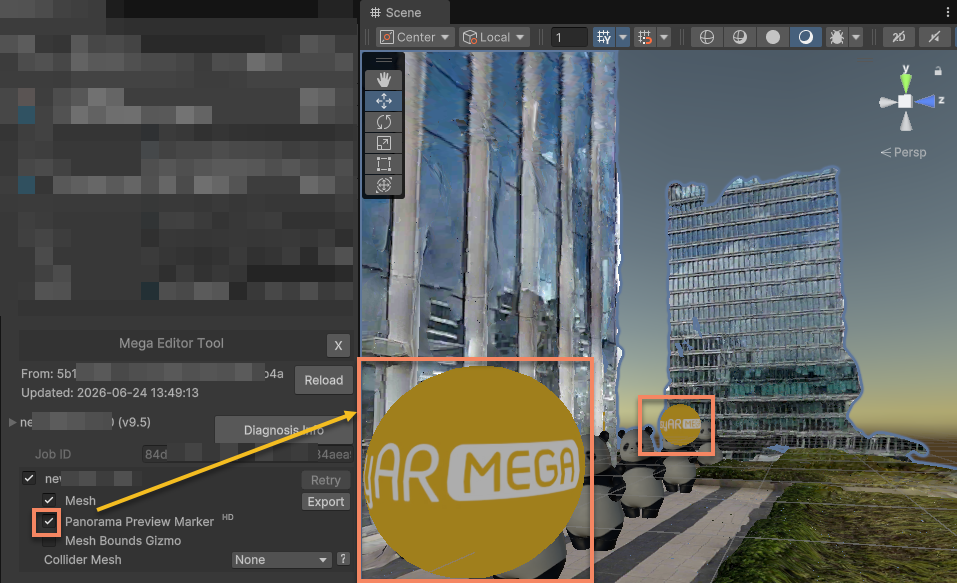
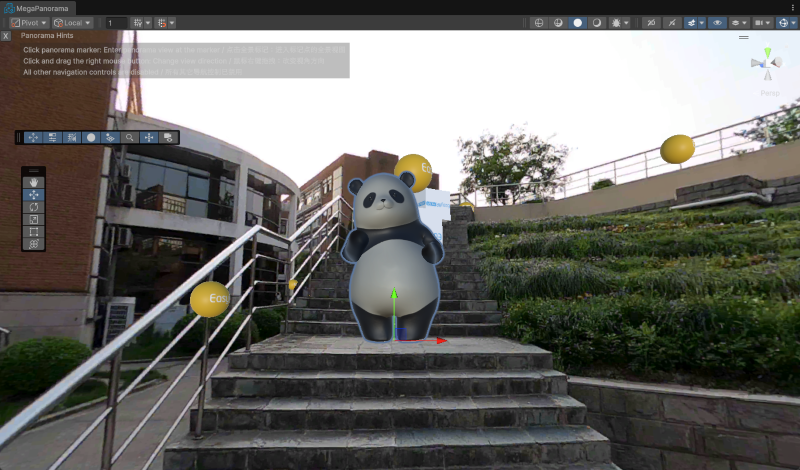
Click the Panorama Preview Marker selection box to display the panorama markers.
Note
- Some data does not support panoramas.
- The default clarity of panoramas is not high-definition. If needed, please contact the business department to obtain higher-clarity panoramas.
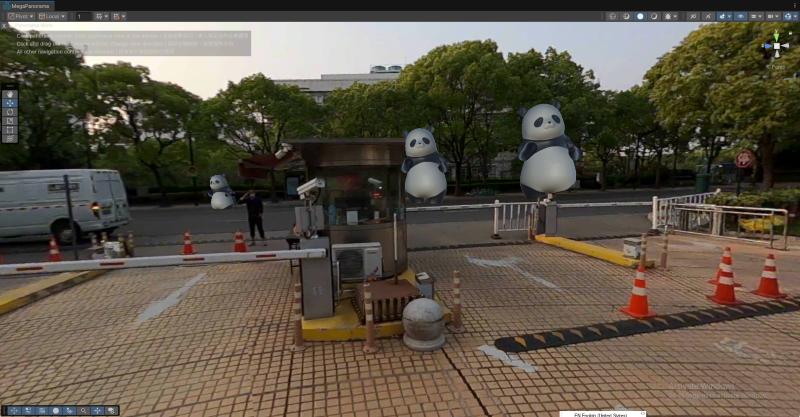
Click any panorama marker to place content in the panorama at that position. You can switch panoramas by clicking different panorama markers to confirm that the position of the 3D content is accurate from different perspectives.
Tip
- When using panorama markers to place content, the occlusion of the spatial model based on the mesh remains effective.
- After the editor enters the play mode, this function is still available, but the accuracy of the occlusion of the spatial model based on the mesh is affected by the disabling of LOD switching.
- The panorama markers and panorama data are stored under the tool node and only exist in the editor mode. They will not be packaged into the final application.
[Optional] Placement Based on LCC 3D Gaussian Splats
Note
This paragraph applies to the usage scenario after data collection and mapping using Qiyuyu devices. The mapping results from other devices do not contain LCC 3DGS data.
If you have used the LCC 3D Gaussian Splats (Qiyuyu LCC) function, you can adjust the model position according to the 3DGS. For the use of LCC data, please refer to Load LCC Data and Align with Mesh.
Impact of Defects in Real - world Scene Data on Content Placement
What to do if the loaded Block model is not horizontal?
Select the block node to be adjusted in the Hierarchy panel, and modify Rotation in the Inspector panel until the orientation of the model looks correct in the Unity editor.
The Transform of the block node in the world coordinate system will not affect the local coordinate system of the block, and therefore will not affect the rendering result of the 3D content as a child node of the block. Its Transform has nothing to do with the final display effect.
Caution
Do not modify the Transform of EasyAR.Mega.EditorTool under the block node, otherwise the editor tool may not work properly or the content display position may be incorrect during tracking.
What to Do If the Loaded Block Model Has Broken or Missing Parts
During the 3D reconstruction process, due to incomplete coverage of the acquisition perspectives, broken or missing parts may appear in the generated dense model.
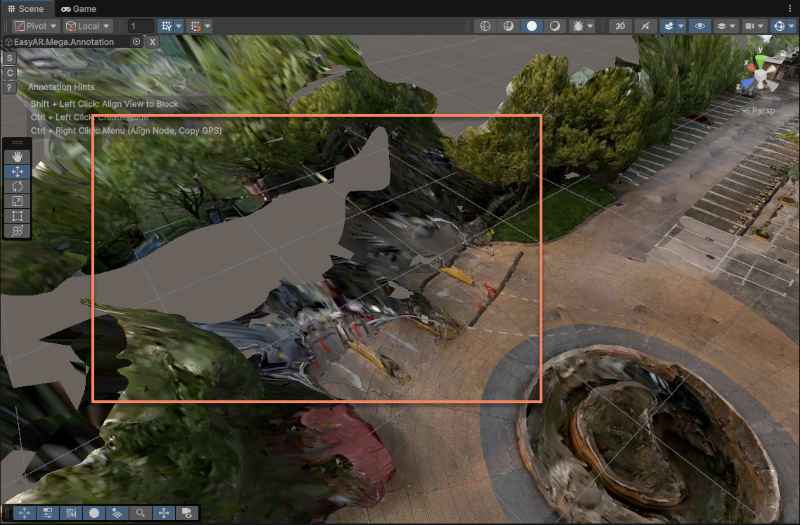
When dealing with an incomplete model, if the alignment accuracy requirements for the 3D content in the broken/missing parts are not high, you can place the 3D content by clicking on the Panoramic Markers and referring to the Panoramic Image. Then, you can verify the effect by clicking on different nearby Panoramic Marker positions.
If the alignment accuracy requirements for the 3D content in the broken/missing parts are very high, you need to supplement or update the map through Incremental Update or Lossless Full Update. Generally, such areas indicate that they were not covered during the image acquisition process. The Mega positioning effect will be affected within these areas, and simply aligning the 3D content in the editor is not enough.
Next Steps
- Further verify the accuracy of the placement by simulating the run using the session verification tool.
- Add accurate environmental occlusion to the scene to enhance the realism of AR.