Annotation Toolkit Component
Note
This component should not be used when developing Unity applications.
When using the Annotation Tool, the Annotation Tool package will open by default. When there is data in the Block module, the tool will be displayed in the Scene window.
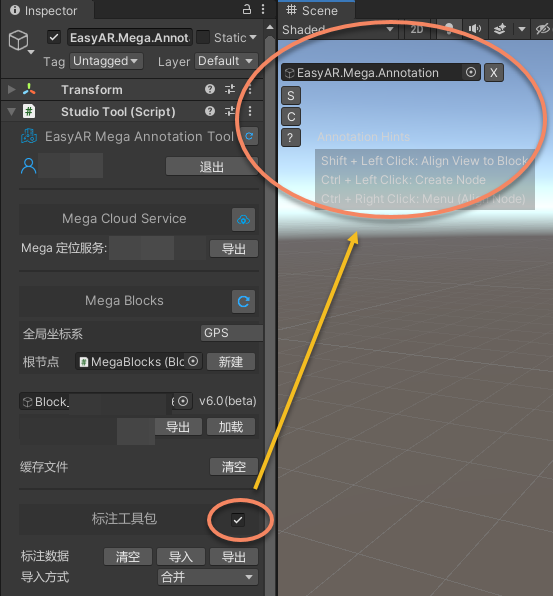
Explanation of the tool interface:
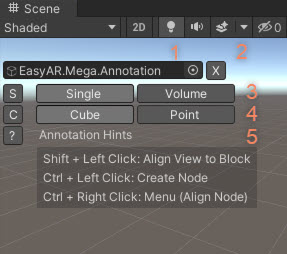
- Display the tool node.
- Close the annotation toolkit. After closing, use
6to reopen it. - Select
Single-point annotation/Batch annotation. - Select the annotation node type.
- Operation prompts and switches.
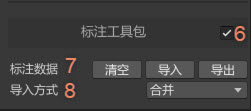
- Open/close the toolkit.
- Import/export/clear annotation data.
- The import method used to import annotation data (files or annotation data packages).
Create Annotations (Using the Scene View Tool)
Press and hold the Ctrl (Windows) / Command (Mac) key, and then click the left mouse button where you need to annotate.
If the area pointed to by the mouse is part of a Block, the annotation data will be created with the bottom surface closely attached to the Block model (or the object above it).
If the area pointed to by the mouse is not part of a Block, a selection dialog will pop up when you click the mouse to choose which Block to create the annotation data on. If the root node has GPS information, you can also use the GPS data for annotation.
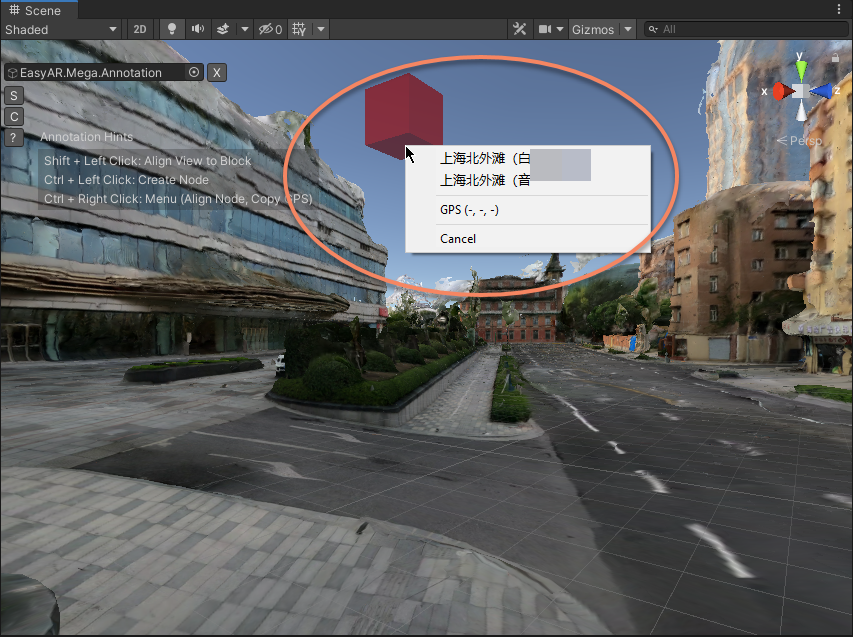
You can choose to create a Cube annotation or a Point annotation, and this type will be reflected in the annotation data (ema file).
You can also create annotation data in batches in space.
When creating in batches, you can choose different annotation types and adjust the annotation interval at will.
Explanation of Commonly Used Shortcut Key Operations
The tool also provides many functions. You can refer to the on-screen prompts when using it. The common operation instructions are as follows:
Single-point annotation mode:
Shift + Left click: Adjust the viewing angle and the rotation center to the Block area pointed to by the mouse.Ctrl/Command + Left click: Create an annotation node.Ctrl/Command + Right click: Display the menu (you can realign the selected annotation or copy the GPS when there is GPS information).
Batch annotation mode:
Shift + Left click: Adjust the viewing angle and the rotation center to the Block area pointed to by the mouse.Ctrl/Command + (shift) + Left click: Start/continue creating a batch annotation area. When holding down the shift key, align to the horizontal plane.Ctrl/Command + (shift) + Double left click: End creating the batch annotation area (you can end it early to create a line or a surface).Esc or Delete the batch annotation area: Cancel the batch annotation creation.Select the batch annotation area + Right click: Display the menu (after the batch annotation area is created, you can create annotations within the area).
Navigation point map mode:
Ctrl/Command + Right click: Cancel the selection.
Note
The above Ctrl/Command means to use Ctrl on Windows and Command on Mac. If there is a shortcut key conflict and you need to use the original Unity shortcut keys, you can close the annotation toolkit.
Create Annotations (Using the Hierarchy View Menu)
When creating a node (Node) in this way, the annotation data is generated at the center of the Scene window by default.
The system will automatically determine the hierarchy based on the scene content: if there is an object (such as a Block) at the center of the window, the annotation will be automatically created on its upper surface; if there is no object blocking, it will be created at the default floating position.
Select the Block node that needs to be annotated (usually the name starts with Block_), right-click and select EasyAR Mega > Annotation > * to add.
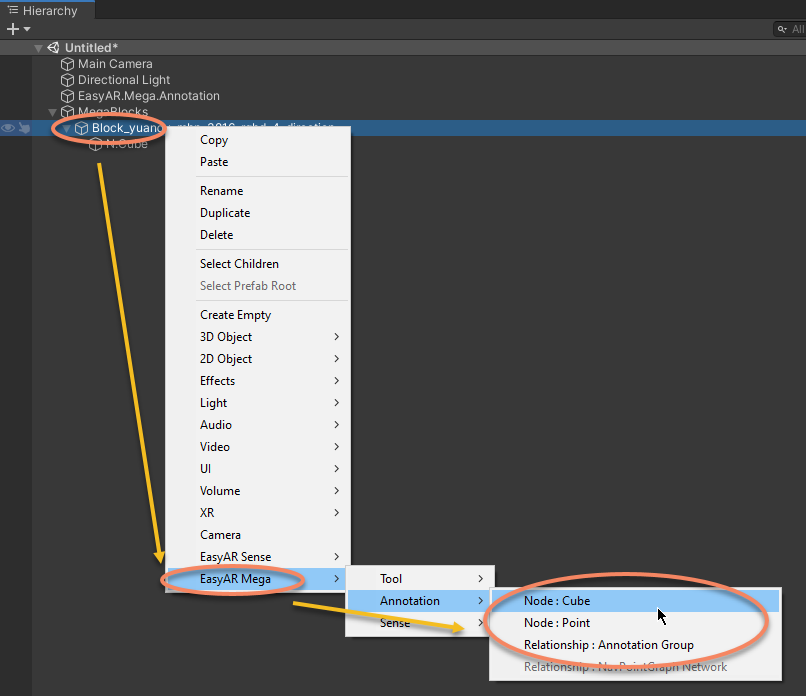
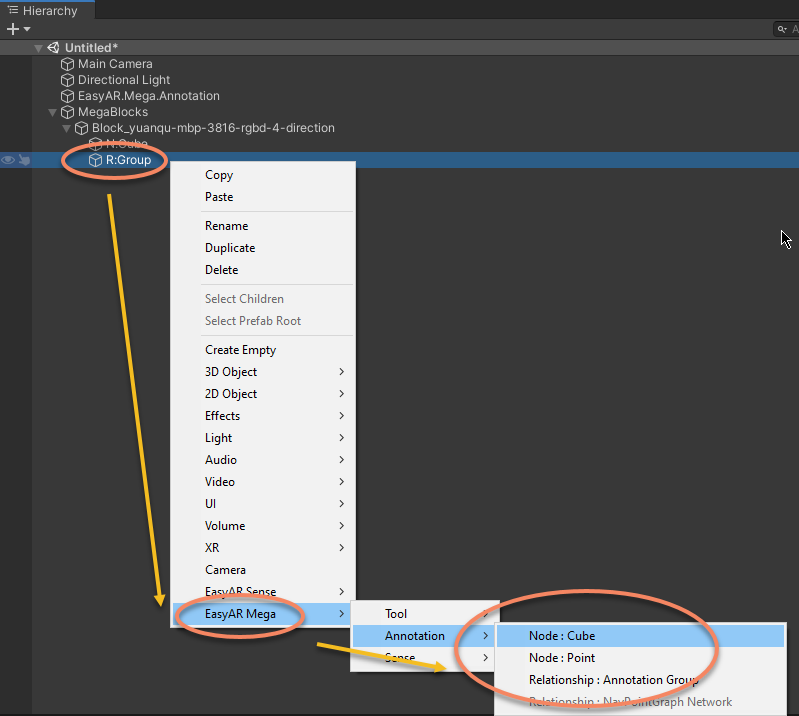
It supports adding various types of annotation nodes (such as points, cubes) or annotation data groups. Users can also first select a specific annotation data group and then perform the creation operation inside it.
Modify Annotations
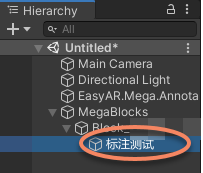
The annotation data nodes can be named as needed, and the names will be reflected in the annotation results.
After creation, the Annotation can be moved at will. The position, rotation, and scale of the annotation nodes can be adjusted, and this information will be recorded in the annotation results.
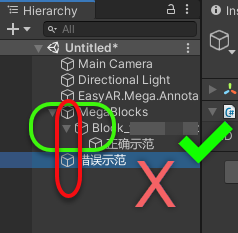
It should be noted that if the position in the scene tree is incorrect (for example, not under a node starting with Block_), the annotation data will not be exported.
Manage Annotation Data
After annotation is completed, you can export the results as a .ema file.
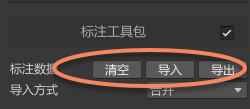
Prerequisite for import: Before performing the import, you must ensure that the corresponding Block resources have been added to the scene. If the target Block does not exist, the import operation will fail.
Scene cleaning: You can use the "Clear" button to remove all annotation data in the current scene with one click.
Import operation: By importing a .ema file, you can add the pre-stored annotation results to the current scene.
Import strategy setting: When importing, the system provides two data processing methods:
Merge: Overlay and coexist the data in the .ema file with the existing data in the scene.
Overwrite: The system will first completely clear the existing data in the scene and then perform the import.
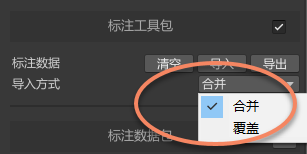
This option will also affect the import method of the
Annotation Data Packagestored on the server.