Validation Component
The validation component is used to simulate and verify Mega effects on a PC.
Note
When developing Unity applications, you should use the session validation tool.
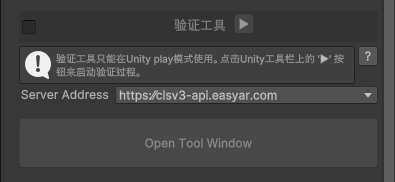
Overview of the Interface in the Non-running State
When not running, the tool panel displays
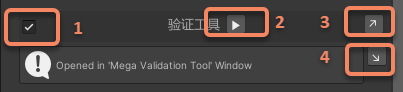
Overview of the Interface in the Running State
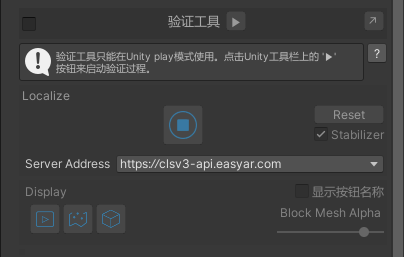
After running, the tool panel will display
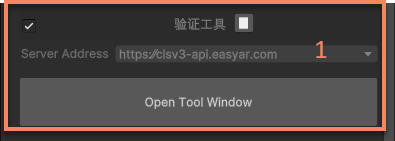
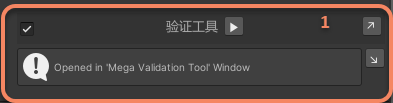
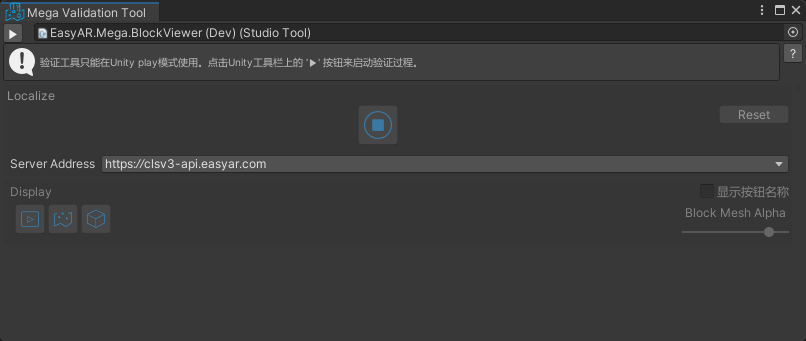
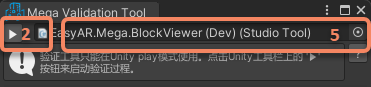
After opening the tool window, the tool window will display
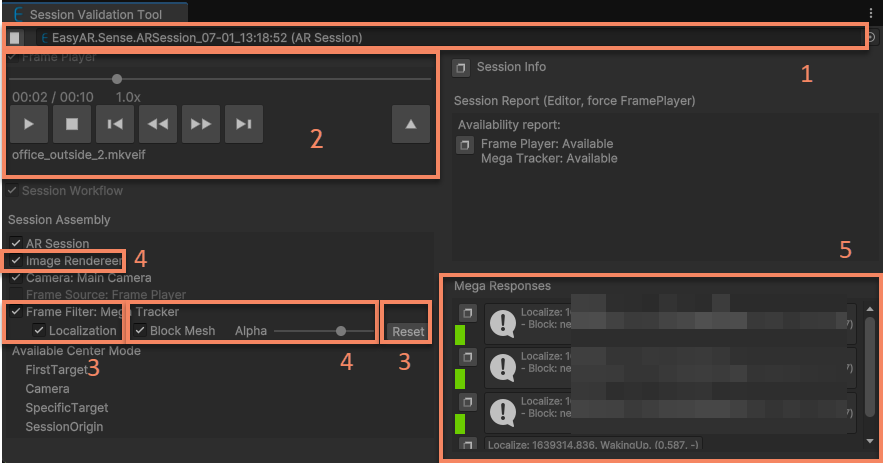
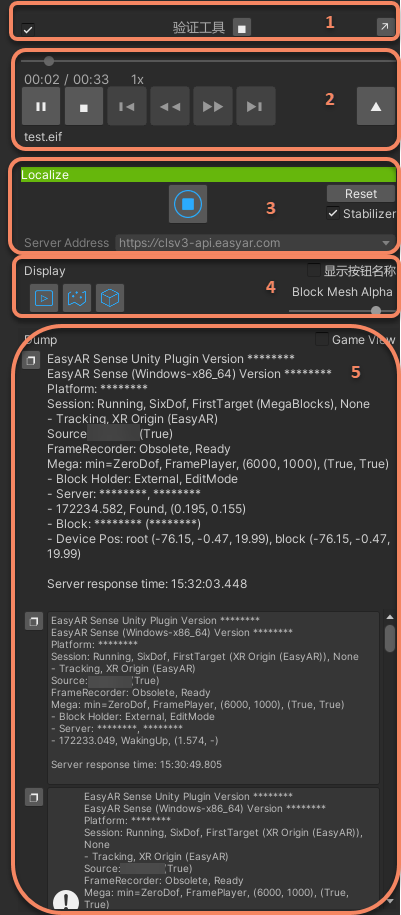
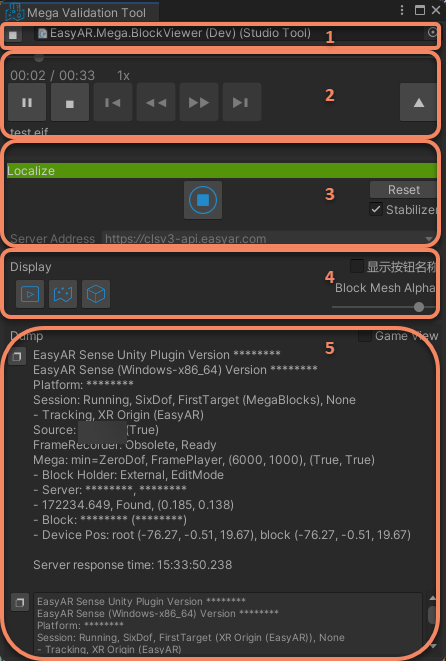
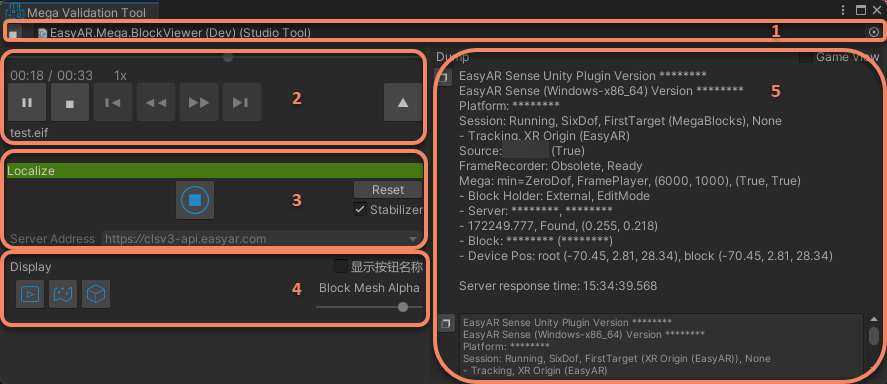
Explanation of the Tool Areas
- Runtime control area
- EIF playback area
- Positioning control area
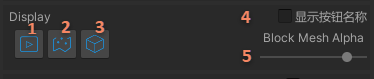
- Display control area
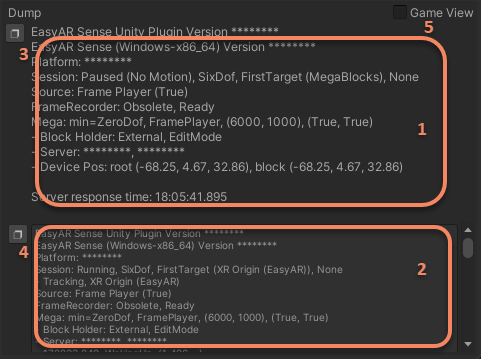
- Status information area
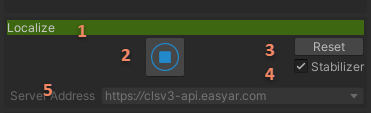
Runtime Control Area
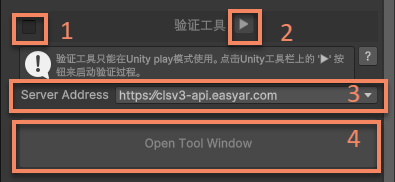
- Use/disable the validation tool
- Start/stop the validation tool
- Select the positioning URL
- Open the runtime control window of the validation tool
- Open the session tool
EIF Playback Area
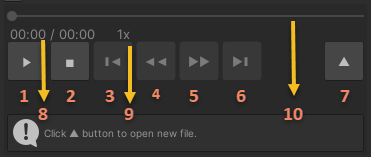
- Play/pause
- Stop
- Forward 5s (available for new format data, except for abnormal recording stops)
- Slow down playback (available for new format data)
- Speed up playback (available for new format data)
- Backward 5s (available for new format data, except for abnormal recording stops)
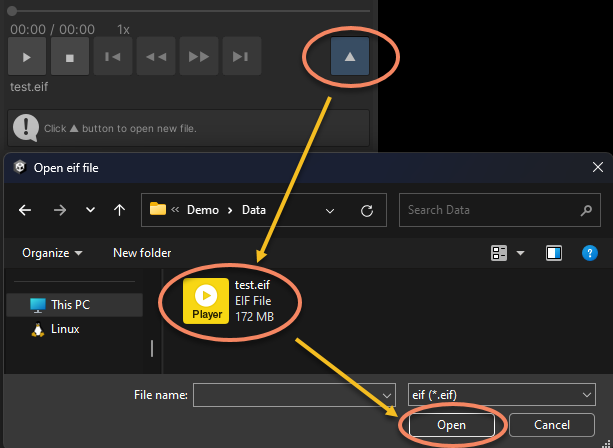
- Open an EIF file
- Current time/total time
- Current speed
- Playback progress (draggable for new format data, except for abnormal recording stops)
Positioning Control Area
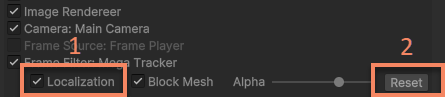
- Start/Stop positioning (starts by default)
- Reset the tracking status
Display Control Area
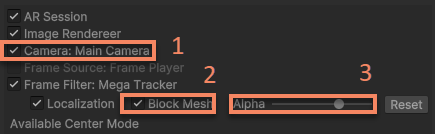
- Show/Hide the video background
- Show/Hide the Block model (the model in the Scene window will also be hidden under URP)
- Control the transparency of the Block model (not available under URP)
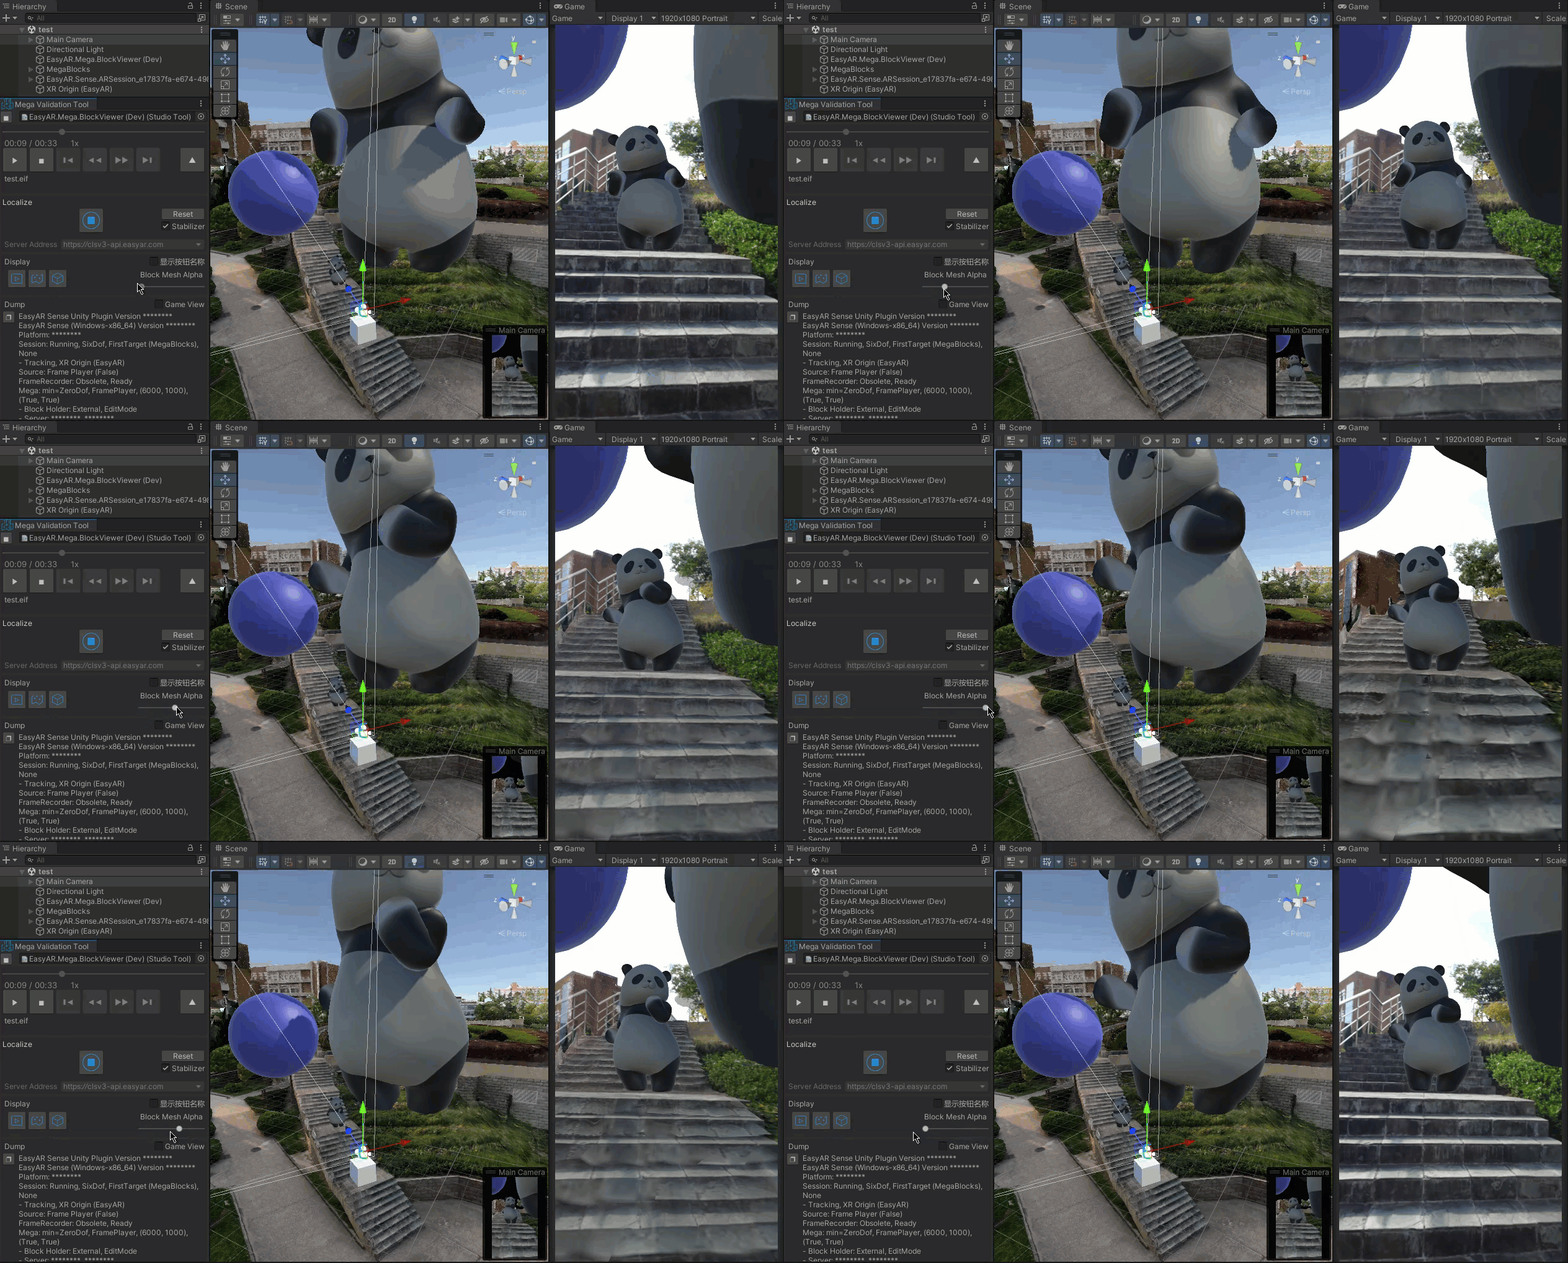
The transparency transformation effect of the Block model is as follows
Status Information Area
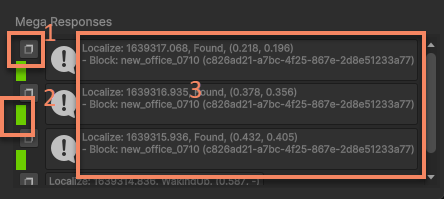
- Copy the content of the current positioning response to the clipboard.
- Response content indicator.
- Green: The positioning process is normal, and a block is located.
- White: The positioning process is normal, and no block is located.
- Red: An exception occurred during the positioning process.
- Positioning response information
Usage Process
Prepare EIF Data
To verify the effect, EIF data is required. Please use the Simulated Data Recording Tool in Mega Toolbox to record EIF files. Depending on the selected recording format, the recording result will save a .mkveif file (or an .eif file and an .eif.json file, both of which are indispensable).
Prepare Package
Ensure that com.easyar.sense has been imported. If it hasn't been imported, you will see the following information:
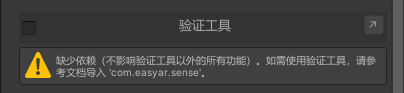
At this time, you need to use the Unity Package Manager to import the required package: com.easyar.sense-**.tgz.
Fill in the EasyAR Sense License Key
Log in to the EasyAR Development Center on the web to obtain the EasyAR Sense License Key.
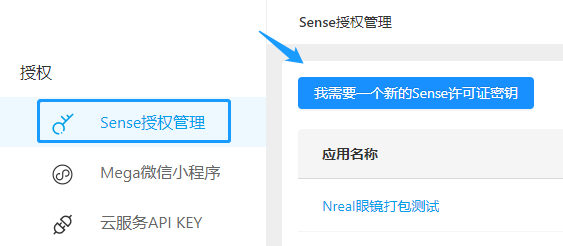
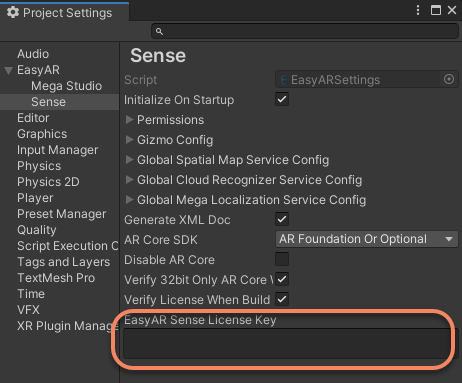
Open EasyAR > Sense > Configuration in the Unity menu.

Then fill in the license key copied from the website in the opened Project Settings window.
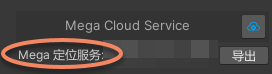
Connect to the Mega Positioning Service After adding the tool, you need to select the positioning service to be verified in the corresponding tool.
Prepare Block Data (Optional)
To intuitively view the positioning effect, it is generally recommended to load the Block model data of the corresponding area. Please refer to the instructions of the Block data component for loading.
Prepare Annotation Data (Optional)
If you need to display annotation data during positioning, you can use the Annotation component to annotate or import annotations through the Annotation Data Package component.
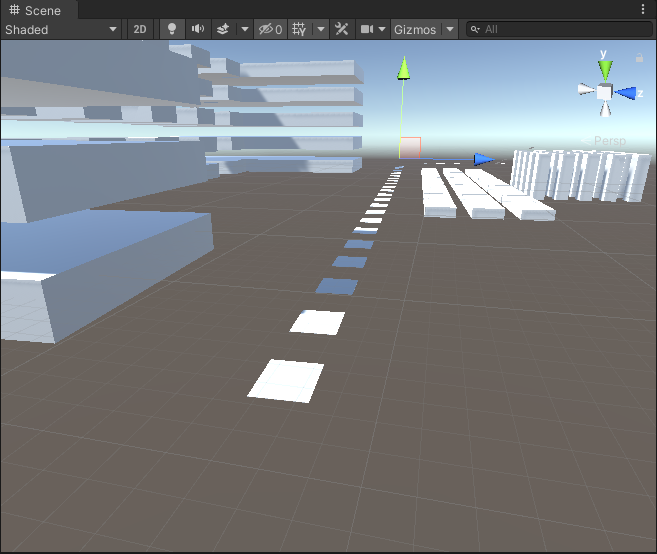
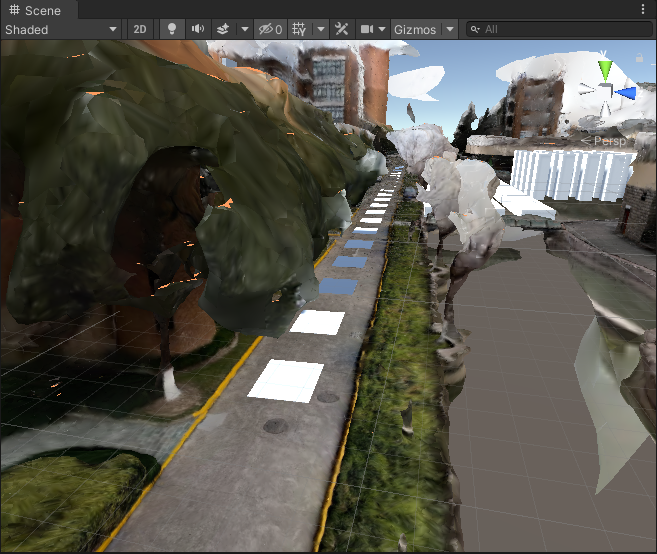
If both the Block and annotation data have been imported into the scene at this time, they will both be displayed in the scene.
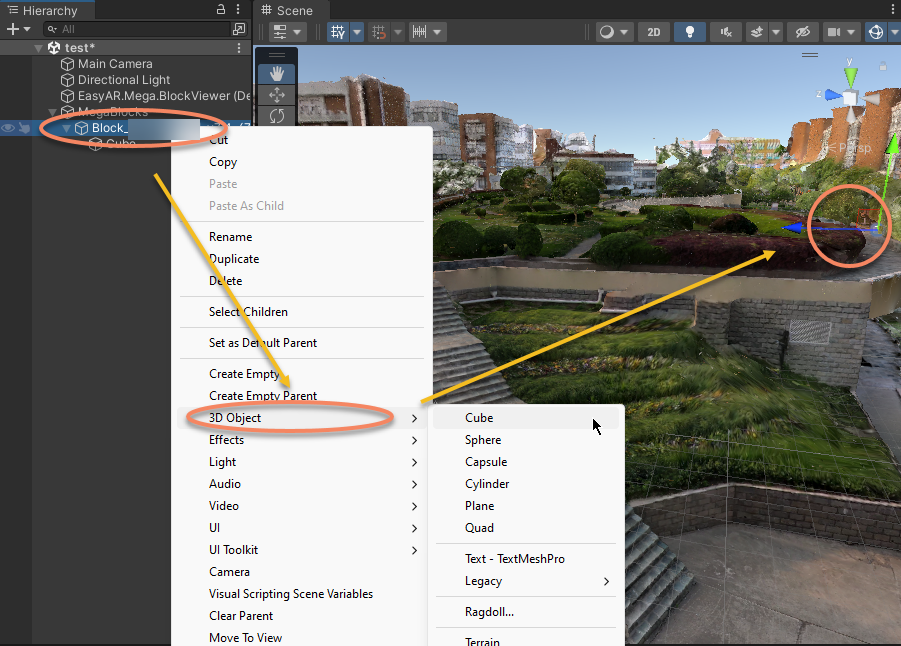
Prepare 3D Content (Optional)
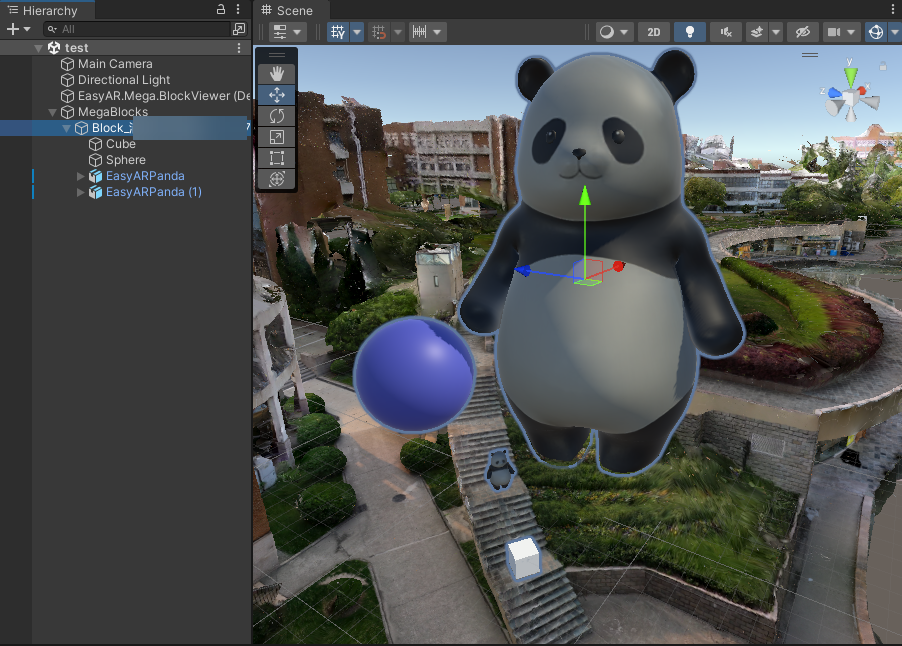
You can create 3D objects through the mail menu. Note that the 3D objects need to be placed under the Block node.
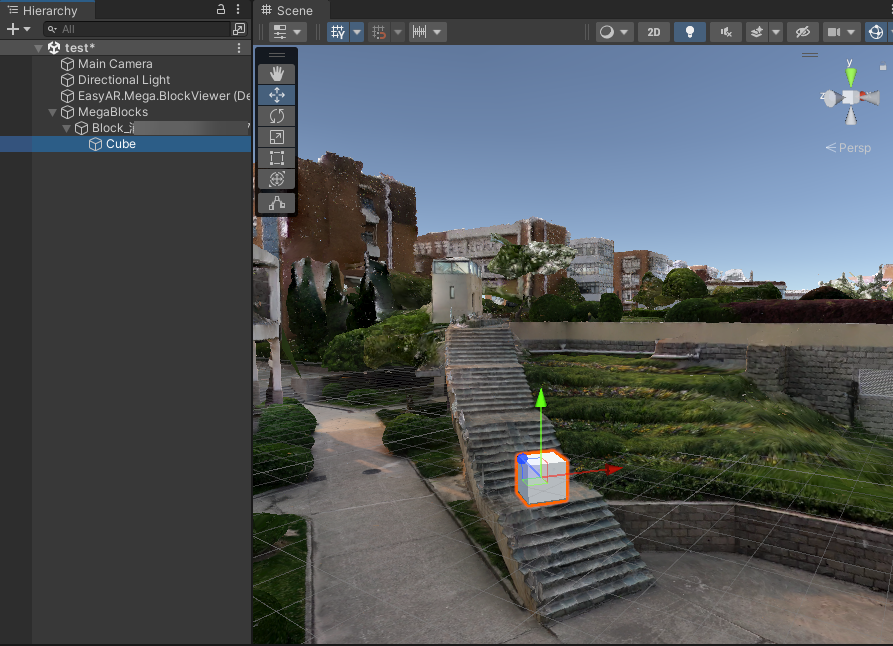
After creation, you can adjust the position, size, etc. as needed.
Of course, you can also import your own models.
Start the Tool
First, enable the tool, and then click the run button to start.
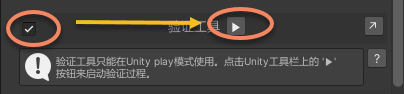
You can also start it through the button on the Unity toolbar.

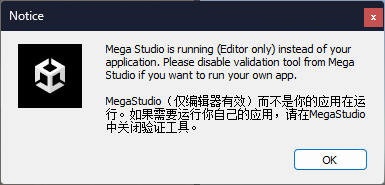
After starting, there will be a prompt pop-up window. If you are developing a Unity application, please read it carefully.
Open the EIF
The EIF will start playing automatically after being opened.
View the Effect
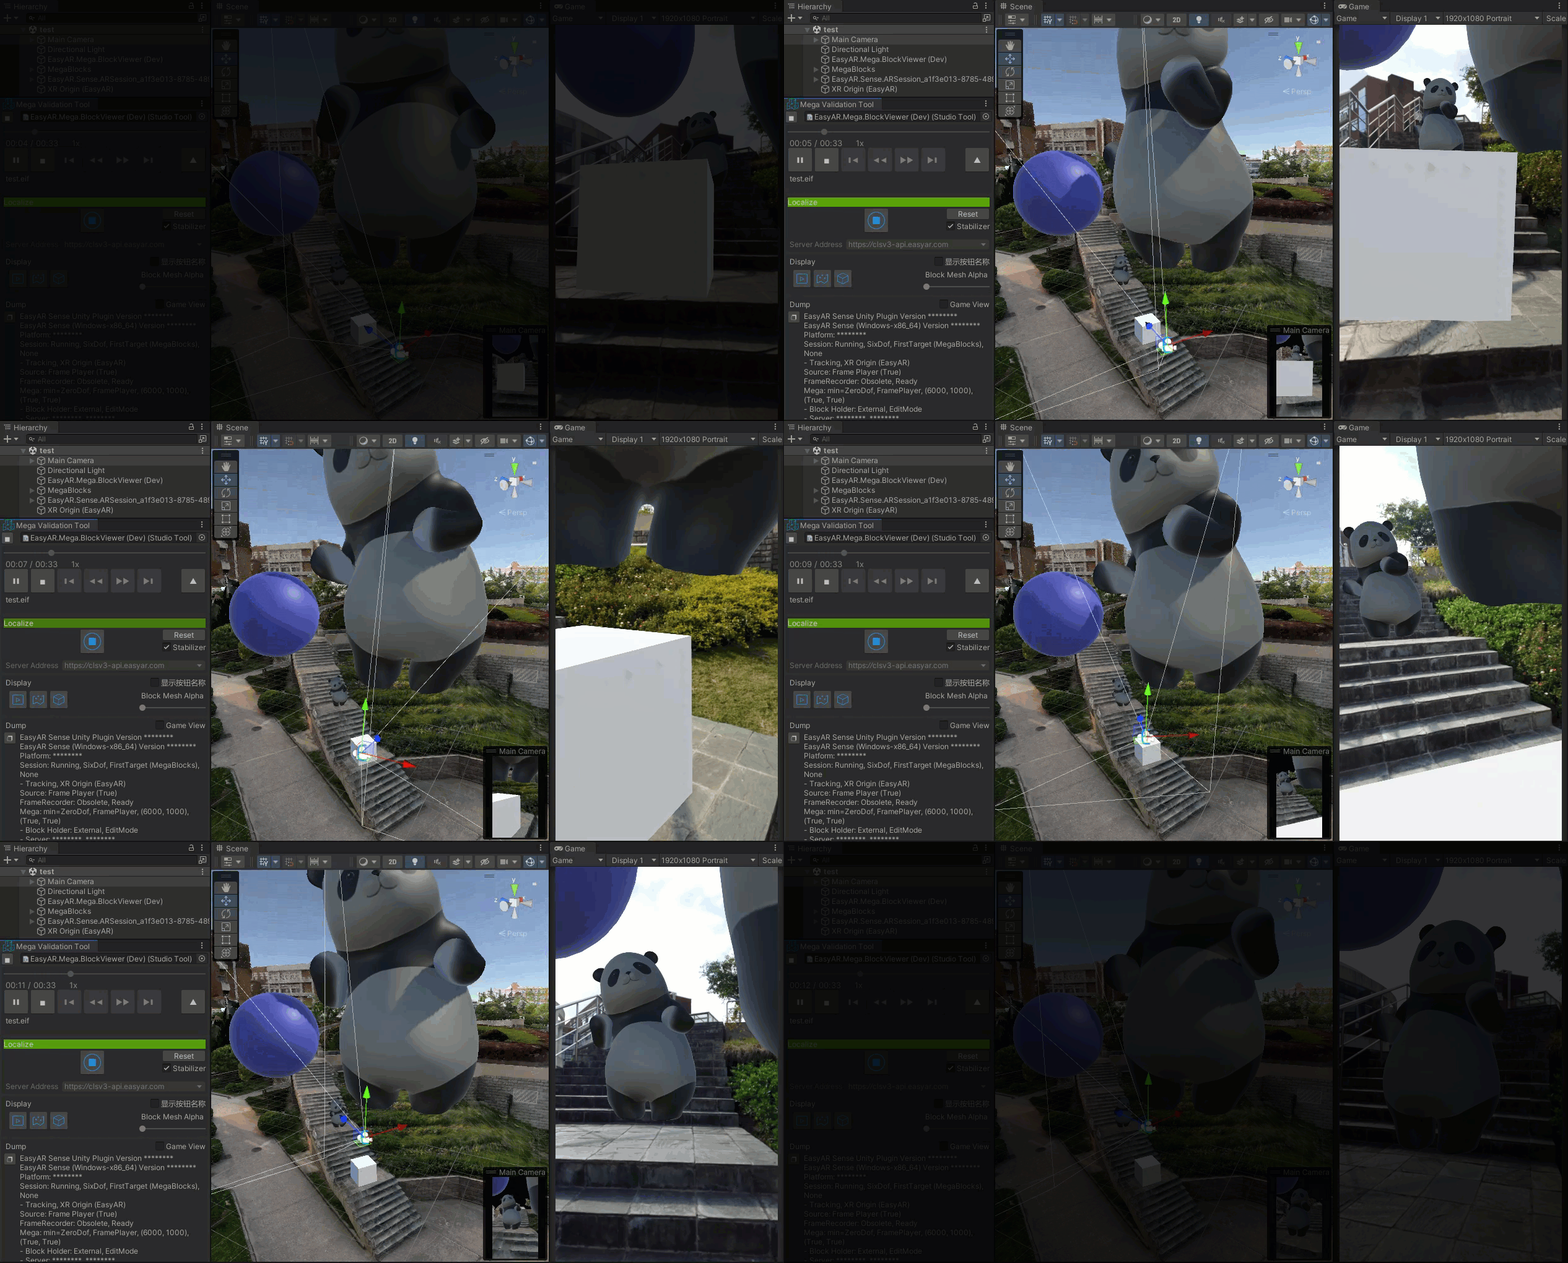
You can control the playback according to your needs. Usually, the effect will be like this.

You can also completely hide the Block model, so that the effect will be the same as what you see in the real scene.
Stop Running and Restore the Application
Stop running through the tool button.
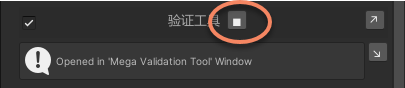
Or you can also stop running through the button on the Unity toolbar.

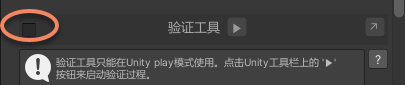
If you need to develop your own application and run your program on the editor, don't forget to disable the verification tool (it only takes effect on the editor and does not affect the effect on the mobile phone).
Display Effects and Unity Usage Recommendations
Adjust Game window size
It is recommended to set the window size consistent with the EIF video frame size. Generally, a fixed size roughly equivalent to 1080P is suggested, such as 1080x1920 (1920x1080 in landscape orientation).
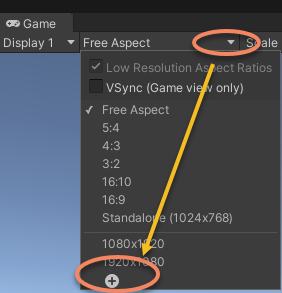
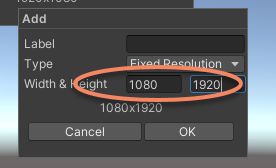
If the window size has a significant difference from the EIF video frame, the complete video image cannot be viewed, and the tool will also display a warning message.
Adjust scene lighting
To better observe rendering effects, you can add and adjust lighting as needed. If there are no special requirements for Unity lighting, you can let Unity automatically generate ambient light.
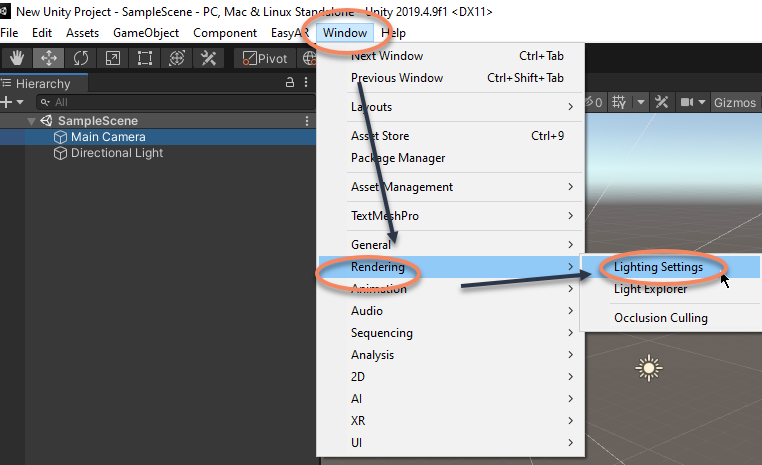
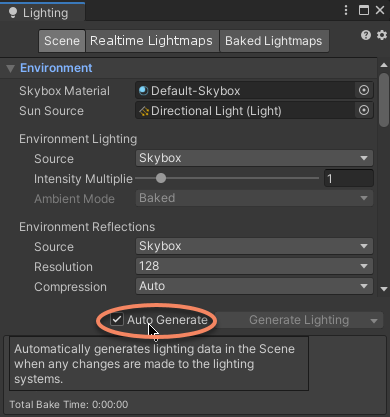
Simultaneously display Scene window and Game window
Sometimes it is necessary to view the contents of both the Scene window and the Game window simultaneously. In such cases, you can adjust the default Unity window layout and reposition the Scene window and Game window according to your needs.
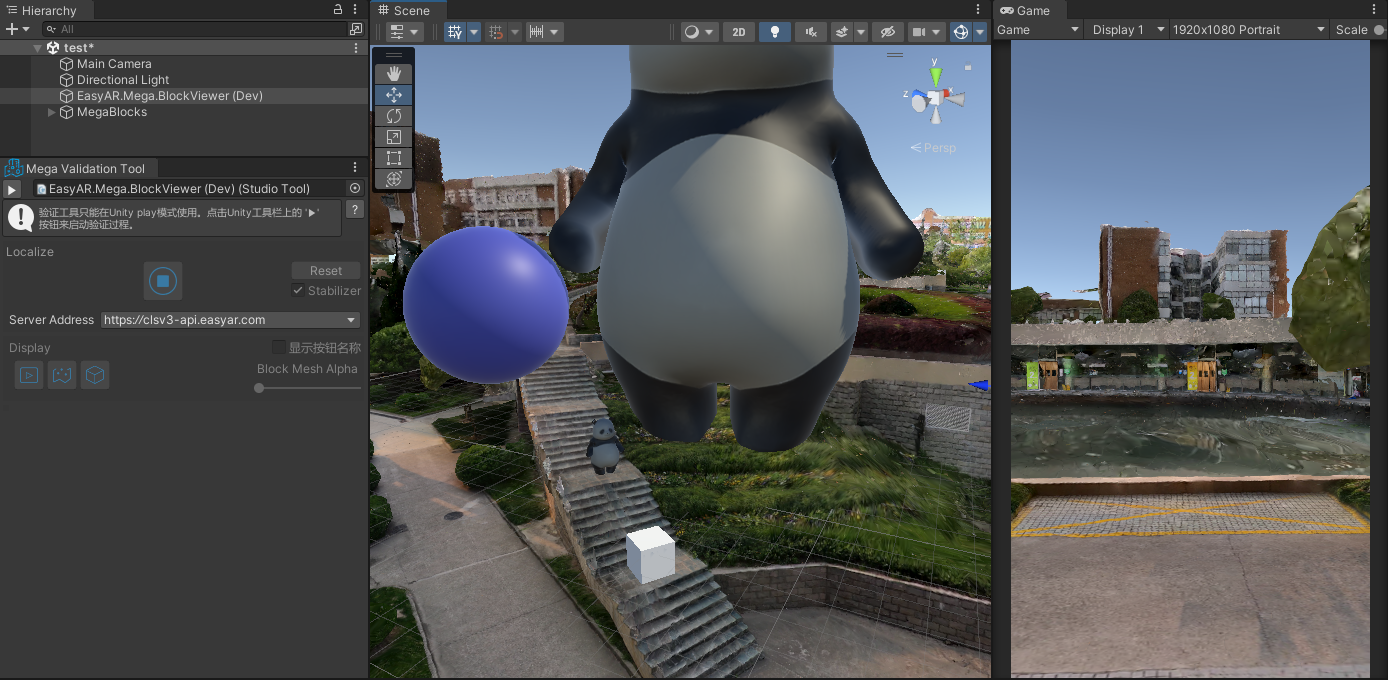
Points to Note in Unity Development
ARSession
When the tool starts, it will automatically create an ARSession and other necessary EasyAR components. If there is already an active ARSession in the scene, the tool will disable the original ARSession. However, dynamically created sessions will not be controlled, and an error will be reported if they are run.
Main Camera
When the tool is running, it will modify the Clear Flags and Background of the main camera. The Clear Flags will be changed to Solid Color, and the Background will be changed to black. These modifications will not be saved.
Center Mode
All supported center modes can be used when the tool is running. Generally, the First Target center mode is recommended.