Configure Universal Render Pipeline (URP)
This documentation explains how to configure Universal Render Pipeline (URP) projects when integrating EasyAR functionality.
Before you begin
- Understand how to use URP in Unity.
- Refer to Enabling EasyAR in Unity to import the EasyAR Unity plugin.
Create Universal Render Pipeline Asset
Note
If the Unity project was created using a URP project template, or if the project already contains UniversalRenderPipelineAsset and Universal Renderer, you can skip to Confirm the project has switched to URP render pipeline.
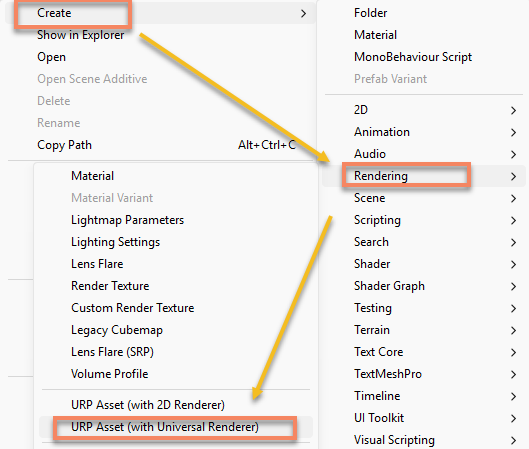
In the Project window, right-click and select Create > Rendering > URP Asset(with Universal Renderer) to create the required assets:
Find the Universal Render Pipeline asset used by the target platform
Click Edit > Project Settings > Graphics in the menu bar.
The Default Render Pipeline slot at the top should have a
Universal Render Pipeline Assetassigned.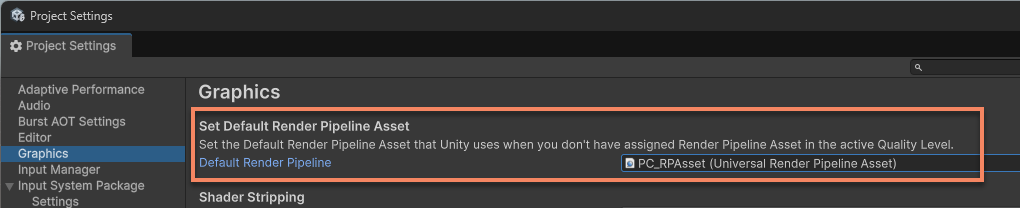
Tip
This option was named Scriptable Render Pipeline Settings in older versions of Unity.
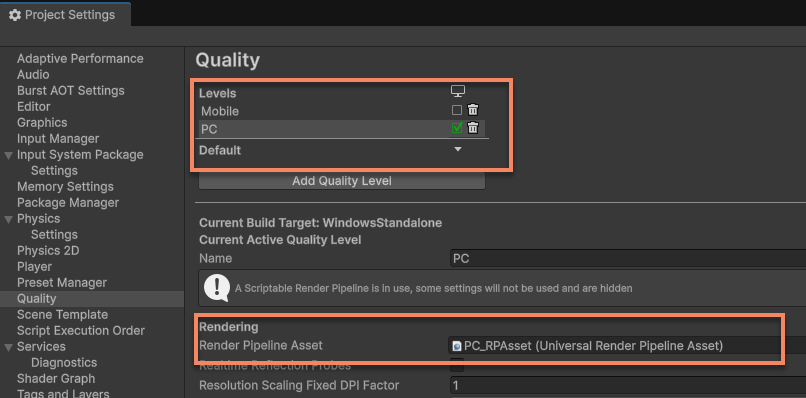
Click Project Settings > Quality in the menu bar.
Select the quality level for the target platform. The Render Pipeline Asset below is the Universal Render Pipeline asset used by the target platform. If empty, the asset configured in the Graphics window is used.
Tip
If settings in Quality conflict with Graphics, the system prioritizes the Asset in Quality.
Configure Universal Render Pipeline asset
Important
The Universal Render Pipeline assets used in the Unity Editor and on devices like Android/iOS are often different. Separate configurations are required for editor and device usage.
Select the
Universal Render Pipeline Assetused by the target platform, then select theUniversal Renderer Datait uses.
Tip
If multiple Renderers are configured in the project, ensure you select the renderer being used by the AR camera. You can confirm the current index value in the scene camera's Camera component > Rendering > Renderer option.
In the
Universal Renderer DataInspector panel, click Add Renderer Feature at the bottom and add EasyARCameraImageRendererFeature.
Notes for using EasyAR samples
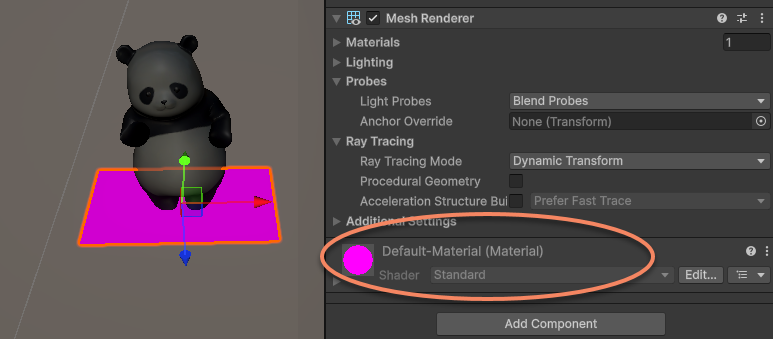
The sample scenes included with the EasyAR Unity plugin use materials and shaders compatible with the Built-in render pipeline by default. Unity automatically converts these materials and shaders to URP-compatible versions, but some resources may render abnormally. Manual conversion may be required by referring to Convert assets using the Render Pipeline Converter.
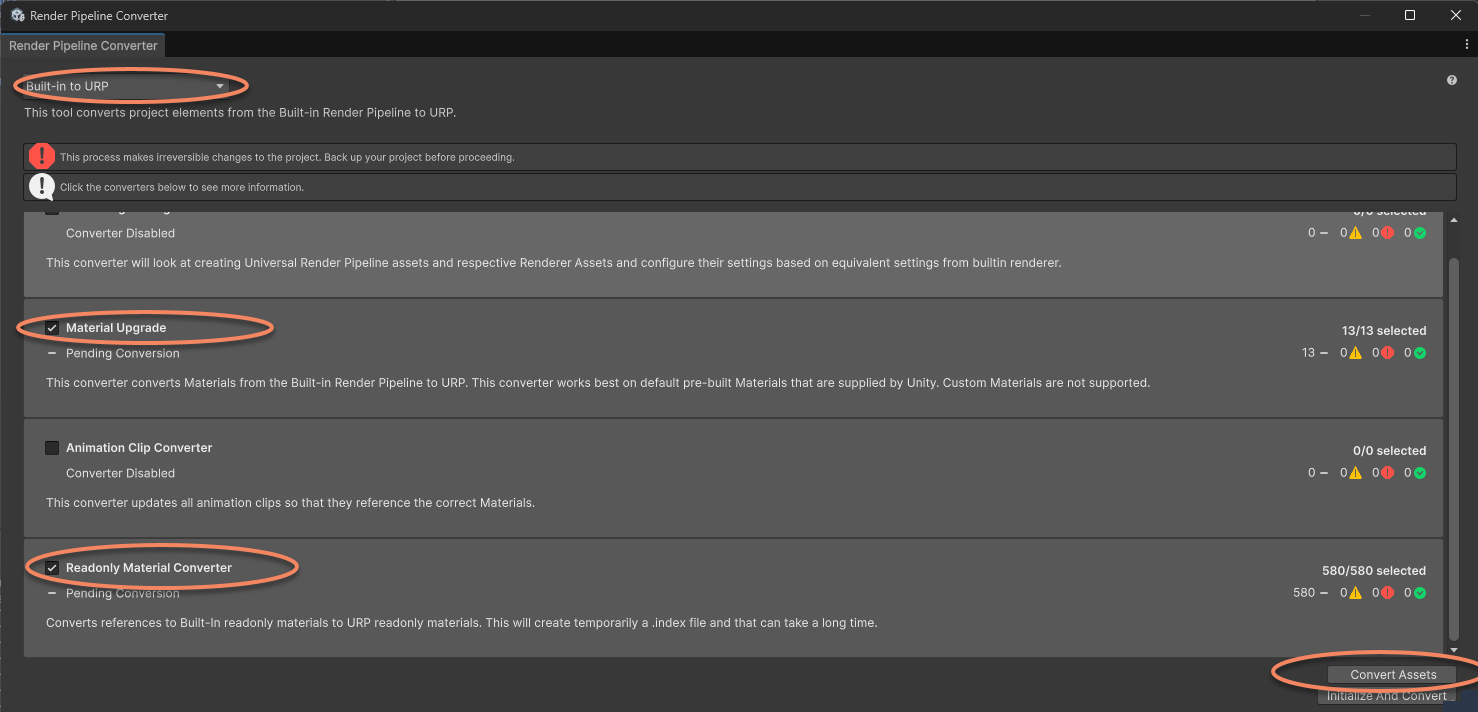
Click Window > Rendering > Render Pipeline Converter in the menu, select Built-in to URP to open the conversion window. Check Material Upgrade and Readonly Material Converter > Click Convert Assets below.
After conversion is complete, sample materials will display normally.
Common issues
If configured incorrectly, the camera feed will be unavailable during runtime, often appearing as a black screen. However, content added under tracked targets will display normally.
In versions 4000 and above, the session will enter the Broken state. At this point, the BrokenReason will show as URP RenderPipeLineAsset not properly setup in the display or logs:

To resolve this issue, properly configure the Universal Render Pipeline Asset as described in this document.