How to load 3D content in AR scenarios at runtime in xr-frame
This article details the separation mechanism of resource loading and node mounting in xr-frame, enabling flexible mounting of 3D content under Block nodes through dynamic scripting to achieve AR.
Official resources
- xr-frame development guide: WeChat official XR engine documentation.
- xr-frame official examples: Includes various basic and advanced usage examples.
The official resources already provide sufficient content on how to load 3D content at runtime. This article briefly explains some commonly used content and loading methods in AR scenarios.
Resource loading vs node mounting
In xr-frame, displaying a 3D model involves two stages:
Resource loading: Refers to downloading and parsing model files (such as
.glb) from the network or local storage into memory. At this point, the model is ready but not visible in the scene.Node mounting: Refers to creating a node in the scene tree and associating the loaded resource with that node. Only then does the model appear in the rendering canvas.
How to dynamically load 3D content using code
Resource loading
Manually load resources by calling loadAsset through the resource management system of the xr-frame scene.
The
typeparameter refers to the resource type,assetIdrefers to the resource id after loading, andsrcrefers to the resource URL, usually the address of the resource hosting server.Record
assetIdfor subsequent mounting and resource release.try { await scene.assets.loadAsset({type: 'gltf', assetId: 'panda', src: 'url/EasyARPanda.glb'}); } catch (err) { console.error(`Failed to load assets: ${err.message}`); }Node mounting
Use
element.addChild()to place the loaded model under ShadowRoot.const root = scene.getElementById("shadow-root"); let panda = scene.createElement(xrFrameSystem.XRGLTF, { "model": "panda", "anim-autoplay": "" } ); root.addChild(panda);The ShadowRoot element is specifically used by xr-frame to prevent dynamic creation and removal of nodes. For details, see Shadow node.
Using the createXRNodeFromNodeAnnotation method provided by the plugin object can create child nodes of Block based on EMA data, ensuring 3D content is displayed at the correct spatial position.
const nodeAnnotation = annotation as easyar.ema.v0_5.Node;
const xrNode: xrfs.XRNode = easyarPlugin.createXRNodeFromNodeAnnotation(nodeAnnotation, blockHolder);
let panda = scene.createElement(xrFrameSystem.XRGLTF,
    {
        "model": "panda",
        "anim-autoplay": ""
    }
);
xrNode.addChild(panda);
How to mount content directly under Block without using annotations
Warning
The prerequisite for using this method is that you have verified the LocalTransform value can achieve the expected rendering effect in the xr-frame coordinate system.
For other cases, please use the annotation function of the Unity editor to implement.
Obtain the block node object on the scene tree through getBlockById(id). If the corresponding block node does not exist, it means that positioning for this Block has not been successful yet (the node will be automatically created when the Block is first positioned). You can use holdBlock(blockInfo, blockTransformInput) to create a node for this Block, or determine the success of positioning for this Block in the positioning callback before mounting content.
Tip
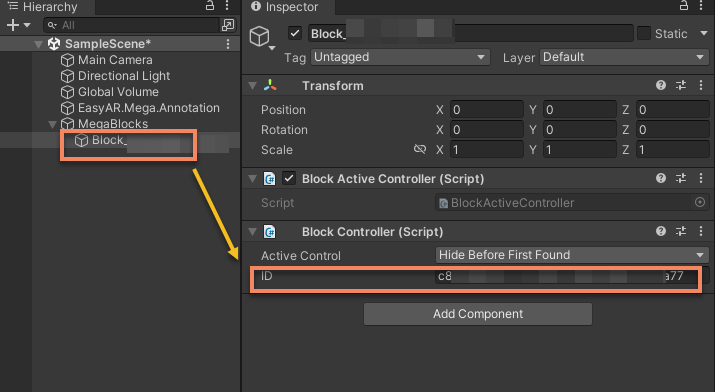
Select Block node in the scene tree of the Unity editor and record the ID displayed on the Inspector panel
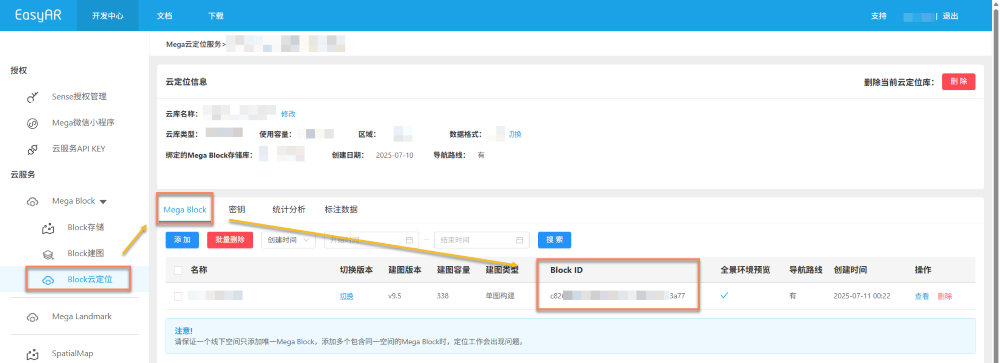
You can also find Block ID in the cloud positioning library page
const blockID = "aaaa1234-bbbb-cccc-dddd-eeeeee123456"
if (!blockHolder.getBlockById(blockParent.id)) {
    // Create one if no Block node exists
    blockHolder.holdBlock({
        id: blockID
    })
}
let blockElement = blockHolder.getBlockById(blockParent.id).el;
Mount the model node under the specified Block, and use position.setArray(), quaternion.set(), and scale.setArray() to modify the LocalTransform of the model node.
export interface LocalTransform {
    /** @description position */
    position: xrfs.Vector3;
    /** @description rotation */
    rotation: xrfs.Quaternion;
    /** @description scale */
    scale: xrfs.Vector3;
}

// Assume there is a known LocalTransform under Block
const targetTransform: LocalTransform;

blockElement.addChild(modelNode);
let modelTransform = modelNode.getComponent(xrFrameSystem.Transform);
    modelTransform.position.setArray([
        targetTransform.position.x,
        targetTransform.position.y,
        targetTransform.position.z
    ]);
    let annoRotation = new xrFrameSystem.Quaternion().setValue(
        targetTransform.rotation.x,
        targetTransform.rotation.y,
        targetTransform.rotation.z,
        targetTransform.rotation.w
    );
    modelTransform.quaternion.set(annoRotation);
    modelTransform.scale.setArray([
        targetTransform.scale.x,
        targetTransform.scale.y,
        targetTransform.scale.z
    ]);
Resource types supported by xr-frame
- Texture textures and images
- CubeTexture cube textures
- VideoTexture video textures
- EnvData environment
- GLTF models
- Keyframe frame animation
- Atlas atlas
Detailed loading methods for each resource can be found in WeChat official documentation and xr-frame official examples
Note
Supported GLTF formats and extensions refer to xr-frame official GLTF usage instructions