Create and upload annotations using the Unity editor
This article introduces how to create and upload annotations using Mega Studio in the Unity editor.
Before you begin
- Ability to use Mega Studio in Unity
- Prepare models: Use the model from the sample project (an adorable panda), or use the small robot model from the official xr-frame Demo, or prepare model files that meet xr-frame requirements by referring to GLTF formats loadable by XRFrame and supported extensions.
- Import the model files into Unity.
Tip
The Mega plugin has added dependencies for com.unity.cloud.gltfast, so you can directly drag model files into Unity Assets.
Why annotations are needed
EasyAR Mega Annotation (EMA) can be used to synchronize spatial positions across platforms (with different coordinate system definitions).
Local coordinate system of annotations in Unity environment: Positive X-direction points backward, positive Y-direction points upward, positive Z-direction points right.
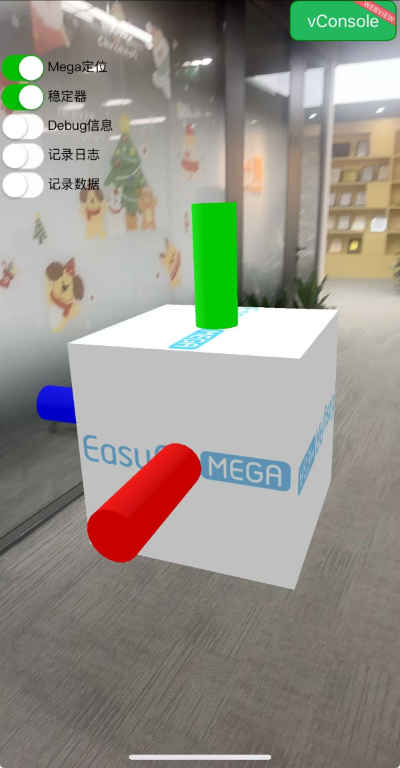
Local coordinate system of annotations in xr-frame environment: Positive X-direction points backward, positive Y-direction points upward, positive Z-direction points left.
These directional differences stem from the different coordinate system definitions (left-hand/right-hand rules) used by Unity and xr-frame.
Using EMA to synchronize spatial positions offers significant advantages:
- Simplifies development workflow: Automatically handles cross-platform coordinate conversions, avoiding cumbersome logic and error-proneness from manual calculations.
- Improves debugging efficiency: Can be directly loaded on MegaToolbox, facilitating quick real-device testing and data verification.
Steps
Create annotation tool
Right-click in Unity's Hierarchy panel and navigate: EasyAR Mega > Tool > Annotation Tool (Edit Mode).
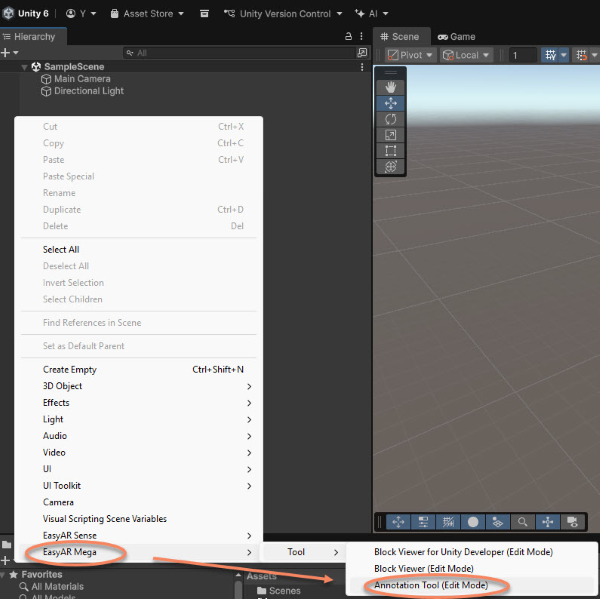
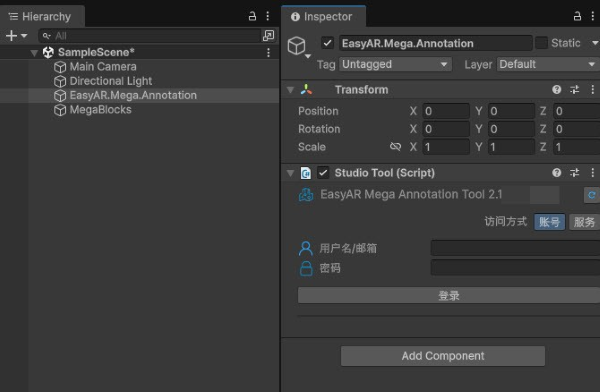
After creation, two nodes will be generated in the scene: EasyAR.Mega.Annotation and MegaBlocks.
Select the EasyAR.Mega.Annotation node, and its Inspector panel will display username/email and password input fields.
Log in to account
Enter EasyAR account credentials and click login. Upon success, the Studio tool will appear in the Inspector panel.
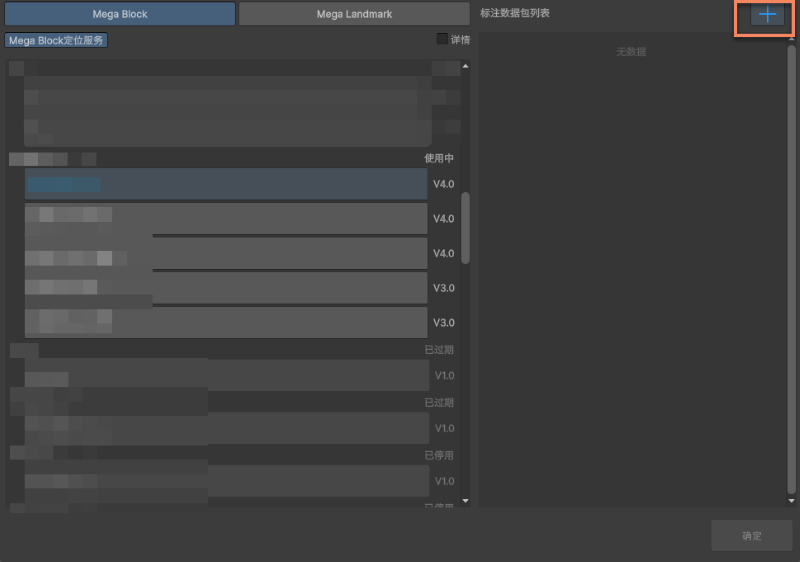
Select Mega cloud localization library
Click the icon on the right of Mega Cloud Service.

Select the library to use.
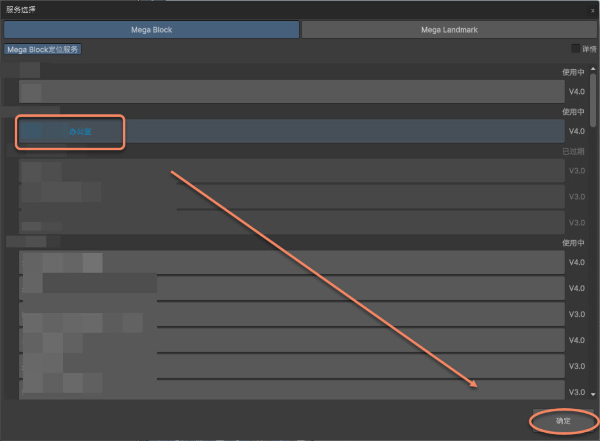
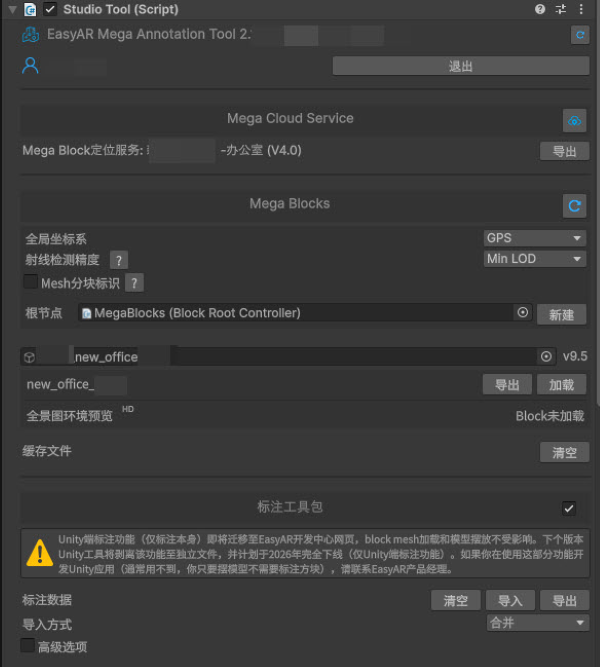
After successfully loading the localization library and Mega Blocks information, the Studio tool panel appears as shown.
Load Block dense model
Click Load on the right side of the Block name to dynamically load its dense model.
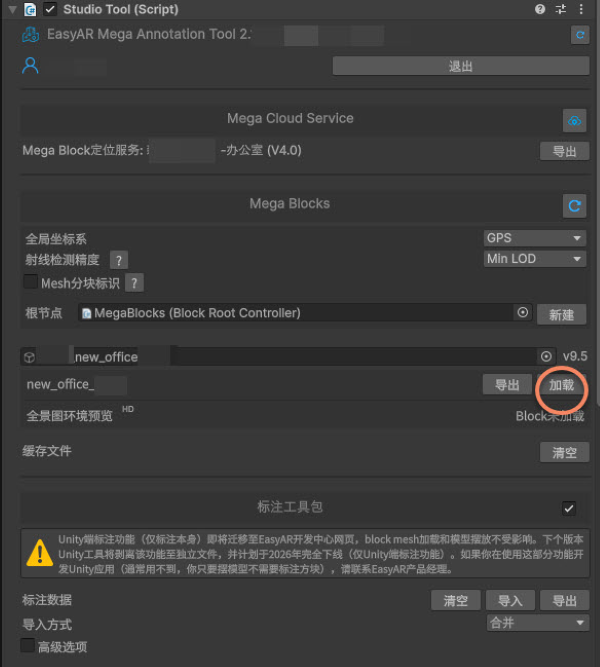
The loaded model appears in the Scene tab. Note: When the indicator shown below appears at the bottom-left, models within the current view haven't finished loading. Wait until it disappears to confirm completion.

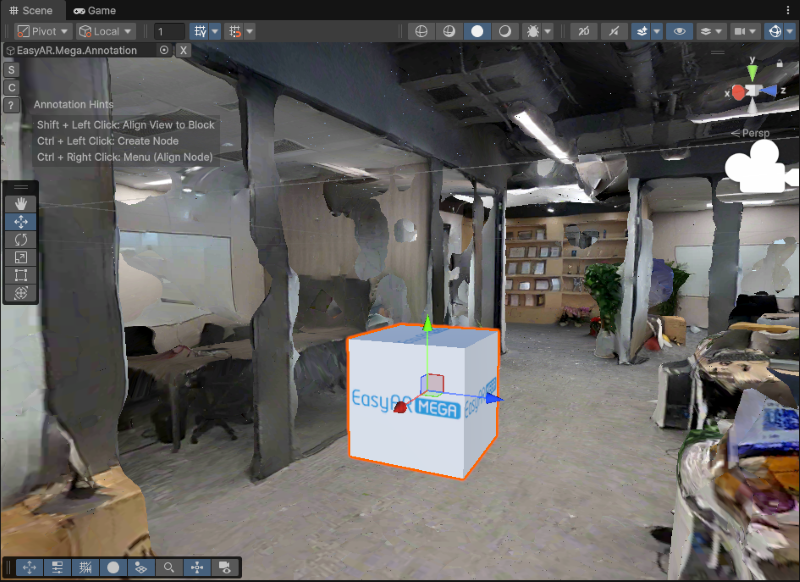
Create annotation
Hold Ctrl (Windows) / Command (Mac) in the scene, then left-click where annotation is needed.
Use models
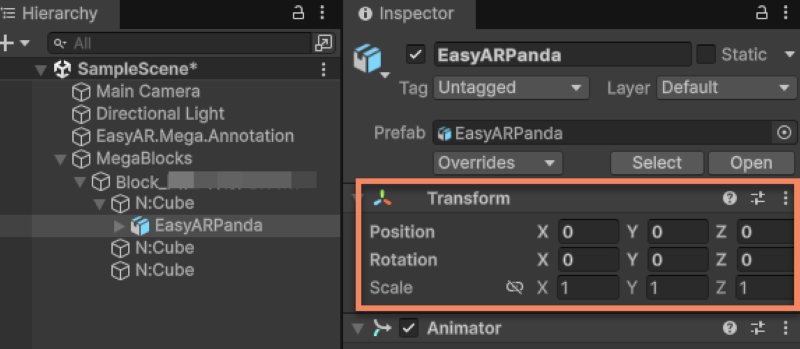
Drag imported models into the scene node as child nodes of the annotation.
Set all Position and Rotation values to 0 in the model's Inspector panel. Adjust Scale as needed.
Note
EMA handles all coordinate conversion logic. Setting model Position and Rotation to 0 ensures the model's geometric center perfectly aligns with the annotation point. All position and rotation adjustments should be done through its parent node (annotation node).
[Optional] Precise model position adjustment
For precise model position and orientation adjustments, refer to How to use Unity editor to precisely align 3D content with real scenes.
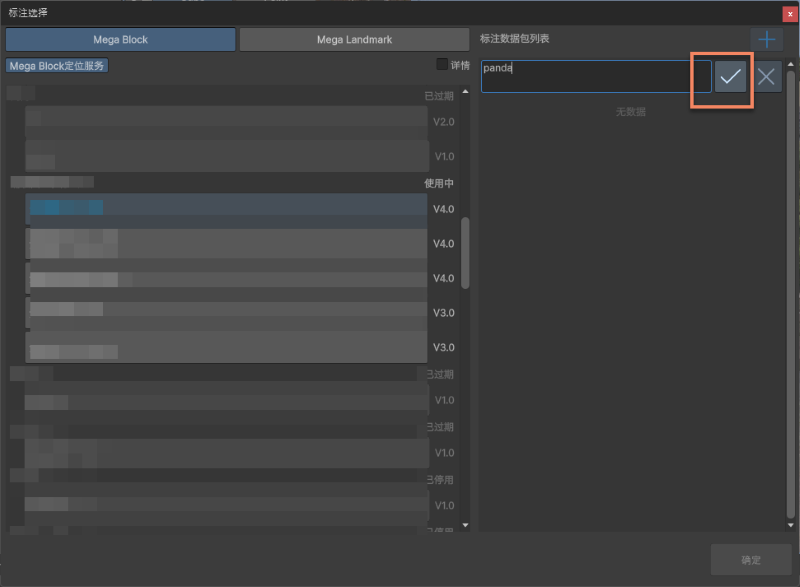
Create new annotation data package
Click the icon on the right of the annotation data package in the Inspector panel.
Enter the annotation data name in the box and click the checkmark on the right.
Upon successful creation, it should appear as shown. Then click Confirm below.
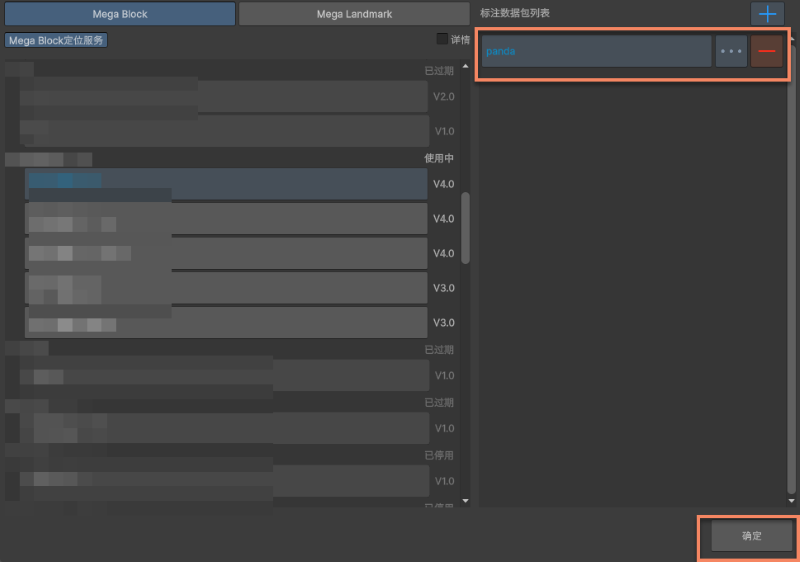
Click the upload icon to upload.

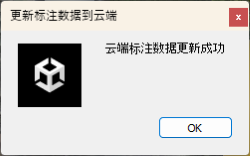
A success prompt appears after upload.
Record annotation ID
Record the annotation data name or ID to load corresponding data on xr-frame.
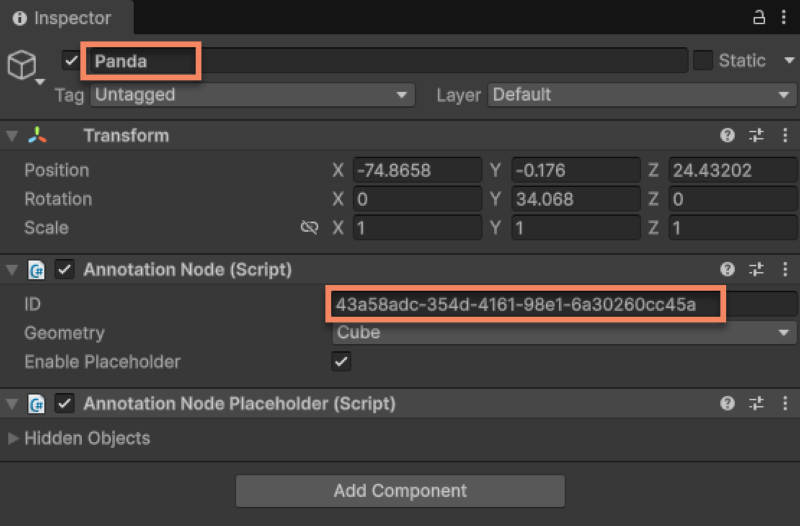
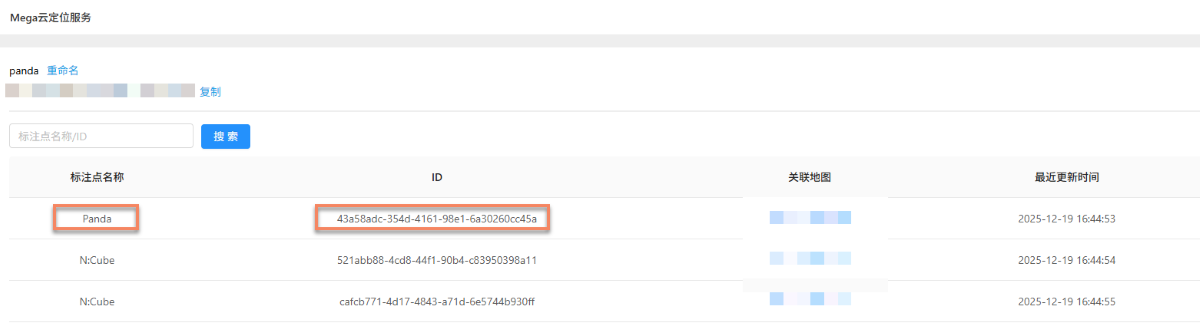
After successful upload, corresponding information appears in the cloud localization library.
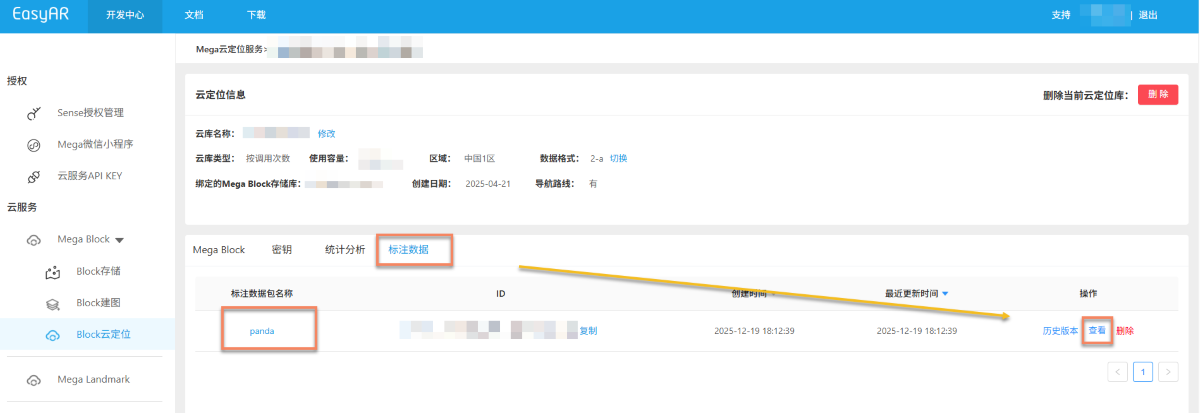
View uploaded annotation data names and IDs here.
Next steps
- Create 3D content aligned with real scenes using the Unity editor
- Try simulating runtime in the Unity editor
- Run the complete sample project