Planning panoramic camera spatial data collection route
This guide aims to standardize the path planning process for Mega Block. By establishing a scientific collection route, it ensures that on-site data collection meets principles such as collecting all necessary data, closed-loop, and loop closure, thereby enhancing map accuracy, positioning effectiveness, and guaranteeing the optimal AR experience.
The final deliverable is a collection route planning video, which is used to guide on-site operations.
Before you begin
Before starting the planning, prepare a floor plan and drawing tools.
Acquire the planar map of the survey area
Obtain the planar map of the survey area through the following methods:
- Mainstream map platforms Utilize mainstream map platforms to obtain planar maps or satellite maps. Ensure the map is zoomed to the highest level (largest scale) to acquire detailed internal road maps and building contour information.
- Property management provided For scenarios such as tourist attractions, indoor shopping malls, exhibition halls, etc., you can also use the floor plan (CAD) provided by the property management.
Save the image: Export and save the obtained planar map in a high-resolution image format (PNG or JPG) locally. This file serves as the foundation for subsequent route drawing.
Important
The more detailed and accurate the road information in the planar map, the higher the precision of subsequent route planning and on-site operation efficiency.
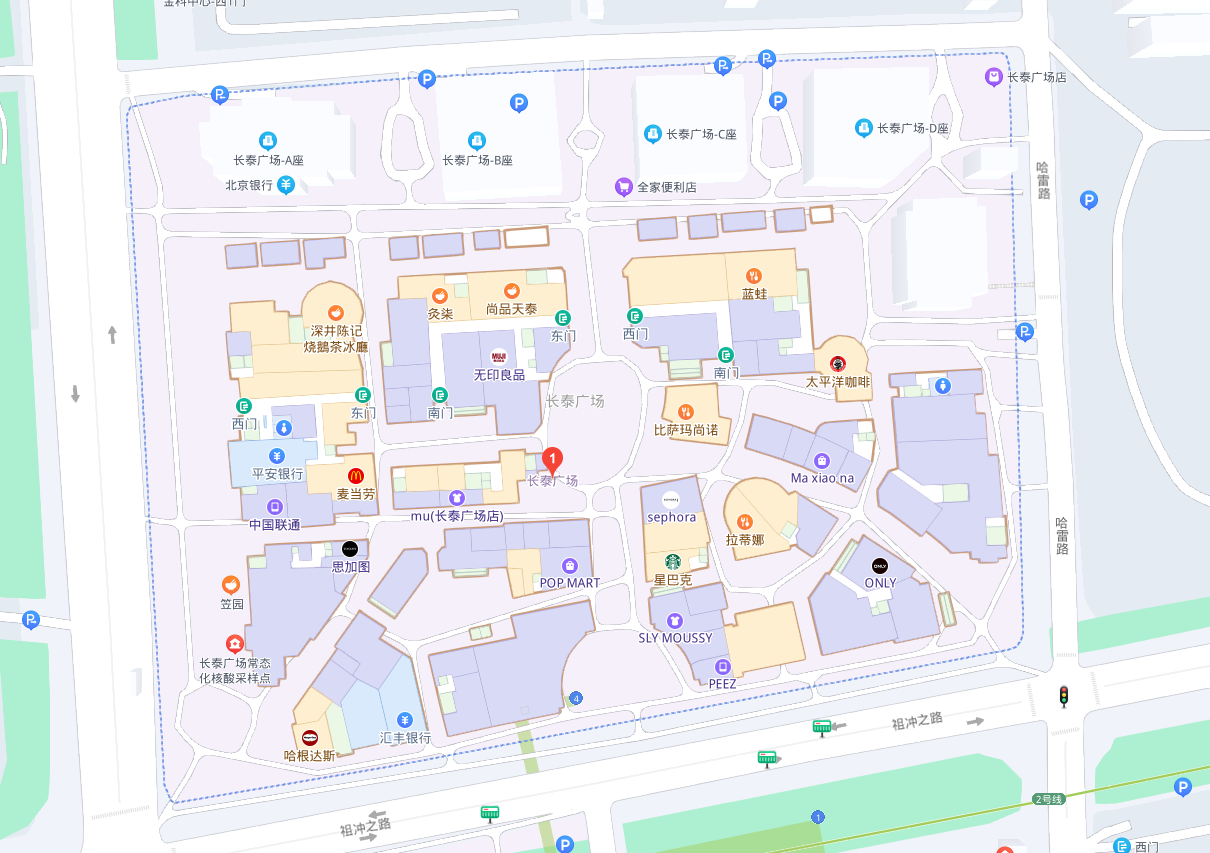
Example: Planar map of Shanghai Changtai Plaza obtained via a map platform.
Preparing the route drawing tool
The output of route planning needs to reflect the dynamic process of drawing the route. It is recommended to use the operating system's built-in tools for drawing and process recording.
Drawing and annotation tools:
- Windows: Right-click the image and open it with the built-in Photos app. Click the Edit button at the top to enter annotation mode.
- macOS: Double-click the image to open it with Preview, then click the Markup icon in the toolbar.
- Mobile (iOS/Android): Use the built-in Edit → Markup feature in the system album.
Screen-recording tools:
- Windows: Open the built-in Snipping Tool, switch to Video mode (camera icon), and click "New" to select the recording area.
- macOS: Press the shortcut
Cmd + Shift + 5and select "Record Selected Portion". - Mobile: Use the Screen Recording feature in the system control center for real-time recording.
Tip
Regardless of the tool used, ensure the recording captures the complete process from the start to the finish of the drawing.
Determine the acquisition scope
Before formally planning the route, you need to determine the acquisition scope. The following example demonstrates this process:
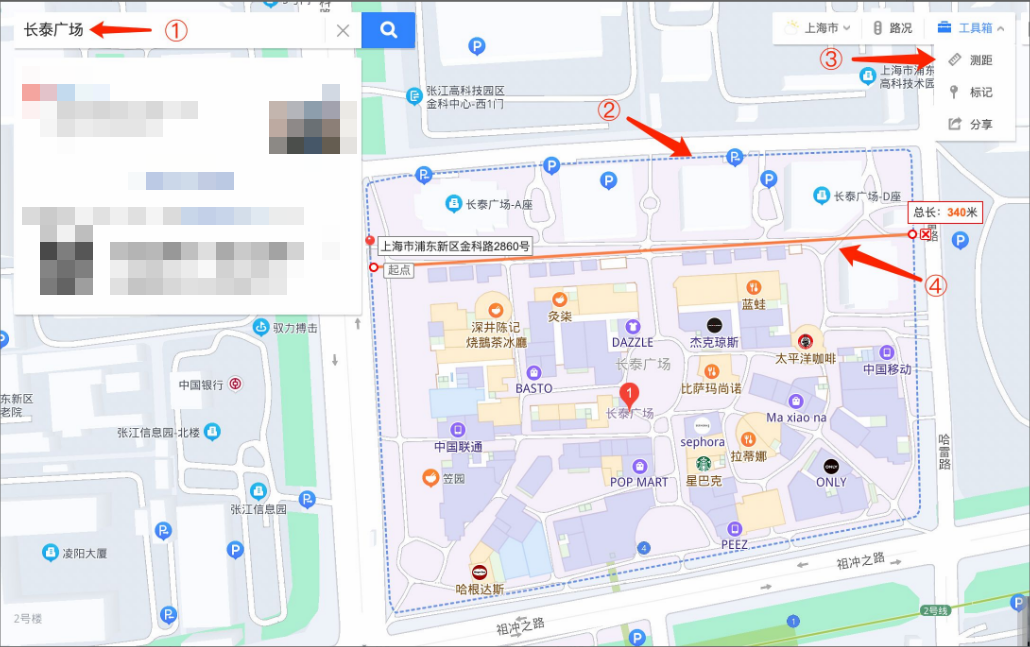
- Locate the area: Search for the target landmark (e.g., XX Mall, XX Park, XX Museum, etc.) on the map platform.
- Define the boundary: Refer to the physical outline or administrative dotted lines displayed on the map to
clarify the scope requiring acquisition(e.g., within the dotted lines in the figure). - Measure dimensions: Use the built-in distance measurement tool on the map platform to measure the length and width of the target area.
- Calculate area: Estimate the total work area based on the measured data. As shown in the figure, the area is approximately 340 meters long and 270 meters wide, resulting in a total work area of about 90,000 square meters.
Collection route principles
To ensure the final mapping effect, the following five principles must be followed when planning routes and conducting field collection.
Principle one: Single-pass completeness
Single-pass completeness: When conditions permit, strive to complete full collection of the target area in a single task. If separate collections are unavoidable, ensure the effective operation duration per collection is no less than 80 minutes (no less than 40 minutes when using only the built-in battery).
Duration limits: Collection duration is constrained by device power supply and system processing capacity. Strictly adhere to the following table:
Power solution Duration limit External power bank (recommended) 128 minutes GoPro Max/Max2 built-in battery 60 minutes Warning
- Storage space: Reserve at least
64 GBstorage space for 128-minute video collection. - Overheat protection: When temperature exceeds 30°C,
remove the GoPro Max/Max2 built-in batteryand use only a power bank to prevent device shutdown due to overheating. - Area estimation: The 128-minute limit covers approximately 90,000 m² (300m × 300m).
- Storage space: Reserve at least
Additional outdoor requirements:
- After powering on the GoPro Max/Max2, wait 2 minutes for GNSS (Global Navigation Satellite System, e.g., GPS, BeiDou) signal initialization before collection.
- The starting point must be outdoors with a landmark building within 3 meters, facing it.
Principle 2: collect comprehensively (Core principle)
Definition: All publicly operated areas within the operational boundary must be included in the collection scope.
Important
User perspective judgment method
When planning or making on-site judgments, adopt the perspective of the end user.
- Scenic area \(\rightarrow\) Tourist
- Shopping mall \(\rightarrow\) Customer
- Hospital \(\rightarrow\) Patient/Visitor
Any area this role
mightreachneedsto be included in the collection scope.Open area coverage: Since the GoPro Max/Max2 captures clearly within
3 metersleft and right of the path, manually add paths in open areas to ensure complete high-definition coverage. Thespacing between paths must not exceed 6 meters.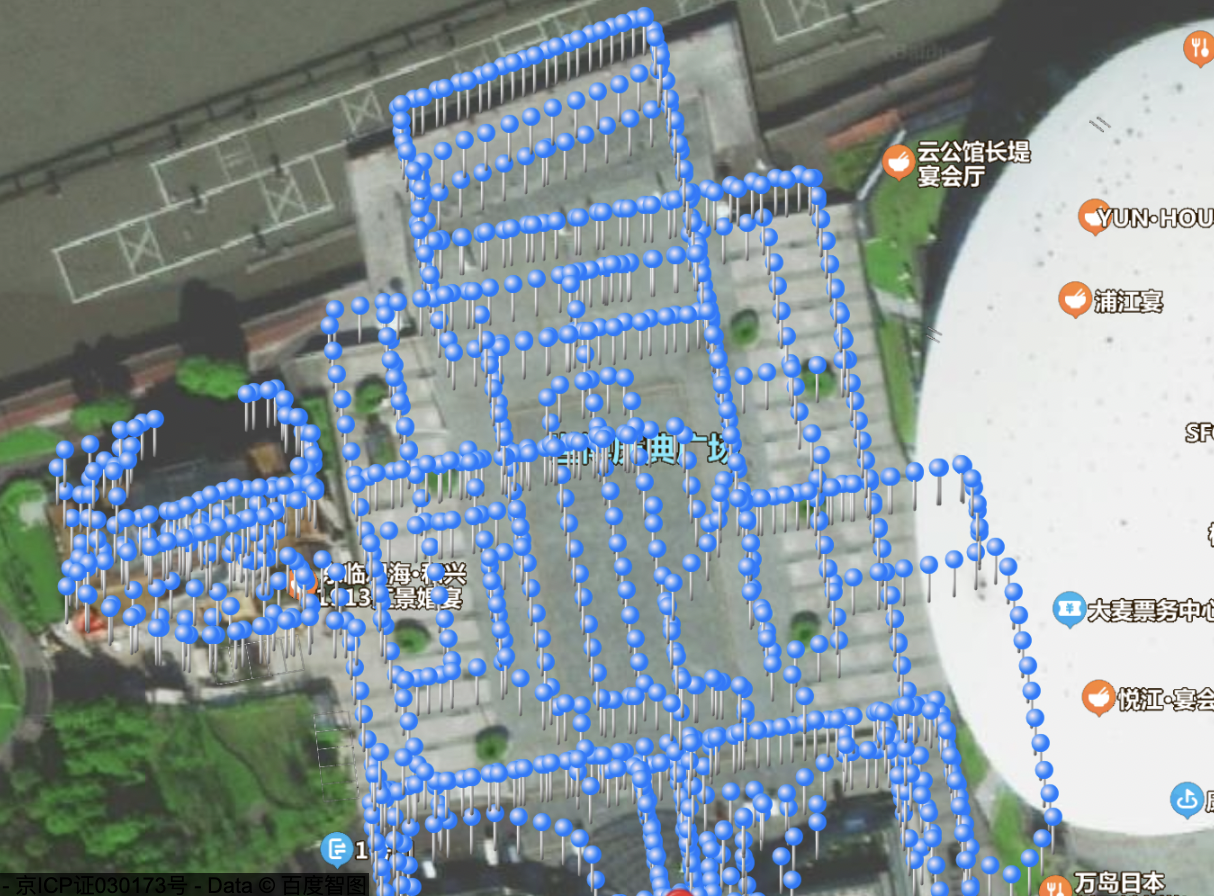
The open square in the image is covered by a grid-like collection path with 6-meter intervals.

The pedestrian street wider than 6 meters in the image is collected using left and right paths in a looped form (like a ladder-shaped nine-link).
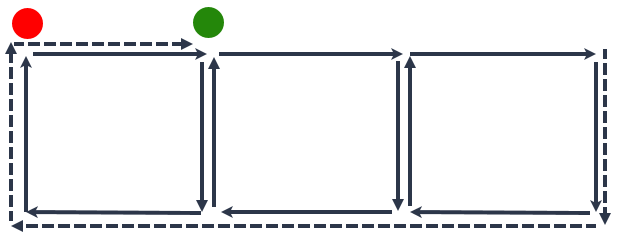
Principle three: Loop closure (Very important)
Core metric for high-quality data: The proportion of
paths traversed twicein the total path. Thehigher the proportion, the stronger the ability to eliminate cumulative errors, and the better the mapping quality.Planning strategy:
Wide road (≥6m): Perform a loop (draw a circle) approximately every 30 meters traveled, and adjacent "loops"
mustshare one overlapping edge.Important
Slow down during turns and follow as large an arc as possible. Rapid in-place turns may cause loop failure!
The video demonstrates loop methods for four consecutive areas. Paths traversed once are marked in black, while paths traversed twice turn green, indicating high-quality image capture completion.
In good collection results, adjacent loops share one overlapping edge, resembling tightly packed plant cell walls.
Narrow road (<6m): No need to loop; simply stay in the middle of the road and traverse back and forth twice.
Collect main framework first, supplement branches later: For large areas, traverse the
complete main routeonce to ensure overall accuracy. Then, during the second pass, enter branch routes or key points to collect branch data.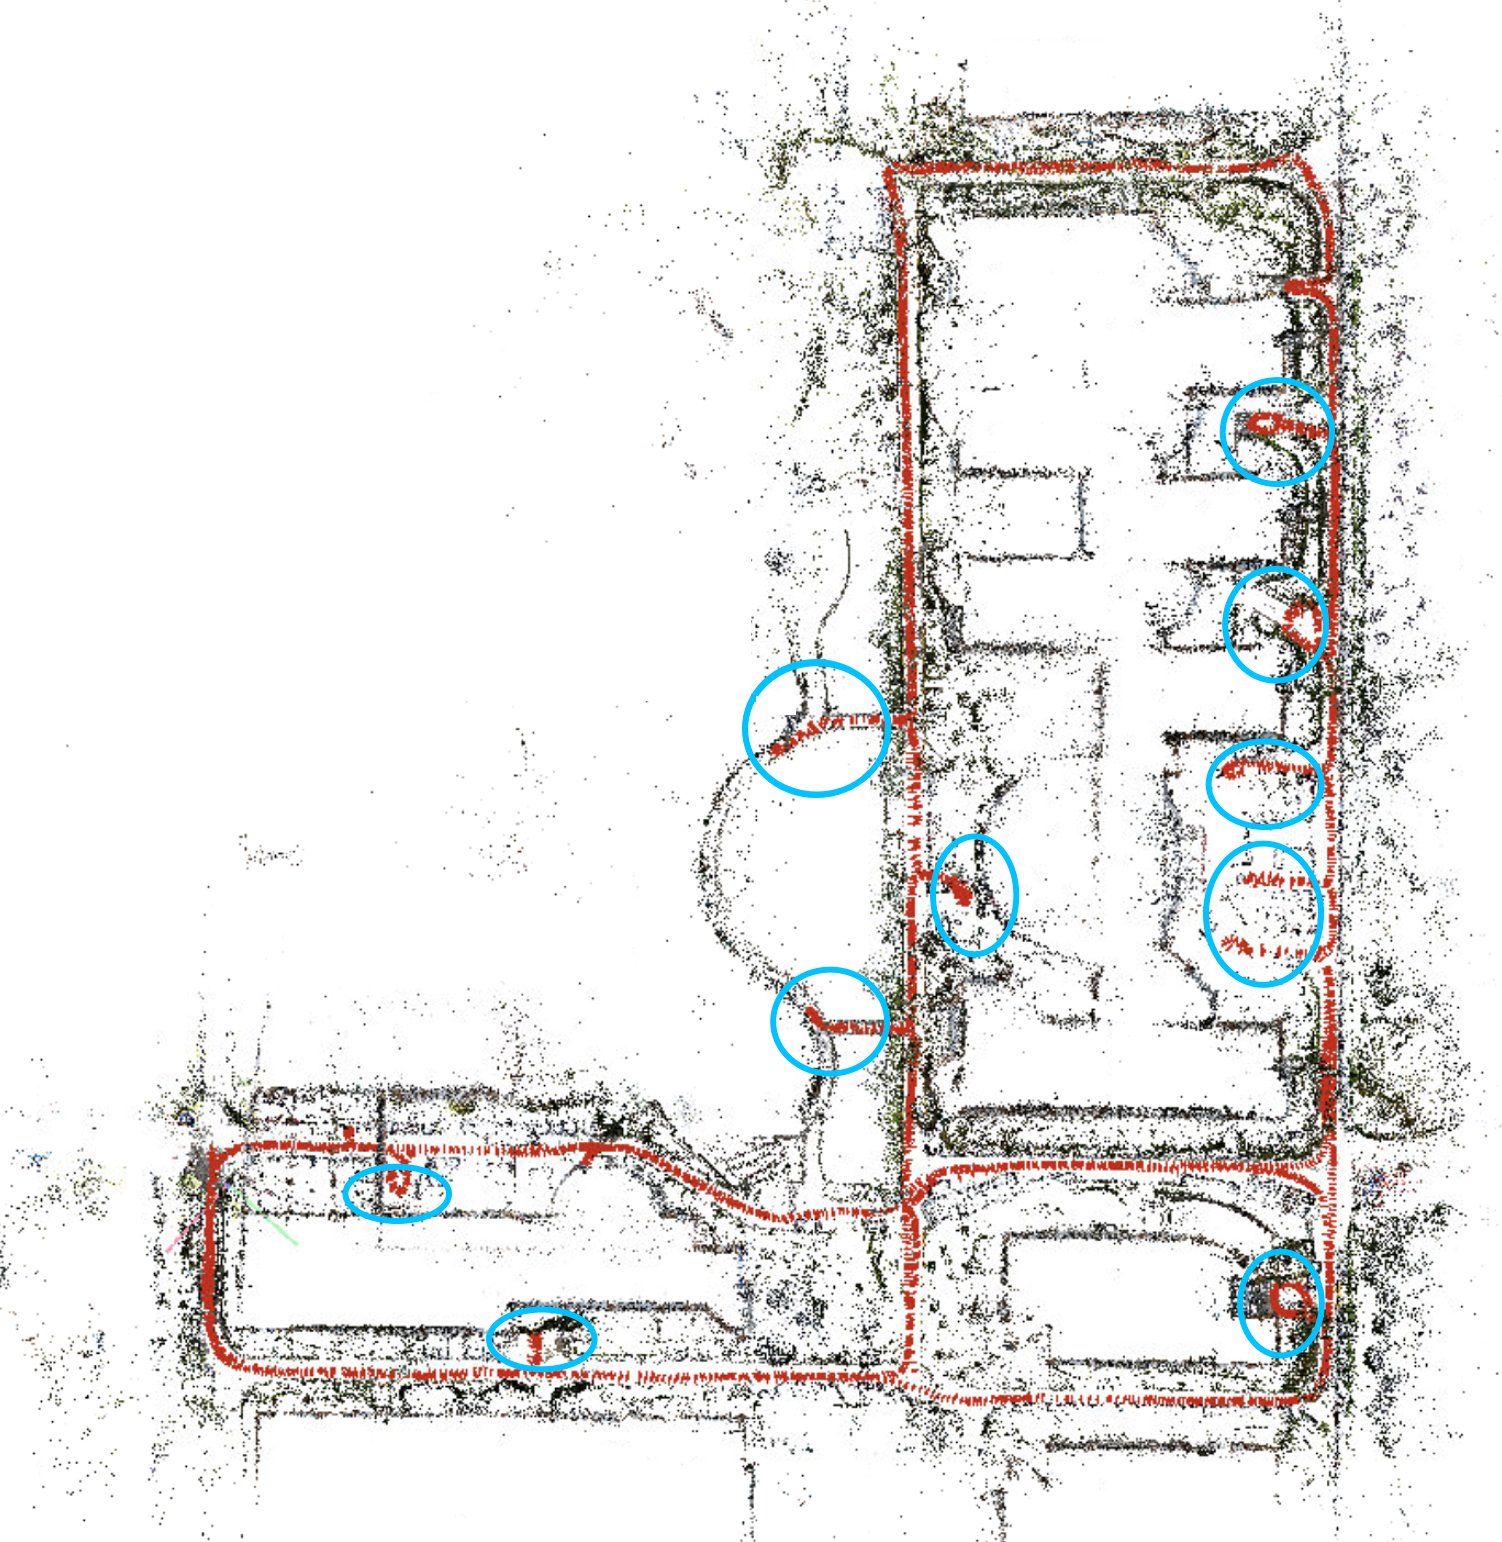
The blue circles indicate "small branches" diverging from the main route. Traverse the entire main route first, then enter branch routes during the second collection pass.
Principle 4: Closed loop
Warning
Do not end prematurely: After returning to the starting point, walk an additional few dozen meters to ensure a closed loop. Unclosed data will cause severe drift in mapping.
- Closed loop standard: Before ending collection, you must return to the starting point, then
retrace the initial path for at least 30 meters.
Example: The red dot is the starting point. After returning to the starting point (dashed line) upon completion of collection, you must walk along the original path to the green dot (at least 30 meters from the starting point) before ending collection.
Principle 5: prioritize on-site conditions
On-site environmental deviation: Online satellite imagery may have timeliness limitations, leading to deviations from the actual physical environment (such as new temporary structures, barriers, or vegetation changes). If the planned route is physically impassable, you need to flexibly adjust the route based on actual conditions.
Detail supplementation: If certain detailed areas are not reflected in the planning during acquisition, you should flexibly adjust the route on-site to include them, fulfilling the principle of comprehensive coverage.
Real-time trajectory assistance: During outdoor acquisition, it is recommended to simultaneously enable a mobile trajectory tracking tool (e.g., sports apps with GNSS data recording function) for subsequent review. By viewing the recorded travel curve in real-time, you can visually determine the currently covered area, promptly identify missed areas, and correct subsequent routes.
This example demonstrates recording the acquisition route using "Huawei Health App".
Check collection results
After collection, verify whether the trajectory data recorded by the tool during collection violates the aforementioned collection principles (especially the core principle of comprehensive coverage). If significant deviations exist, re-collect is recommended to avoid affecting subsequent mapping results.
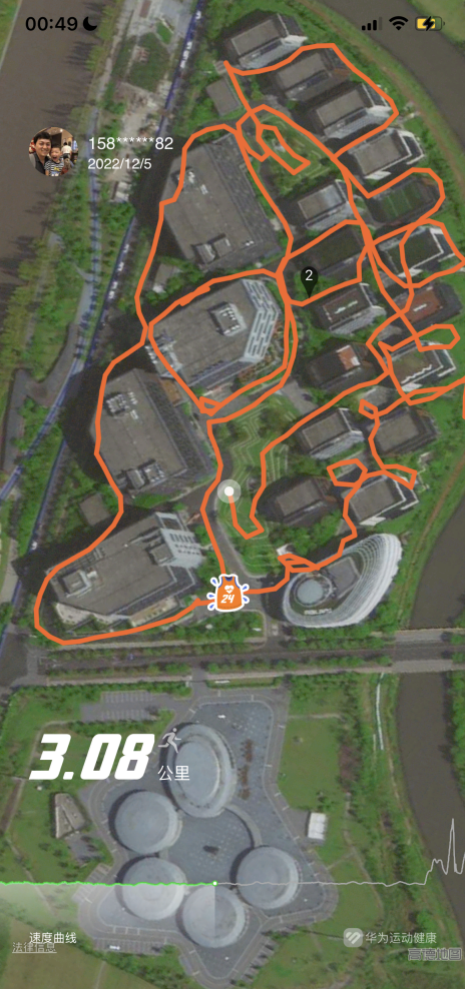
Example: Collection trajectory recorded by the mobile trajectory tracking tool.
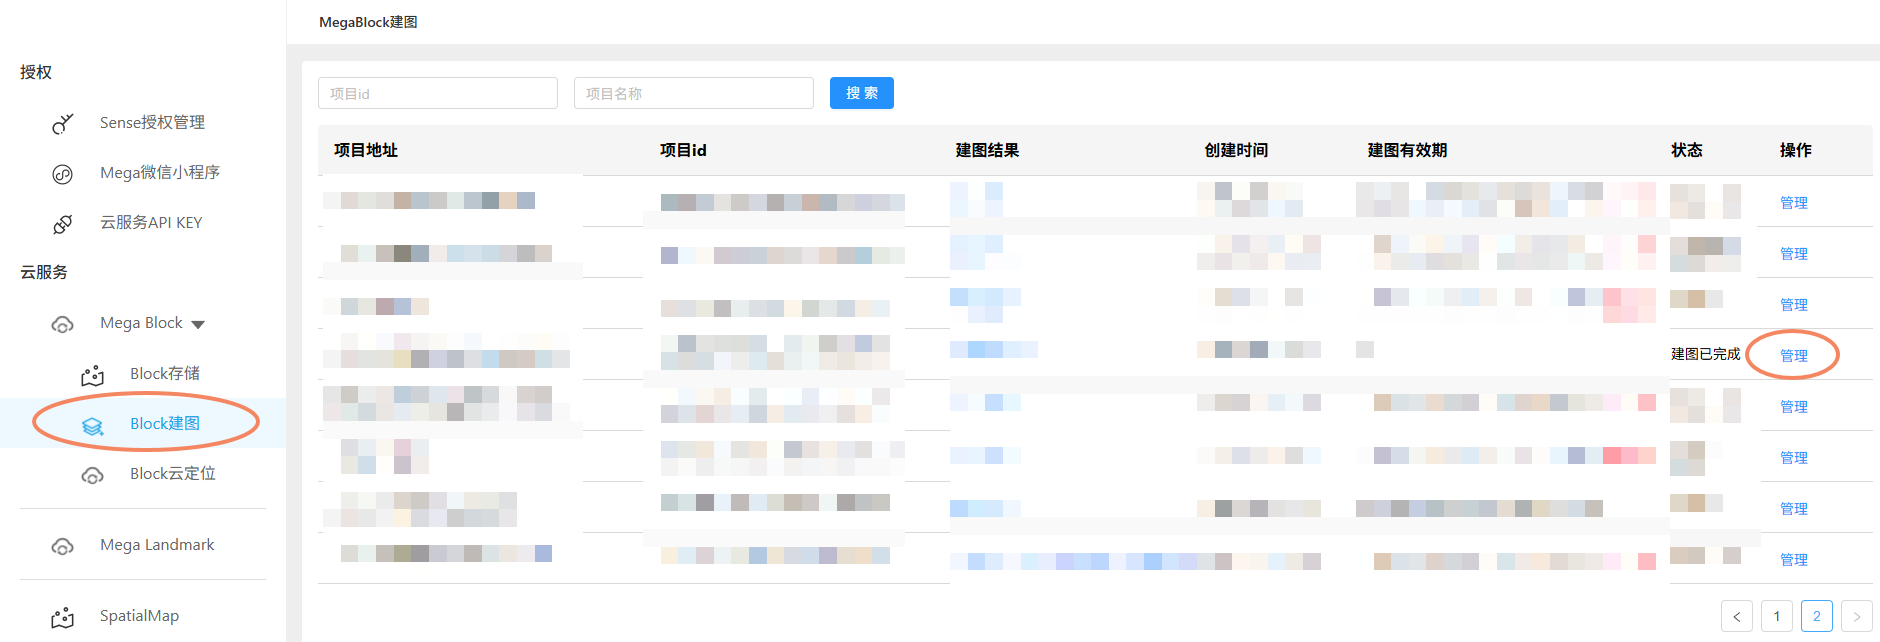
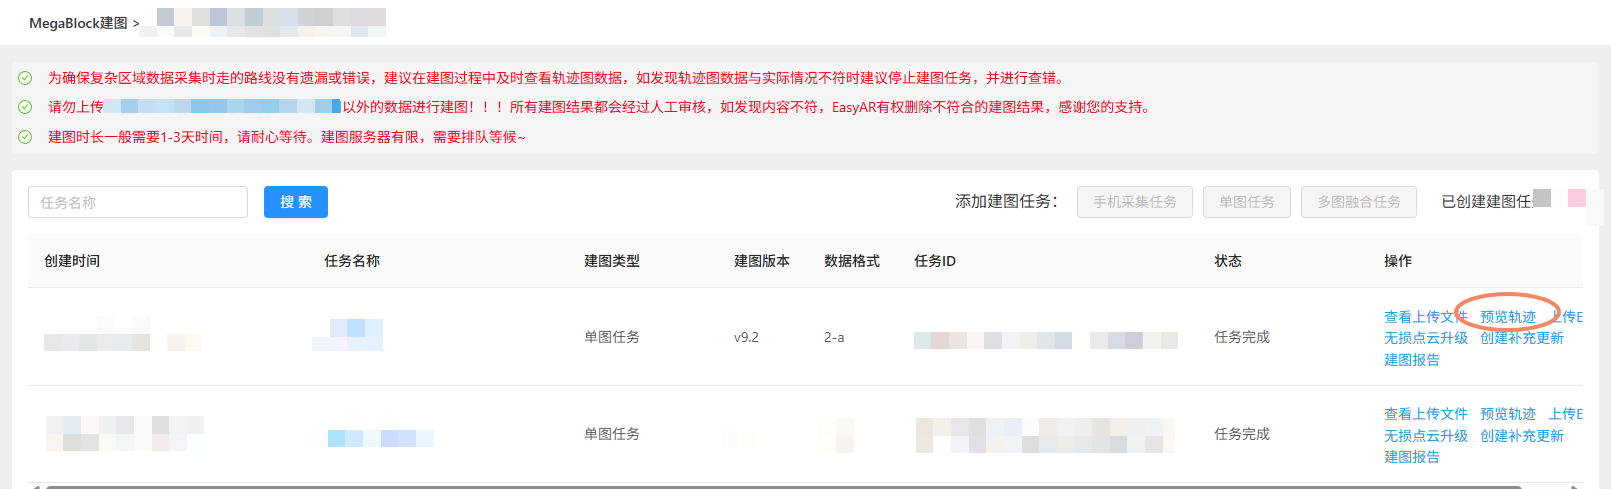
You can also view the trajectory of the current collection route by navigating to the EasyAR developer center: Cloud services > Mega Block > Block mapping > Click Manage on the far right of the corresponding project > Click Preview trajectory in the mapping task.
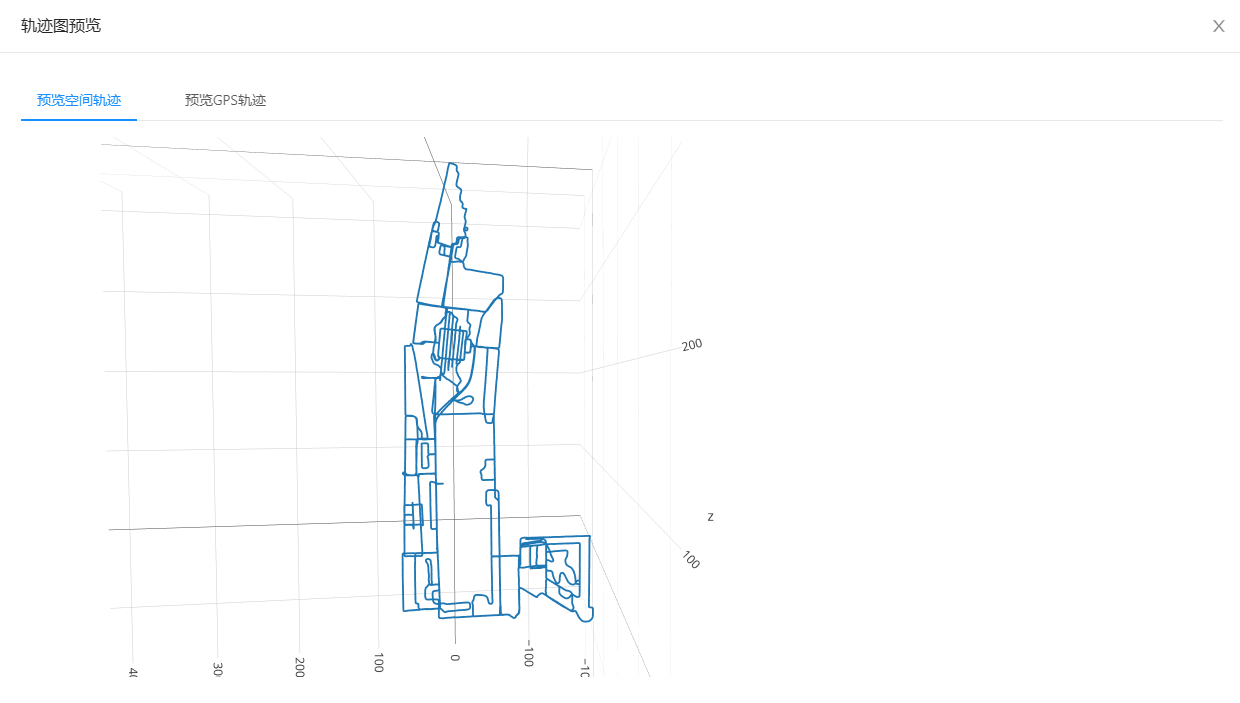
If indoor collection lacks GNSS data, after completing Mega Block mapping, you can still view the collection route trajectory in the developer center's mapping management.
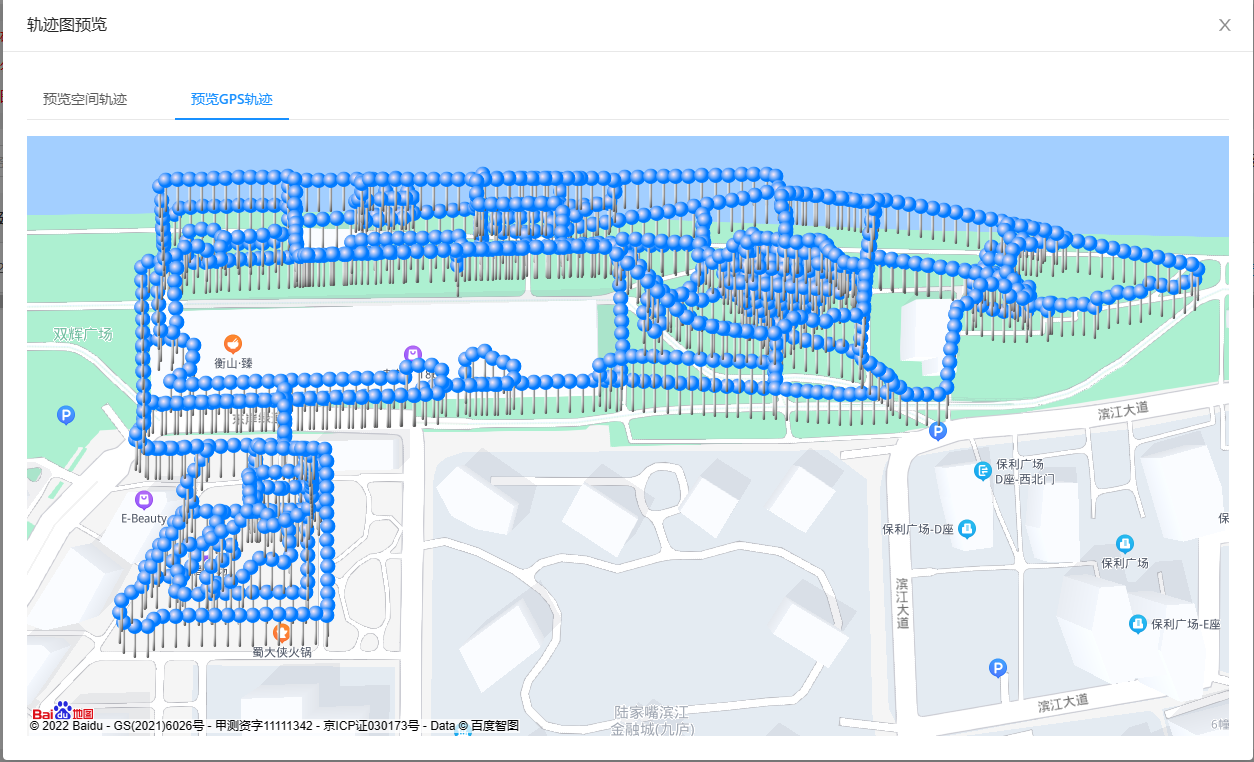
If outdoor collection includes GNSS data, the collection route trajectory in the developer center can also correspond to the map. (GNSS information may have slight offsets, which is normal.)
Suggested division of labor
If you are facing large-scale data collection tasks, or need to conduct mapping operations simultaneously in multiple distinct areas, consider the following team division approach:
- Technical personnel: Design the mapping paths based on floor plans and the collection principles described in this document, and record planning videos. After collection, check the mapping quality using the trajectory recorded during collection.
- Field operators: Perform on-site collection operations according to the provided planning videos, requiring on-the-spot route adjustments. Use path-tracking tools during mapping to record the movement trajectory, aiding in preventing missed areas during collection and for post-collection review.
Tip
The division of labor is not a fixed requirement; you can flexibly adjust it based on your team's actual manpower situation.
Next steps
- Learn how to plan multi-view acquisition.
- Learn about acquisition methods.