Create an Object Mobile Collection Task
This article details the complete operation process of the object mobile collection and mapping task, including task creation, data preparation, data upload, and mapping process description, etc., to help users quickly meet the mapping requirements for specific objects.
Create an Object Mobile Collection Task
The creation methods vary depending on the type of service purchased.
Create via the Mobile Collection Task Button
Click the
Mobile Collection Taskbutton in the upper right corner.
In the pop-up dialog box, set the collection method to
Object Collection, enter the task name, select the mapping version and data format (it is recommended to use the latest version), and finally click theConfirm Additionbutton to complete the creation of the object mobile collection task.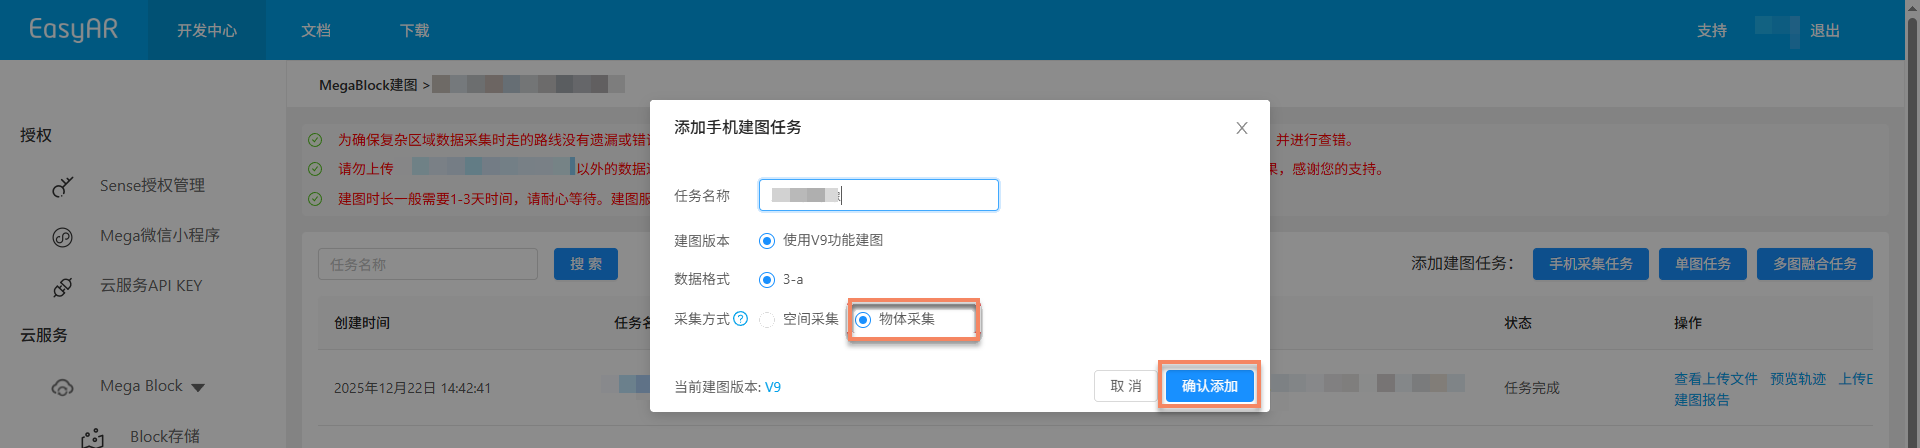
Note
This method is suitable for users who have purchased the complete Mega service.
Create via the Mobile Collection - Object Button
Click the
Mobile Collection - Objectbutton in the upper right corner.
In the pop-up dialog box, enter the task name, select the mapping version and data format (it is recommended to use the latest version), and finally click the
Confirm Additionbutton to complete the creation of the object mobile collection task.
Note
This method is suitable for users who have purchased the object collection service separately.
Data Collection and Export
Use a mobile phone to collect spatial data of specific objects. For relevant device configurations and collection points, please refer to:
Upload Data
Click the
Upload Databutton.

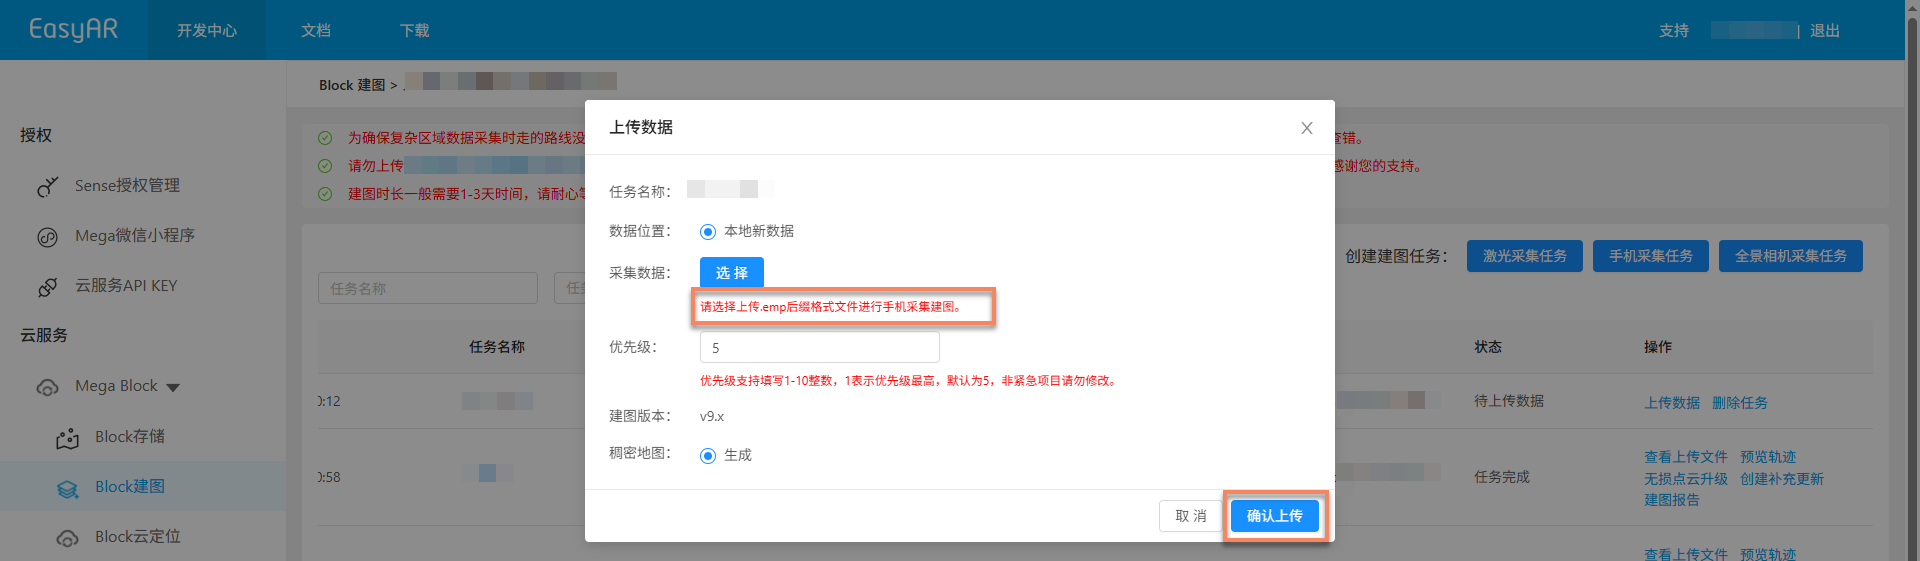
In the pop-up data upload window, complete the following configurations:
- Collected data: Select and upload files with the
.empsuffix.
- Collected data: Select and upload files with the
After completing the settings, click the
Confirm Uploadbutton.
Start Mapping
After uploading the data, the mapping process will start automatically, and the status will be displayed as In Queue or Generating. The mapping duration varies depending on the data volume. Please be patient.

Auxiliary Functions
The following functions can help you better manage and operate mapping tasks and improve work efficiency:
View Uploaded Files
This is used to check whether the uploaded mapping files are complete and avoid mapping failures caused by missing files.
Click the
View Uploaded Filesbutton, and view the list of all uploaded files in the pop-up window to confirm whether the files have been uploaded completely.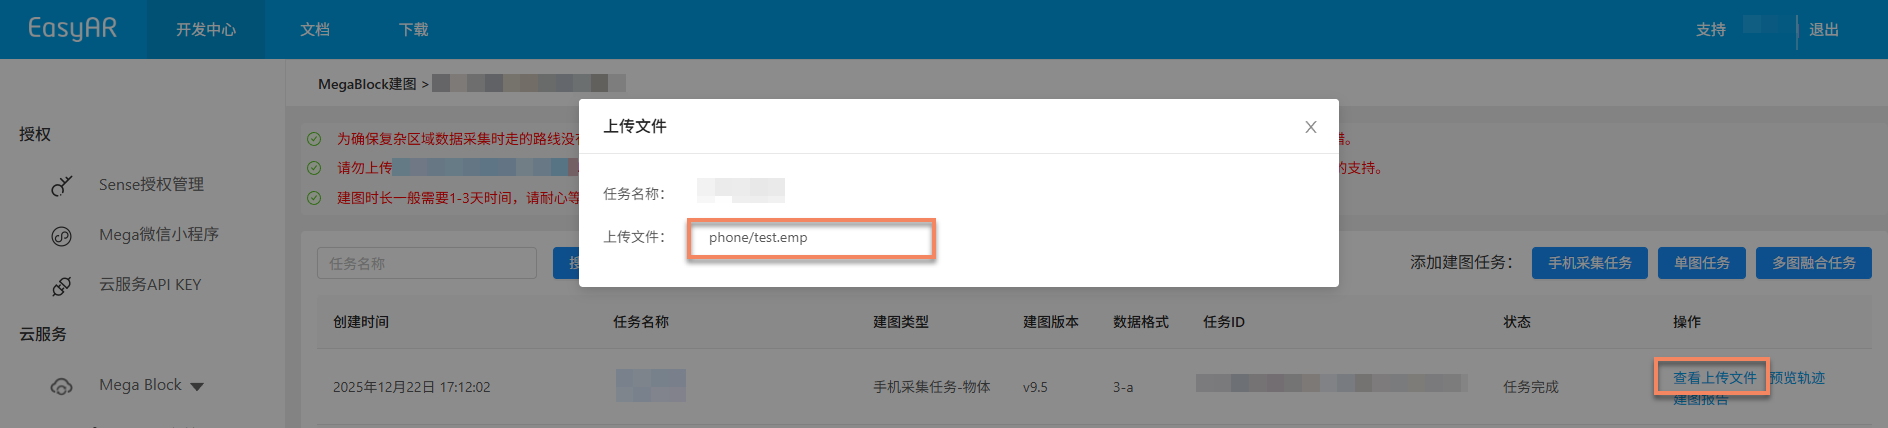
China Region 1: You can click on a specific
.emp-suffixed file to preview the video content online and ensure that the quality of the collected data meets the requirements.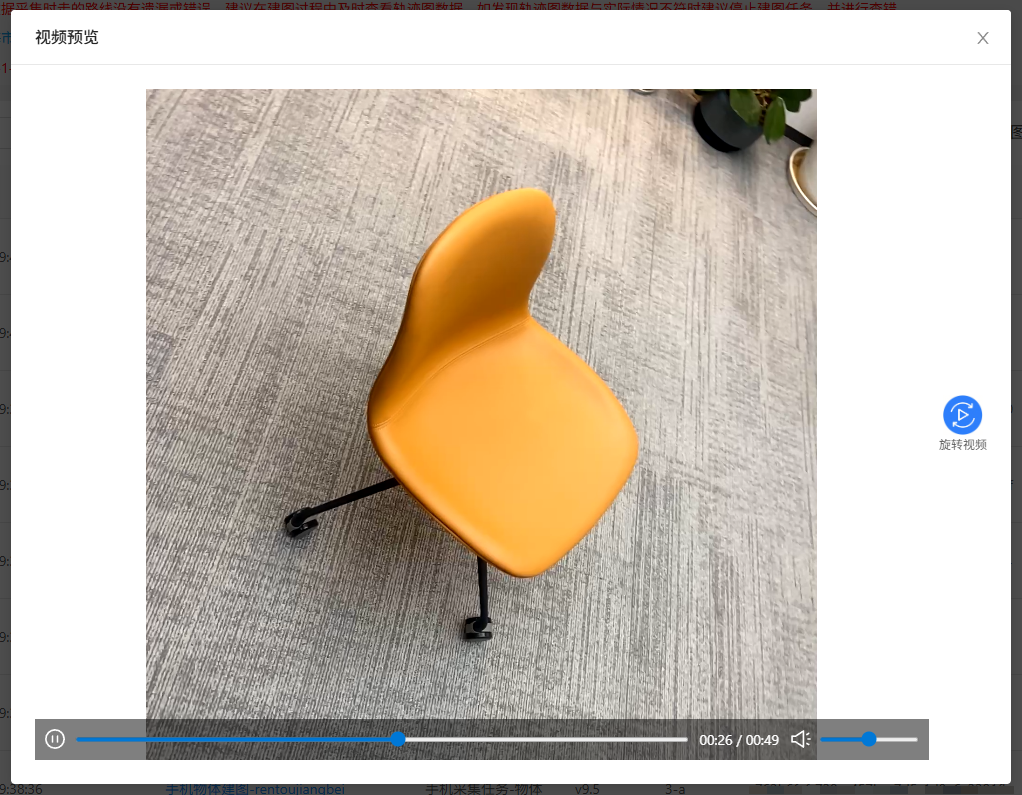
Stop Mapping
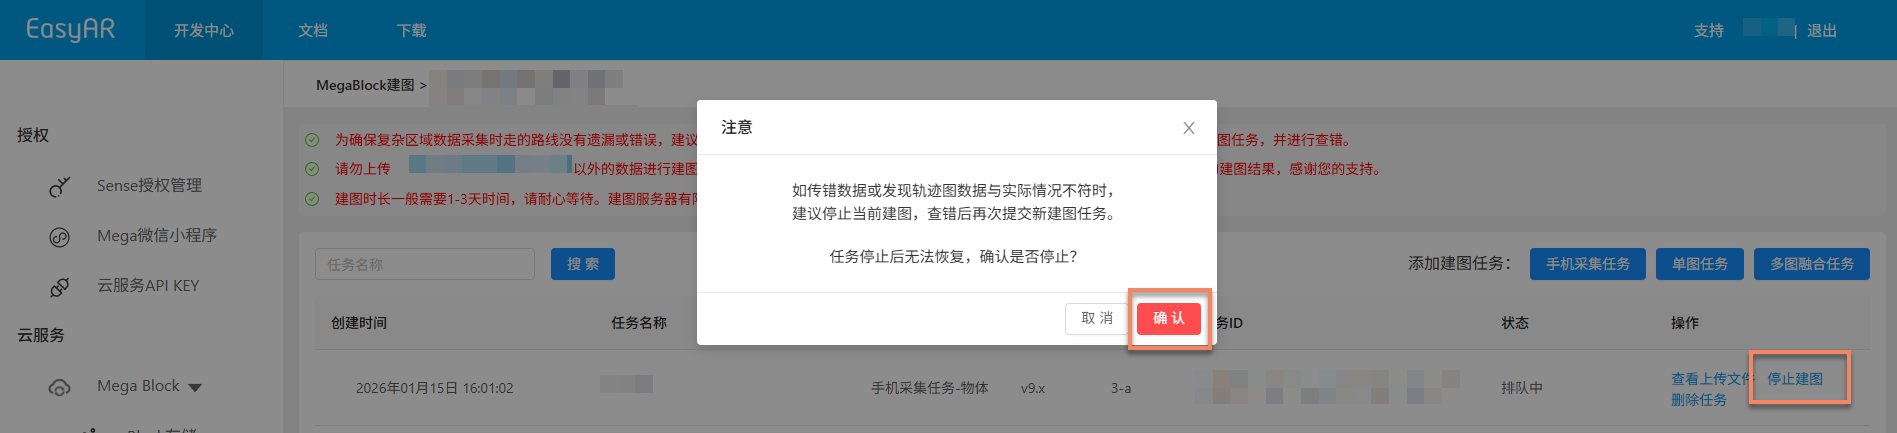
Before the mapping task is completed, if you find that the wrong data has been uploaded or the trajectory map data does not match the actual situation, you can click the Stop Mapping button and click Confirm in the secondary confirmation pop-up window to stop the mapping.
Delete Task
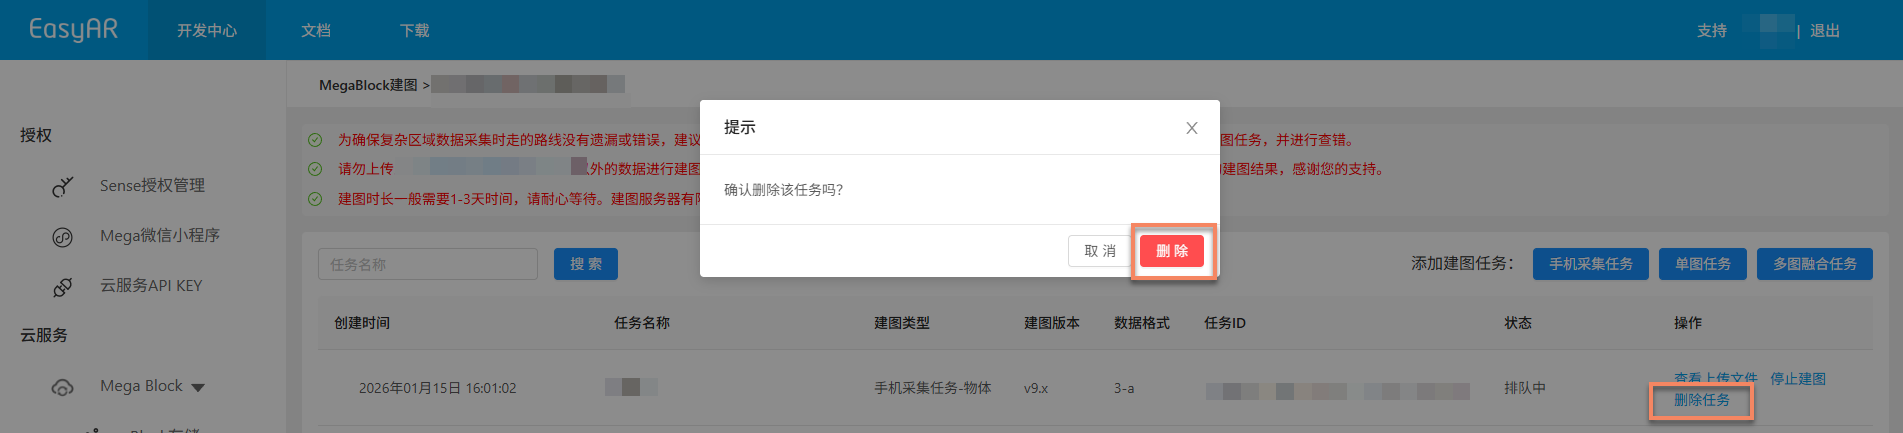
If the current mapping task fails to generate or is no longer needed, you can click the Delete Task button to delete the task. Click Delete in the secondary confirmation pop-up window to complete the deletion operation.
Confirm Mapping Results
After the task enters the mapping process, you can determine whether the mapping task is completed through the Task Status. When the status is displayed as Task Completed or Generation Failed, it means that the mapping task has ended.

Mapping Successful
When the task status is displayed as Task Completed, it means that the mapping is successful and the mapping results have been generated. At this time, you can further view the mapping results to confirm whether they meet the expected requirements.
View the mapping results:
- Review the Collection Route
- View the Mapping Report
- Preview the Spatial Model
- View Block Information
Mapping Failed
When the task status is displayed as Generation Failed, it means that the mapping has failed. It is recommended to troubleshoot the problem in the following ways:
- View the mapping report: View the mapping report and find solutions based on the report information.
- Refer to troubleshooting: Consult the Mapping Failure Troubleshooting Guide to obtain solutions to common problems.
- Contact technical support: If the above methods do not solve the problem, please contact EasyAR staff and provide the
Task IDfor quick problem location.