Simulating 3D Content Effects
This document introduces how to use the simulation running function of Mega Studio on the computer to load annotation data and 3D models, and view the overlay effect of virtual content in the real world.
Note
The following content and tools are not applicable to the Unity application development process.
If you are developing a Unity application, please refer to Simulating and Running with the Session Verification Tool in the development guide.
Preparation Before Annotation
Before starting to create annotations, you need to ensure that you have prepared the corresponding environment and data.
If you need to display annotation data during positioning, you can use the Annotation Component for annotation. Before that, you should have completed EIF data collection and finished the configuration preparation work of the software environment as introduced in Simulating and Running.
Annotation Data Process
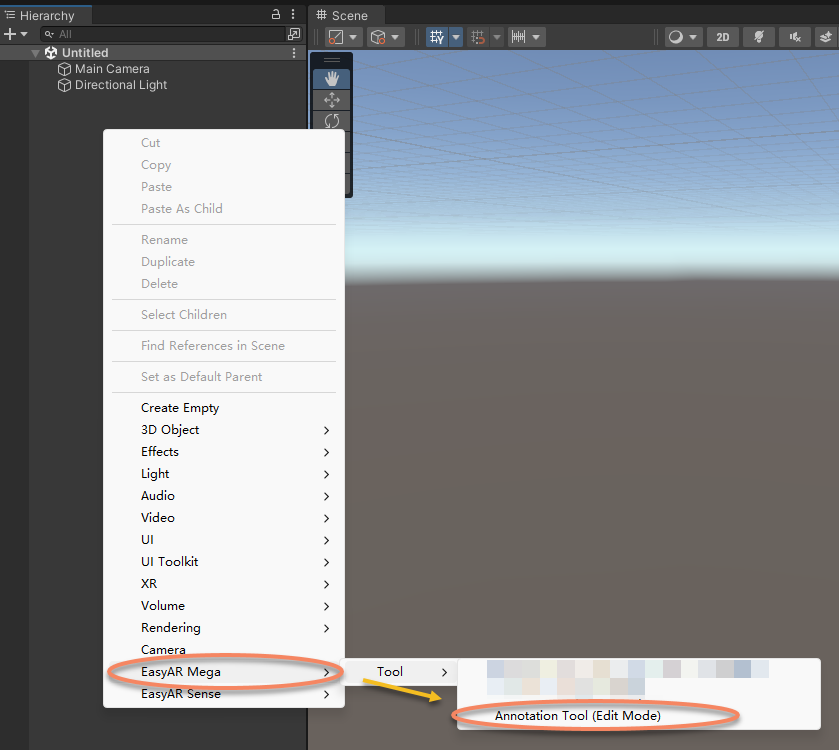
Right-click on the blank area of the "Hierarchy" in the left panel and import "Annotation Tool(Edit Mode)"
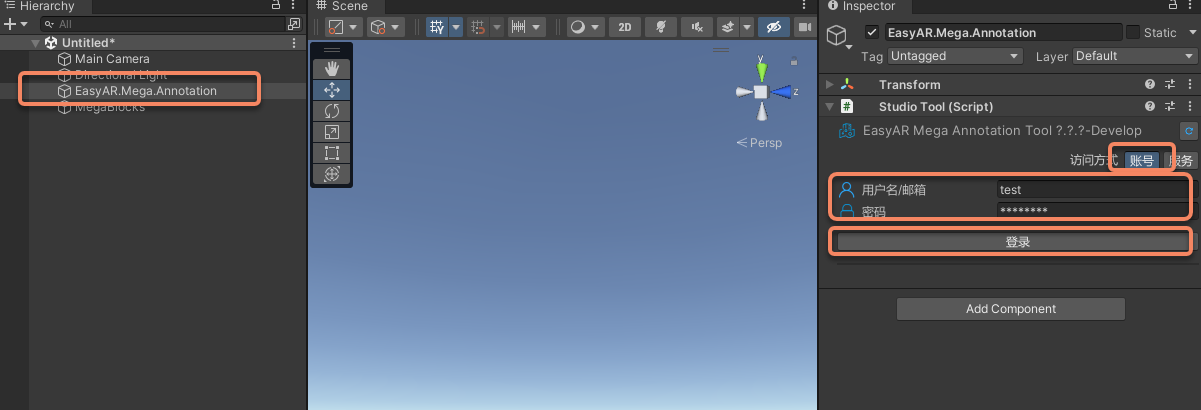
Select "EasyAR.Mega.Annotation" in the "Hierarchy" of the left panel.
Enter your EasyAR account name and password in the "Inspector" of the right panel.
Click "Login".
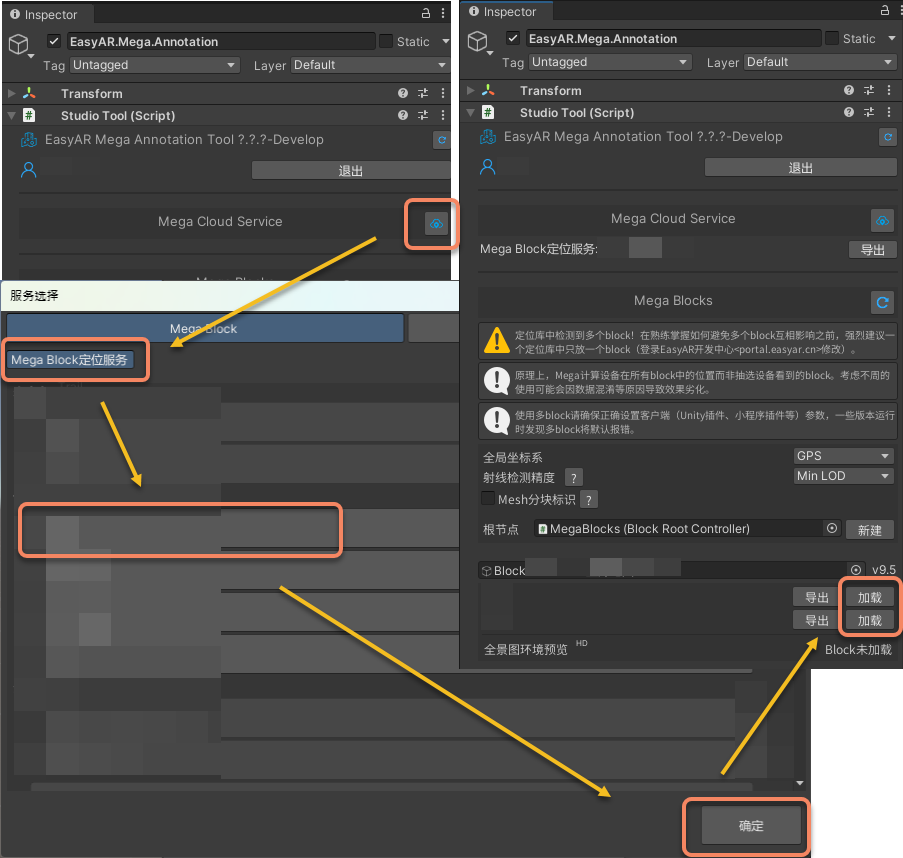
In the "Inspector" of the right panel, click the icon after "Mega Cloud Service".
In the opened window, select a "Mega Block positioning service".
Click "OK".
In the "Inspector" of the right panel, click "Load" to add the map to the Unity project.
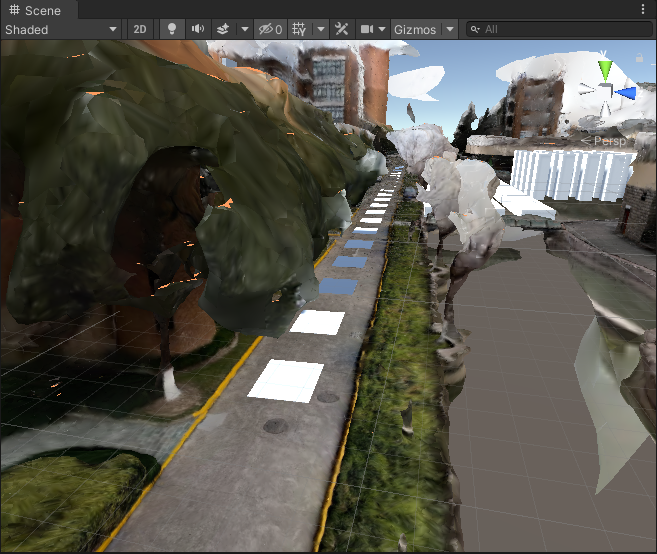
Create annotation data
At the spatial position where you need to annotate, press Ctrl and the left mouse button simultaneously to create an annotation cube.
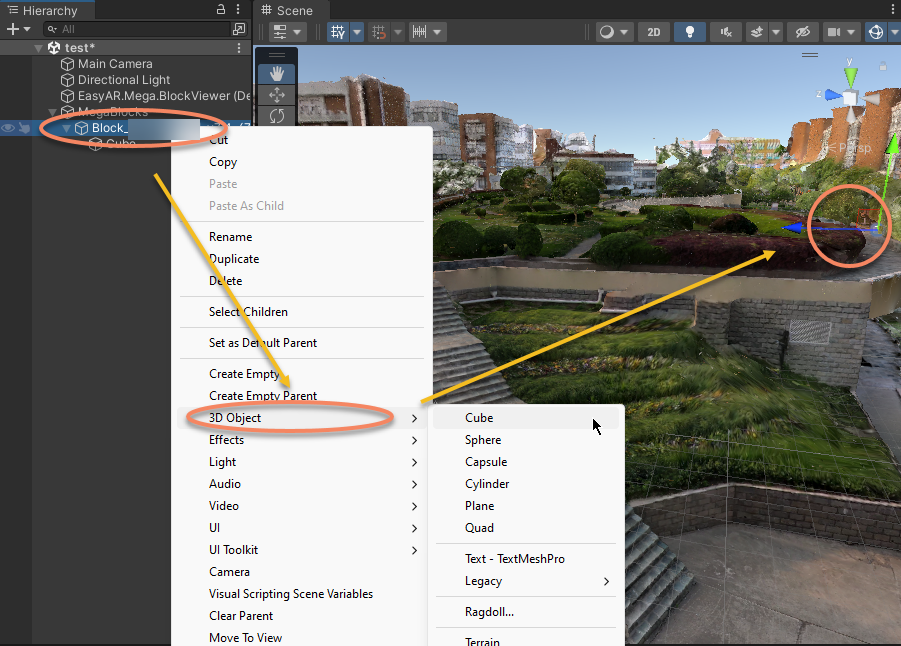
Create 3D objects through the right-click menu. Note that 3D objects need to be placed under the Block node.
Directly import pre-generated models.
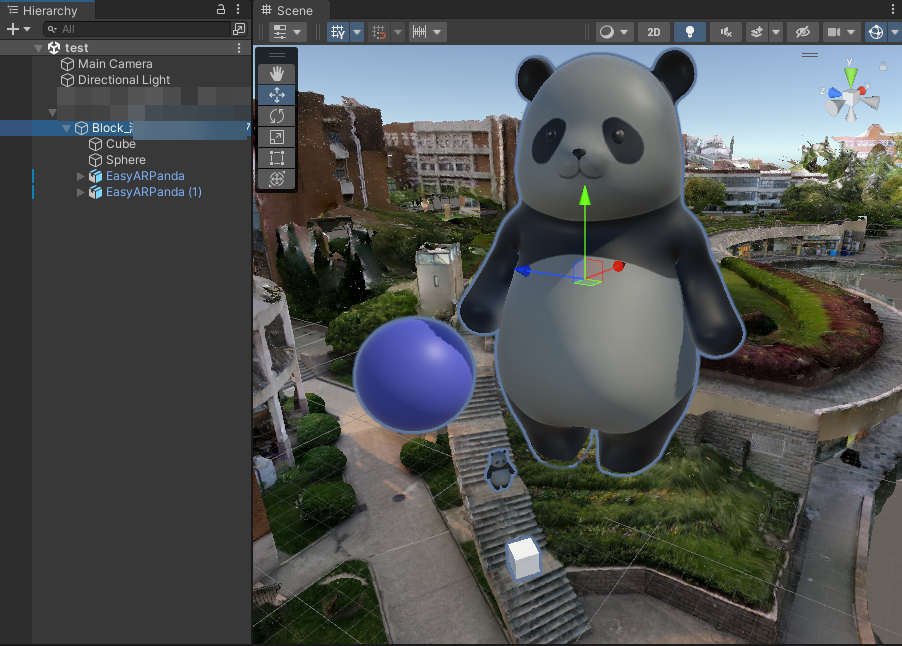
Select "EasyAR.Mega.Annotation" in the "Inspector" of the left panel, and then click the icon after the annotation data package in the "Inspector" panel on the right.
Viewing the Positioning Effect Using Annotation Data
This part of the operation is similar to Simulating and Running. For more detailed steps, you can refer to the previous section.
First, enable the tool, and then click the run button to start.
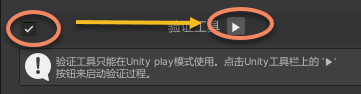
You can also start it through the button on the Unity toolbar.

Open and automatically play the EIF.
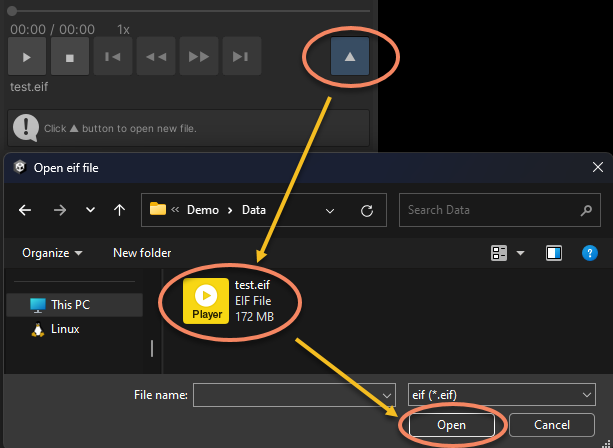
You can perform playback control according to your needs. Usually, the effect will be like this.
You can also completely hide the Block model, so that the effect will be the same as what you see in the real scene.
Stop running through the tool button.
Related Topics
For more detailed operations of Mega Studio, you can refer to the Mega Studio Operation Manual.