Simulation Run (Non-Unity Application Development)
This document introduces how to use the Annotation Tool in Mega Studio for simulation runs to view the positioning effects.
Note
The following content and tools are not applicable to the Unity application development process.
If you are developing a Unity application, please refer to Simulate and Run with the Session Verification Tool in the development guide.
Preparation
Before the simulation run, you need to prepare the Annotation Tool in Mega Studio.
Download Mega Studio
Mega Studio is provided in the form of a Unity plugin. You need to download the EasyAR Sense Unity Plugin (for Mega) on the EasyAR Download Page and then import it into Unity for use.
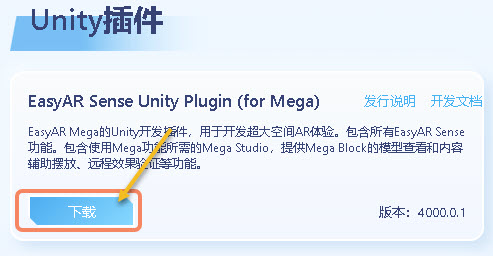
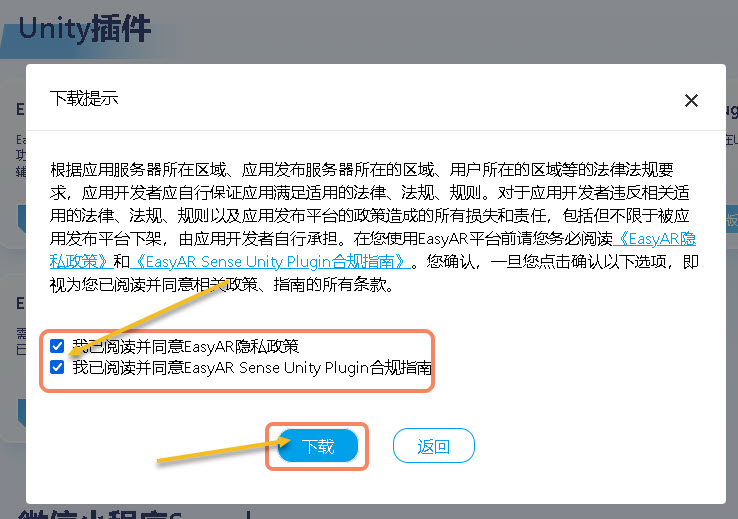
Read and agree to the "Privacy Policy" and "Compliance Guide", then click "Download".
Unzip the file. Unzip the downloaded file into the following structure.


Create a Unity Project
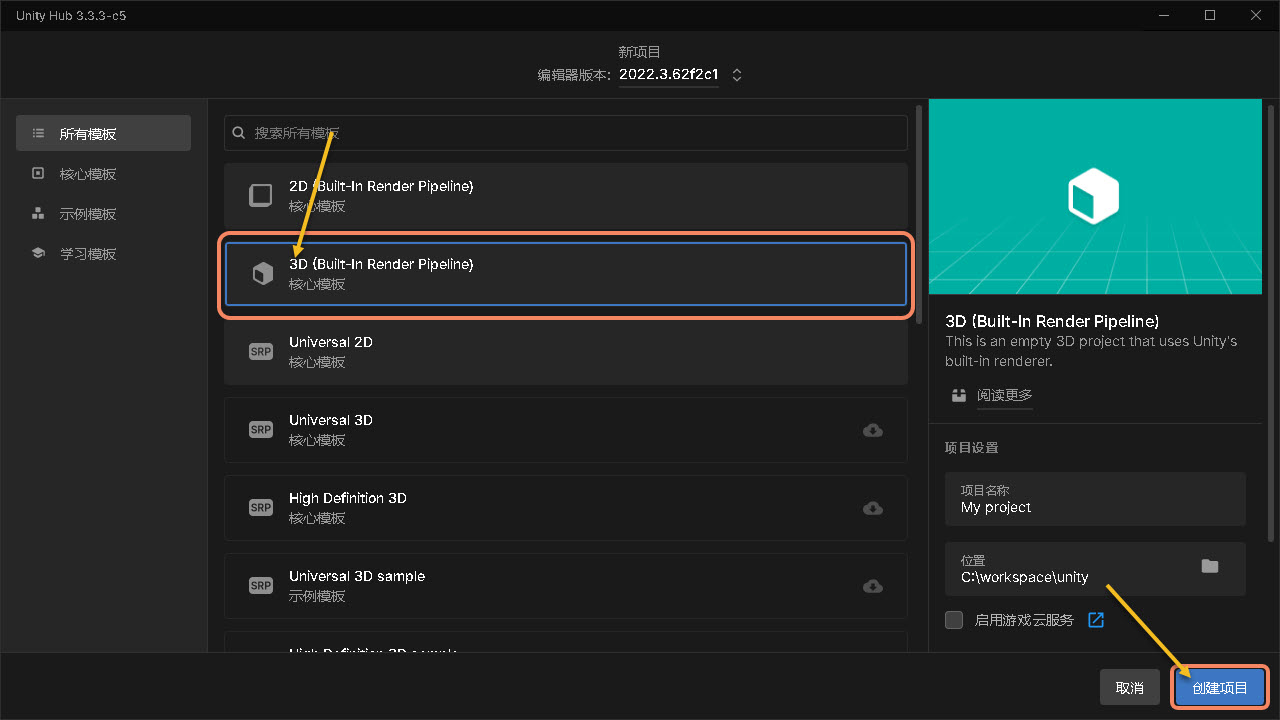
Run Unity and create a project.
Click "New Project".
Select "3D (Built-In Render Pipeline)".
Click "Create Project".

Tip
For versions after Unity 6000, you need to download the 3D (Built-In Render Pipeline) component first.
Install Mega Studio
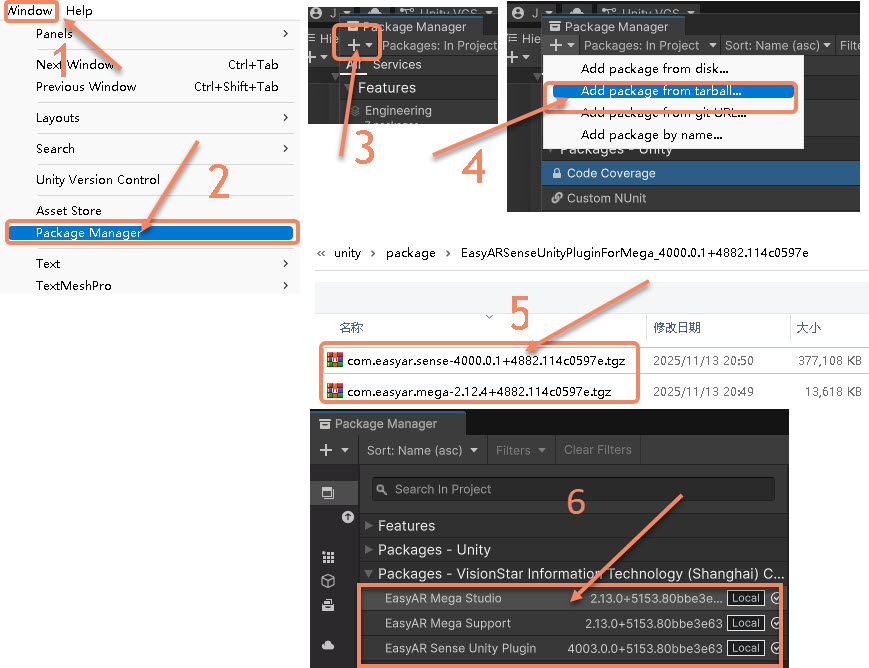
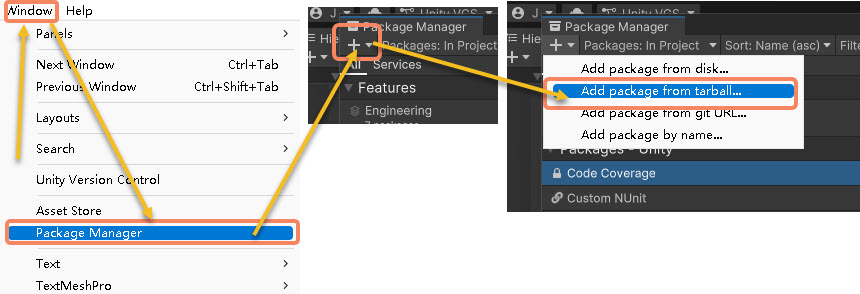
Click "Window" in the menu bar.
Select "Package Manager".
In the pop-up window, click the "+" symbol in the upper left corner.
Select "Add package from tarball...".
Install the three packages
com.easyar.sense,com.easyar.mega, andcom.easyar.mega.studioin sequence.After successful installation, it will be as shown in the figure.
Fill in the License
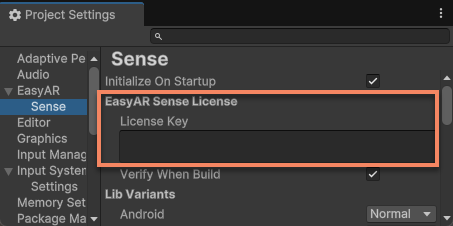
Select EasyAR > Sense > Configuration from the Unity menu to bring up the EasyAR Sense settings interface.

Fill in the EasyAR Sense License in the input box under EasyAR Sense License.
Tip
The EasyAR Sense License can be created from the EasyAR Development Center (Chinese, English). For the first use, you can create it according to the following steps:
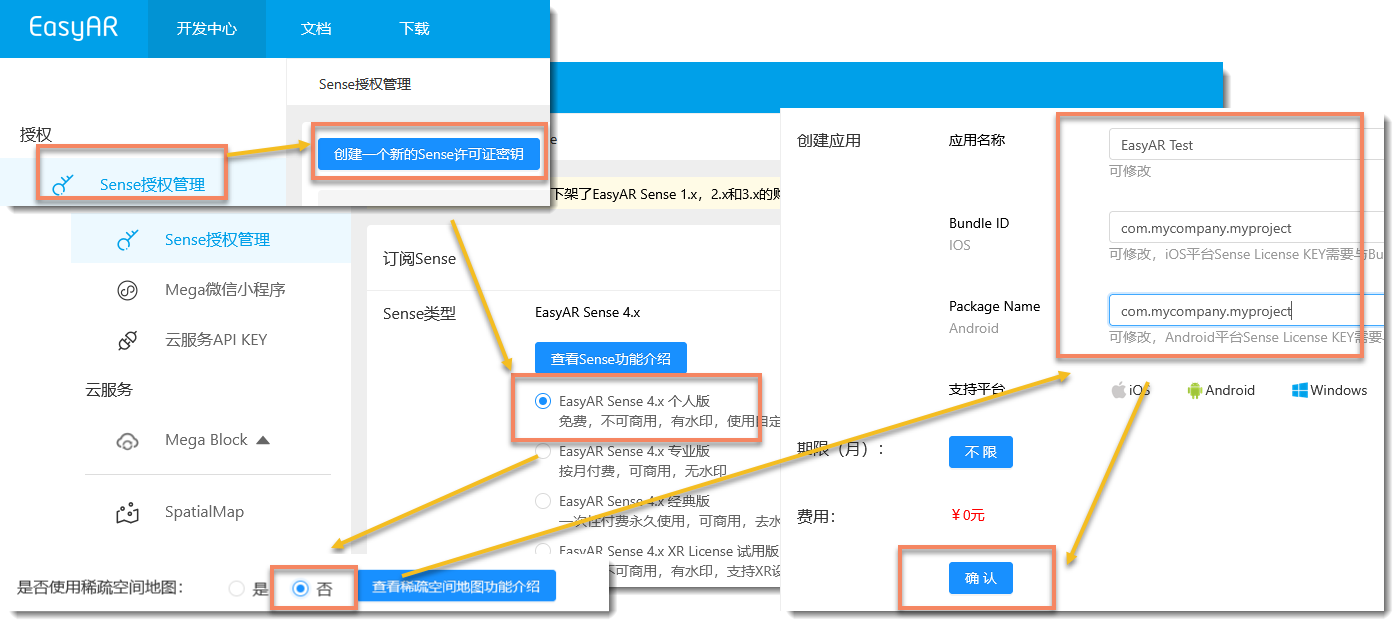
- Create
EasyAR Sense 4.x Personal Edition. - Select
Nofor the sparse spatial map. - Fill in the application name at will. Fill in
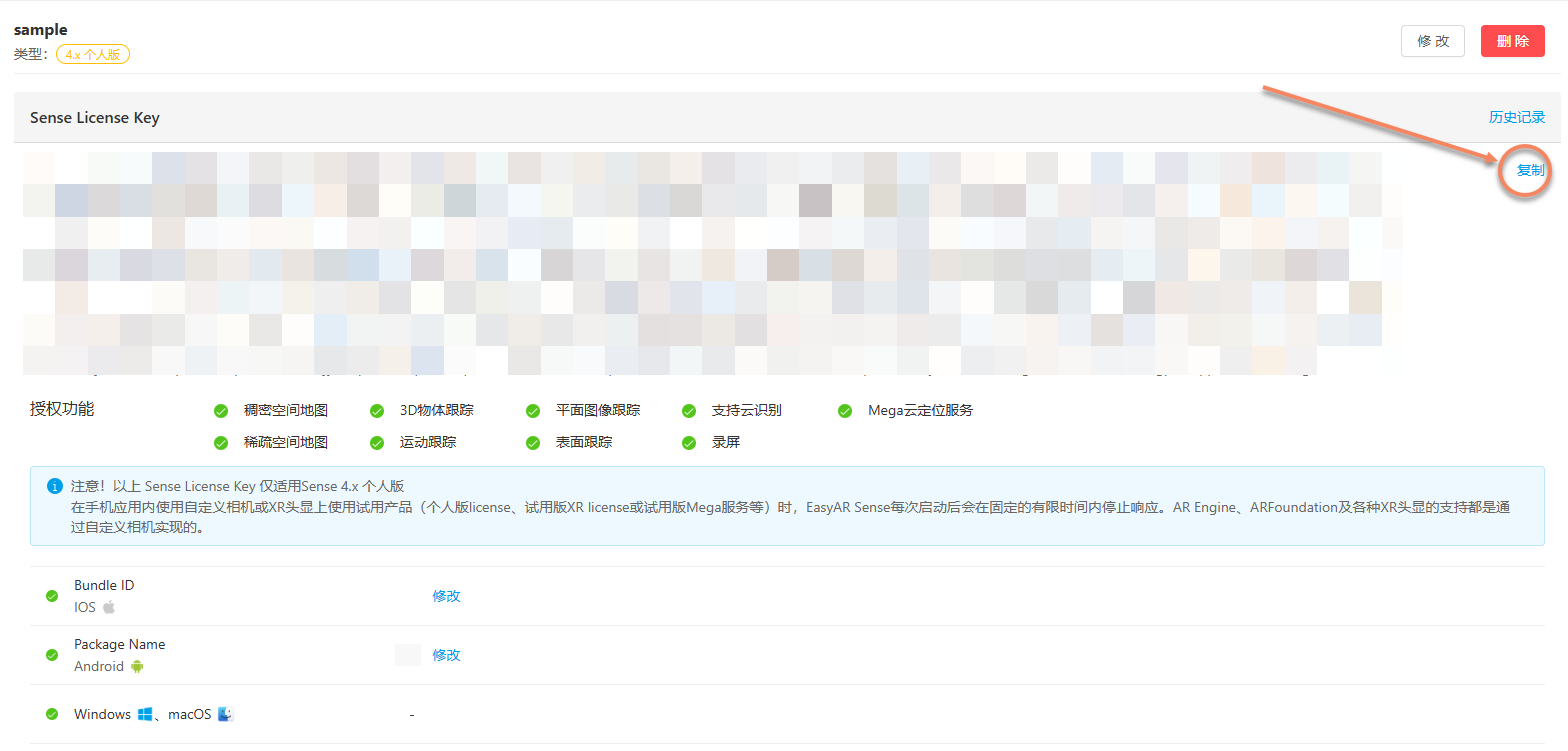
com.mycompany.myprojectfor the Bundle ID and Package Name. - Select the newly created License. After entering, click the copy button on the right.
Start the Simulation Run
The simulated positioning test allows you to directly view the overlay rendering effect without complete application development. By playing back EIF data in Mega Studio, sending positioning requests, and overlaying and rendering the Mesh, you can preview the positioning results. The following is the specific operation process:
Load the Map
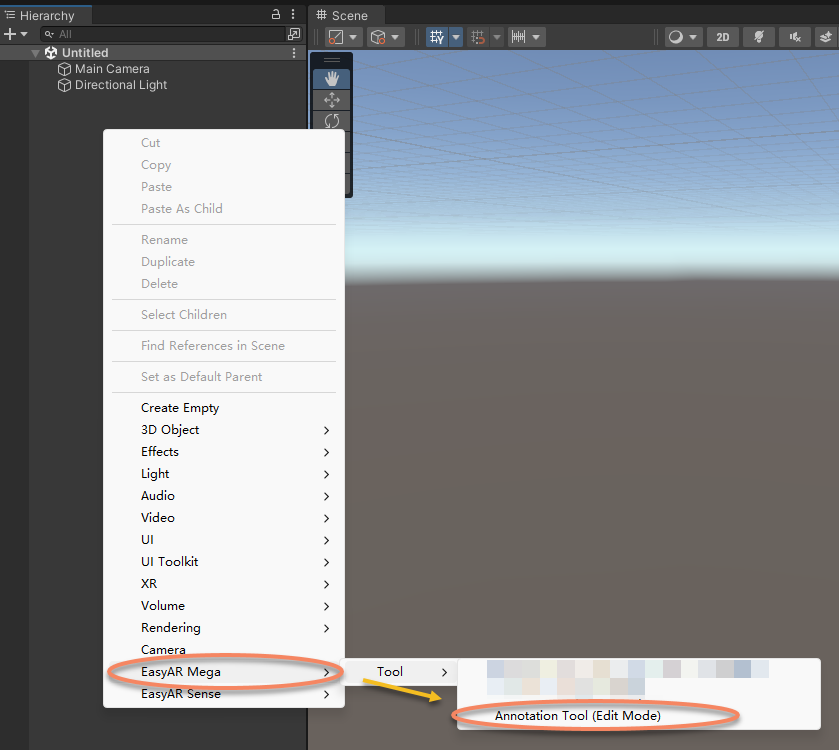
Right-click on the blank space in the left panel "Hierarchy", select "EasyAR Mega" -> "Tool" -> import "Annotation Tool (Edit Mode)".
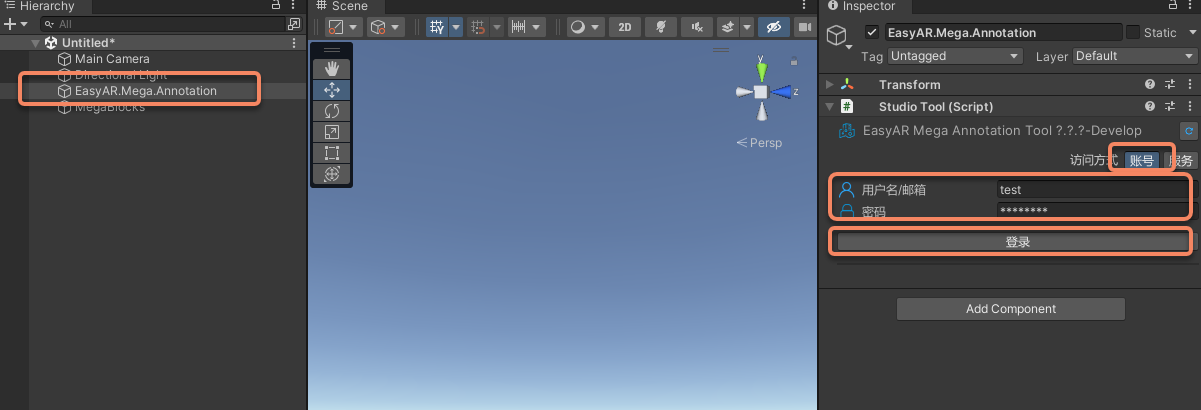
Select "EasyAR.Mega.Annotation" in the left panel "Hierarchy".
Select
Accountin the right panel "Inspector", and enter the EasyAR account name and password.Click "Login".
If you need to use service login, you can refer to Unity Login Component.
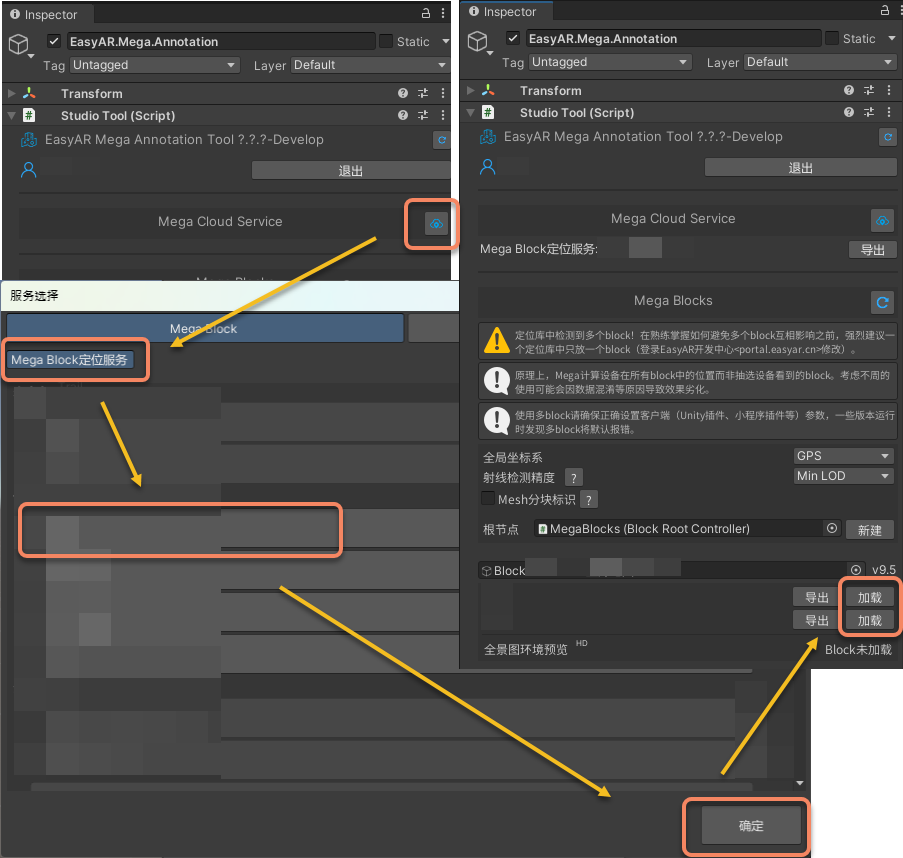
In the right panel "Inspector", click the icon after "Mega Cloud Service".
In the opened window, select a "Mega Block Positioning Service" and click "OK".
In the right panel "Inspector", click "Load" to add the map to the Unity project.
Load the EIF
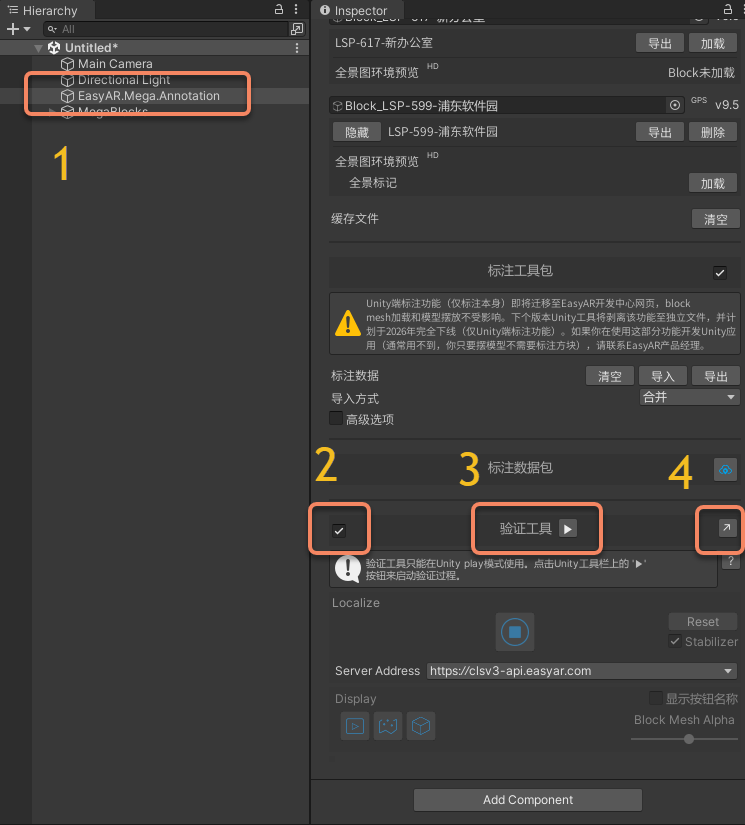
As shown in the following figure, click "EasyAR.Mega.Annotation" in the left panel "Hierarchy", then click "2" in the right panel "Inspector" to check the verification tool, and then click button "3" to play.
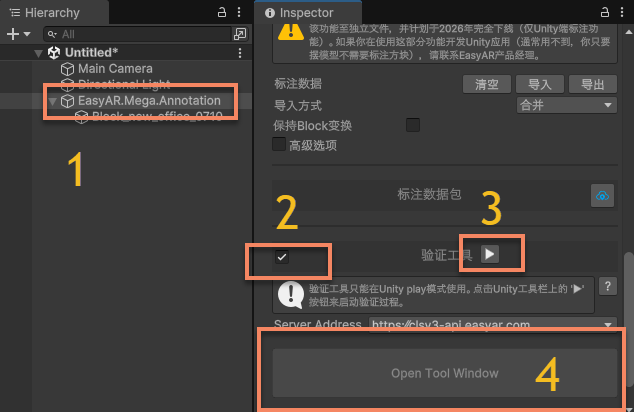
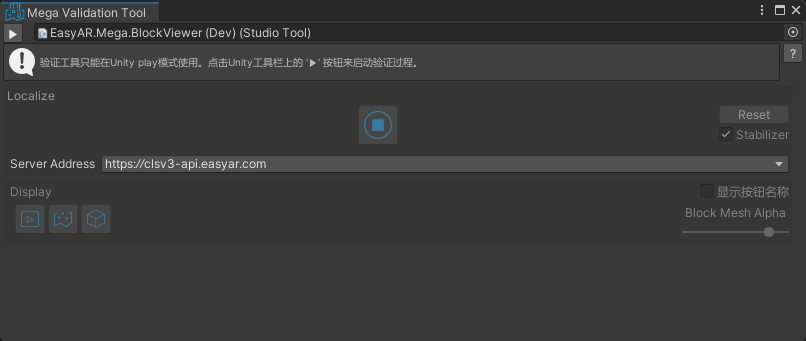
After clicking the tab "4", the "Mega Validation Tool" tool window will be displayed separately.
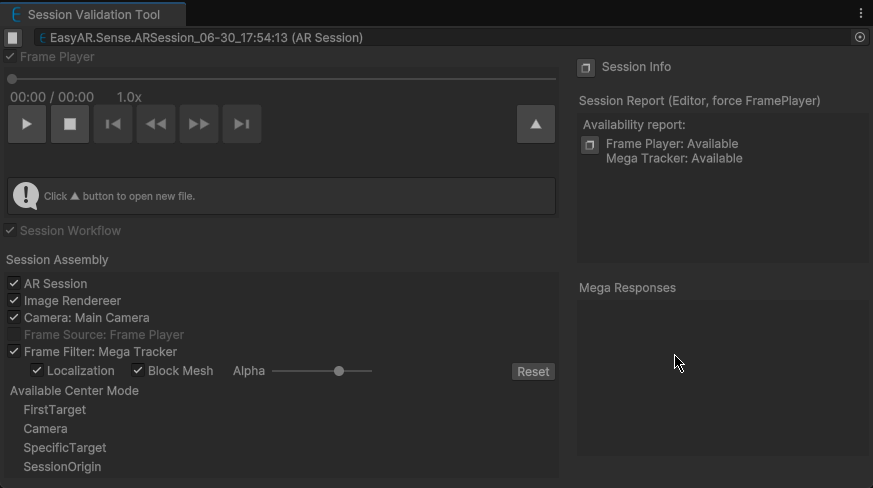
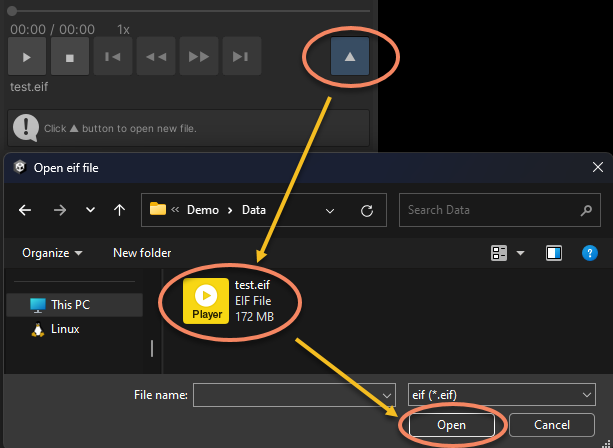
Click the load button as shown in the following figure, select the EIF file you use for testing, and click "Open". Then the EIF will play automatically, and you can view the positioning effect.
Running Effect and Control
After loading the EIF, "EasyAR.Mega.Annotation" will automatically play the EIF and perform positioning. You can view the Mesh overlay effect in Game.
You can view the positioning effect by adjusting the transparency of the model rendering. You can also drag the progress bar to adjust the start time of playback.
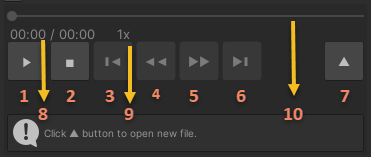
Function description
- Play/Pause
- Stop
- Forward 5s (Available for new format data, except for abnormal recording stops)
- Slow down playback (Available for new format data)
- Speed up playback (Available for new format data)
- Backward 5s (Available for new format data, except for abnormal recording stops)
- Open the EIF file
- Current time/Total time
- Current speed
- Playback progress (Can be dragged for new format data, except for abnormal recording stops)
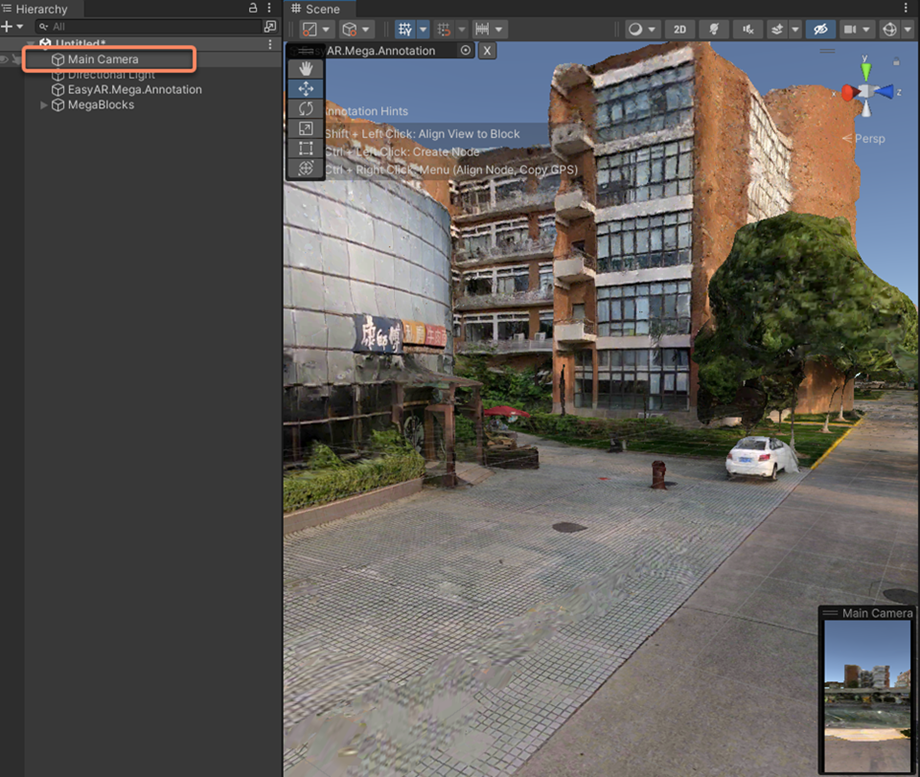
You can also click "Main Camera" in "Hierarchy" to view the real-time position of the camera during the positioning process.
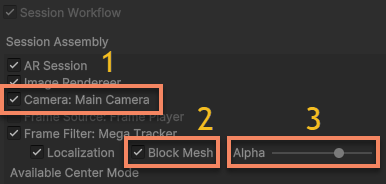
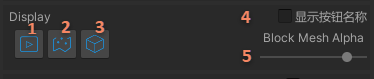
In the positioning display control area, you can adjust the content display:
Show/Hide the video background
Show/Hide the Block model (The model in the Scene window will also be hidden under URP)
Control the transparency of the Block model (Not available under URP)
Next Steps
- If you need to experience a more comprehensive simulation run, you can refer to How to Add Virtual Content During the Simulation Run.
Related Topics
- For a more detailed operation manual, you can refer to Annotation Tool Component.