Workflow_arsession example detailed explanation
Workflow_ARSession is a lightweight AR session management example demonstrating how to build a complete AR application flow with minimal dependencies. It supports both AR Foundation-compatible mode and simple mode, allowing flexible selection based on project requirements.
Usage method
Scene selection (choose one)
In the Unity editor, the Workflow_ARSession scene contains two mutually exclusive configuration root objects. Activate only one group (ensure the other is inactive):
| Configuration name | Applicable scenario | Dependencies |
|---|---|---|
ARFoundationCompatibleSceneSetup |
Projects using or planning to integrate AR Foundation | Requires AR Foundation configuration |
SimpleSceneSetup |
No AR Foundation dependency, directly uses EasyAR native capabilities | No additional dependencies, suitable for lightweight AR applications |
Build and run
- Add
Workflow_ARSessiontoFile>Build SettingsorBuild Profiles>Scene Listin the menu bar. - Confirm build options in
Project Settings>Playerbased on the target platform (e.g., Android or iOS). - Build to a real device and run.
After launching, the application will automatically initialize the camera and wait for target recognition.
Recognition targets and acquisition methods
This example demonstrates image tracking by default, but its architecture can easily extend to object tracking, cloud recognition, and other modes.
Default target: namecard.jpg
- Target type: 2D image (recommended print size ≥ 90mm × 54mm)
- Download: 🔗 namecard

How to replace targets?
- Place your image (JPG/PNG) in
Assets/Samples/EasyAR Sense Unity Plugin/[version]/__All Samples__/Workflow/Workflow_ARSession/Targets. - Select the
ImageTarget-namecardcomponent in the scene, and changeTextureto your image in the Inspector'sImage Target Controller (Script). - Modify
NameandScale.Scaleis the physical size of your target (unit: meters), based on the long edge of the image.
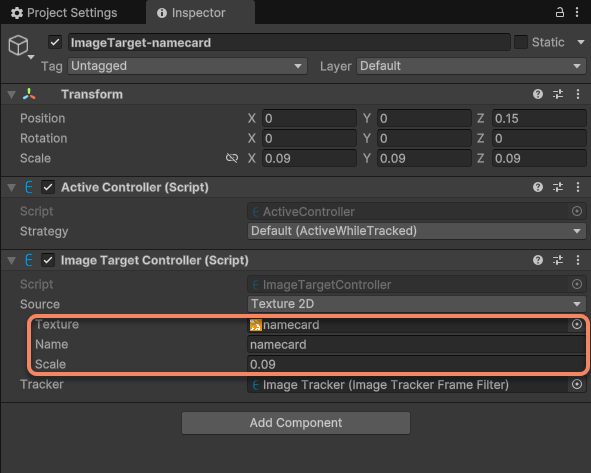
- Save and rebuild.
Expected effect
When the camera aligns with the target image, the system will:
- Detect and track the image in real-time;
- Overlay a 3D panda on the image plane;
The panda's position, orientation, and scaling are strictly bound to the image target's pose. Tracking remains stable even during image movement, partial occlusion, or lighting changes.
Extension suggestions
- Add object tracking: Replace
ImageTrackerwithObjectTrackerand load.objmodel files; - Integrate cloud recognition: Use
CloudRecognizerinstead of local target lists; - Multi-target support: Extend from a single image target to multiple images; the system will automatically handle concurrent tracking.
Tip
For more functional components, visit AR functional components.
Through Workflow_ARSession, you can quickly master EasyAR's core workflow and build production-level AR applications based on it.