Introduction to the headset extension package template
The com.easyar.sense.ext.hmdtemplate package provides samples and templates for headset extension development. It is an SDK implementation and includes examples for application developers.
Template content
This package's structure follows the Unity recommended file layout:
.
├── CHANGELOG.md
├── Documentation~
├── Editor
├── LICENSE.md
├── package.json
├── Runtime
└── Samples~
    └── Combination_BasedOn_HMD
Some key contents include:
- Runtime: Folder containing runtime platform assets. This is the most important folder in the template.
- Samples~: Folder containing all samples in the package. It contains examples for downstream use, serving as demos for testing extensions. For in-place development of this sample, rename the folder to
Samples. Using the Client.Pack method will automatically rename it toSamples~when packaging a new release. - Editor: Folder containing editor-time platform assets. Scripts in this folder primarily create menu items.
- package.json: The manifest file for the package.
Template sample creation process
-
In the
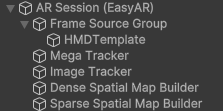
Hierarchyview:- Right-click in a blank area, select
EasyAR Sense>Mega>AR Session (Mega Block Default Preset)from the menu to add an ARSession. - Select AR Session (EasyAR) and right-click, then choose
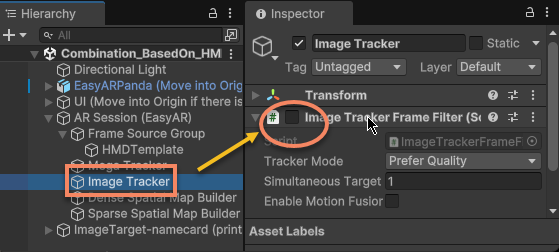
EasyAR Sense>Image Tracking>Frame Filter : Image Trackerfrom the menu to add an ImageTrackerFrameFilter to the session. - Select AR Session (EasyAR) and right-click, then choose
EasyAR Sense>SpatialMap>Frame Filter : Dense SpatialMap Builderfrom the menu to add an DenseSpatialMapBuilderFrameFilter to the session. - Select AR Session (EasyAR) and right-click, then choose
EasyAR Sense>SpatialMap>Frame Filter : Sparse SpatialMap Builderfrom the menu to add an SparseSpatialMapBuilderFrameFilter to the session. - Select AR Session (EasyAR) and right-click, then choose
EasyAR Sense>Extensions>Frame Source : HMD Template (keep it only)from the menu to add and retain only the HMD Template FrameSource.
- Right-click in a blank area, select
-
In the
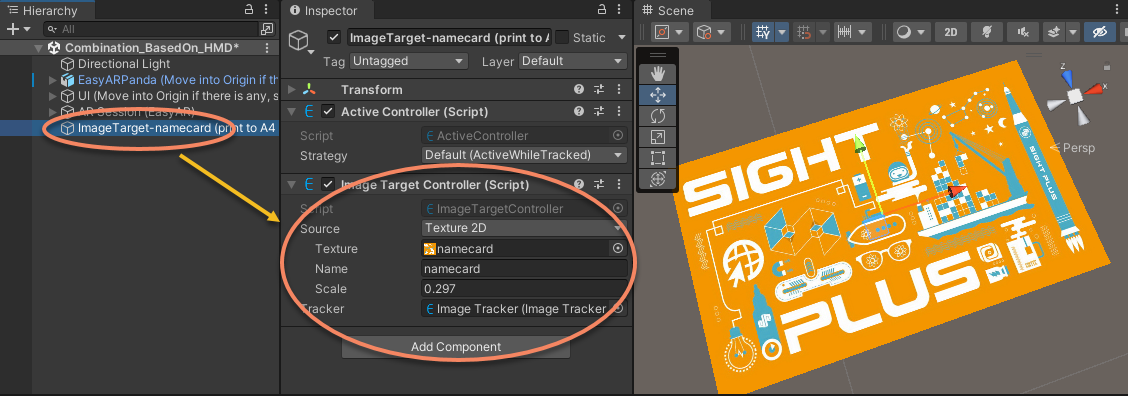
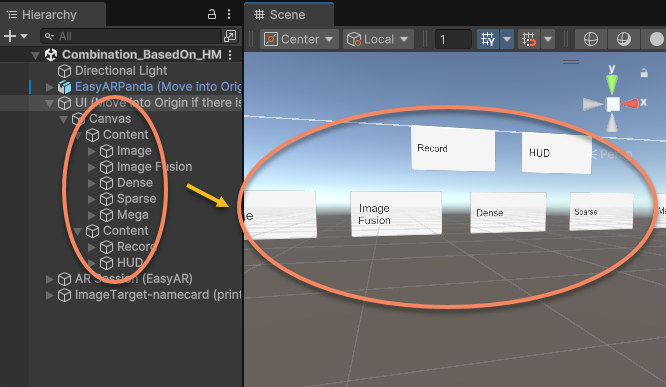
Hierarchyview, right-click in a blank area, selectEasyAR Sense>Image Tracking>Target : Image Targetfrom the menu to add an ImageTargetController to the session.Configure the ImageTargetController:
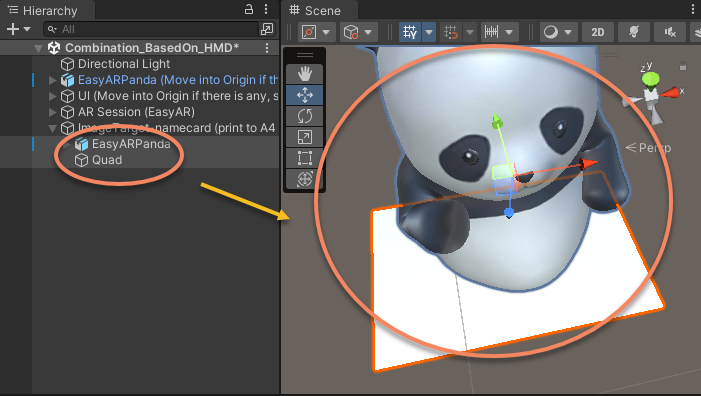
After completing the above configuration, the image displayed in the
Sceneview is a gizmo. In this example, a quad is used to display virtual objects corresponding to the same image.Add virtual objects to display on the target:
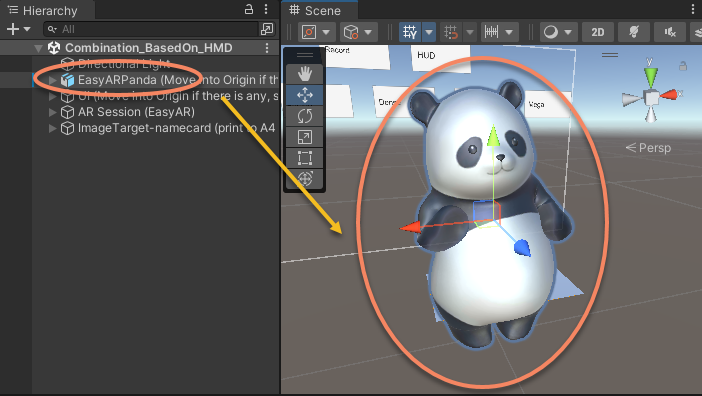
Add a model as a motion tracking origin reference
This model is important for both developers and downstream users, as it decouples device motion tracking from EasyAR algorithms.
Add UI for feature selection
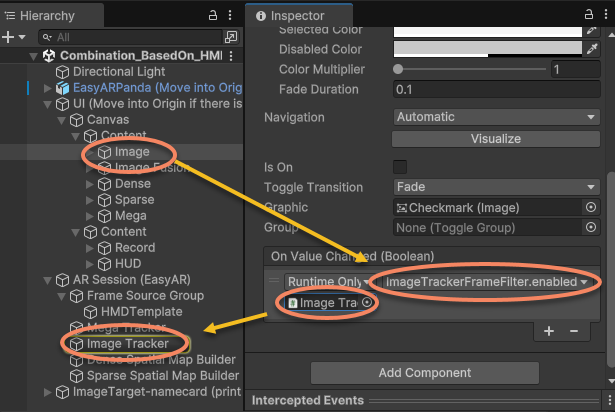
Disable EasyAR features at startup and enable them via UI switches
For example, the image tracking feature can be disabled at startup by setting the corresponding component's enable property to false:
Then add UI switch handling:
Related topics
- Enabling EasyAR support for headsets introduces how to use this template to create a new headset extension package
- Running validation (bring-up) explains how to verify the correctness of input extensions using the examples provided by this template
- Publishing extension packages describes how to complete the final packaging and distribution based on this template