Configuring the localization database
After completing environment capture, map building, and successfully generating Mega Blocks, you need to create a cloud localization service, bind the project to the service, and complete the overall configuration by adding Mega Blocks to the localization database instance. This chapter details the operational steps to help you quickly complete the configuration process.
Check Mega Block generation completion
Log in to the console
- Access the EasyAR console and log in
Enter storage management
- Navigate to Mega Block -> Block storage
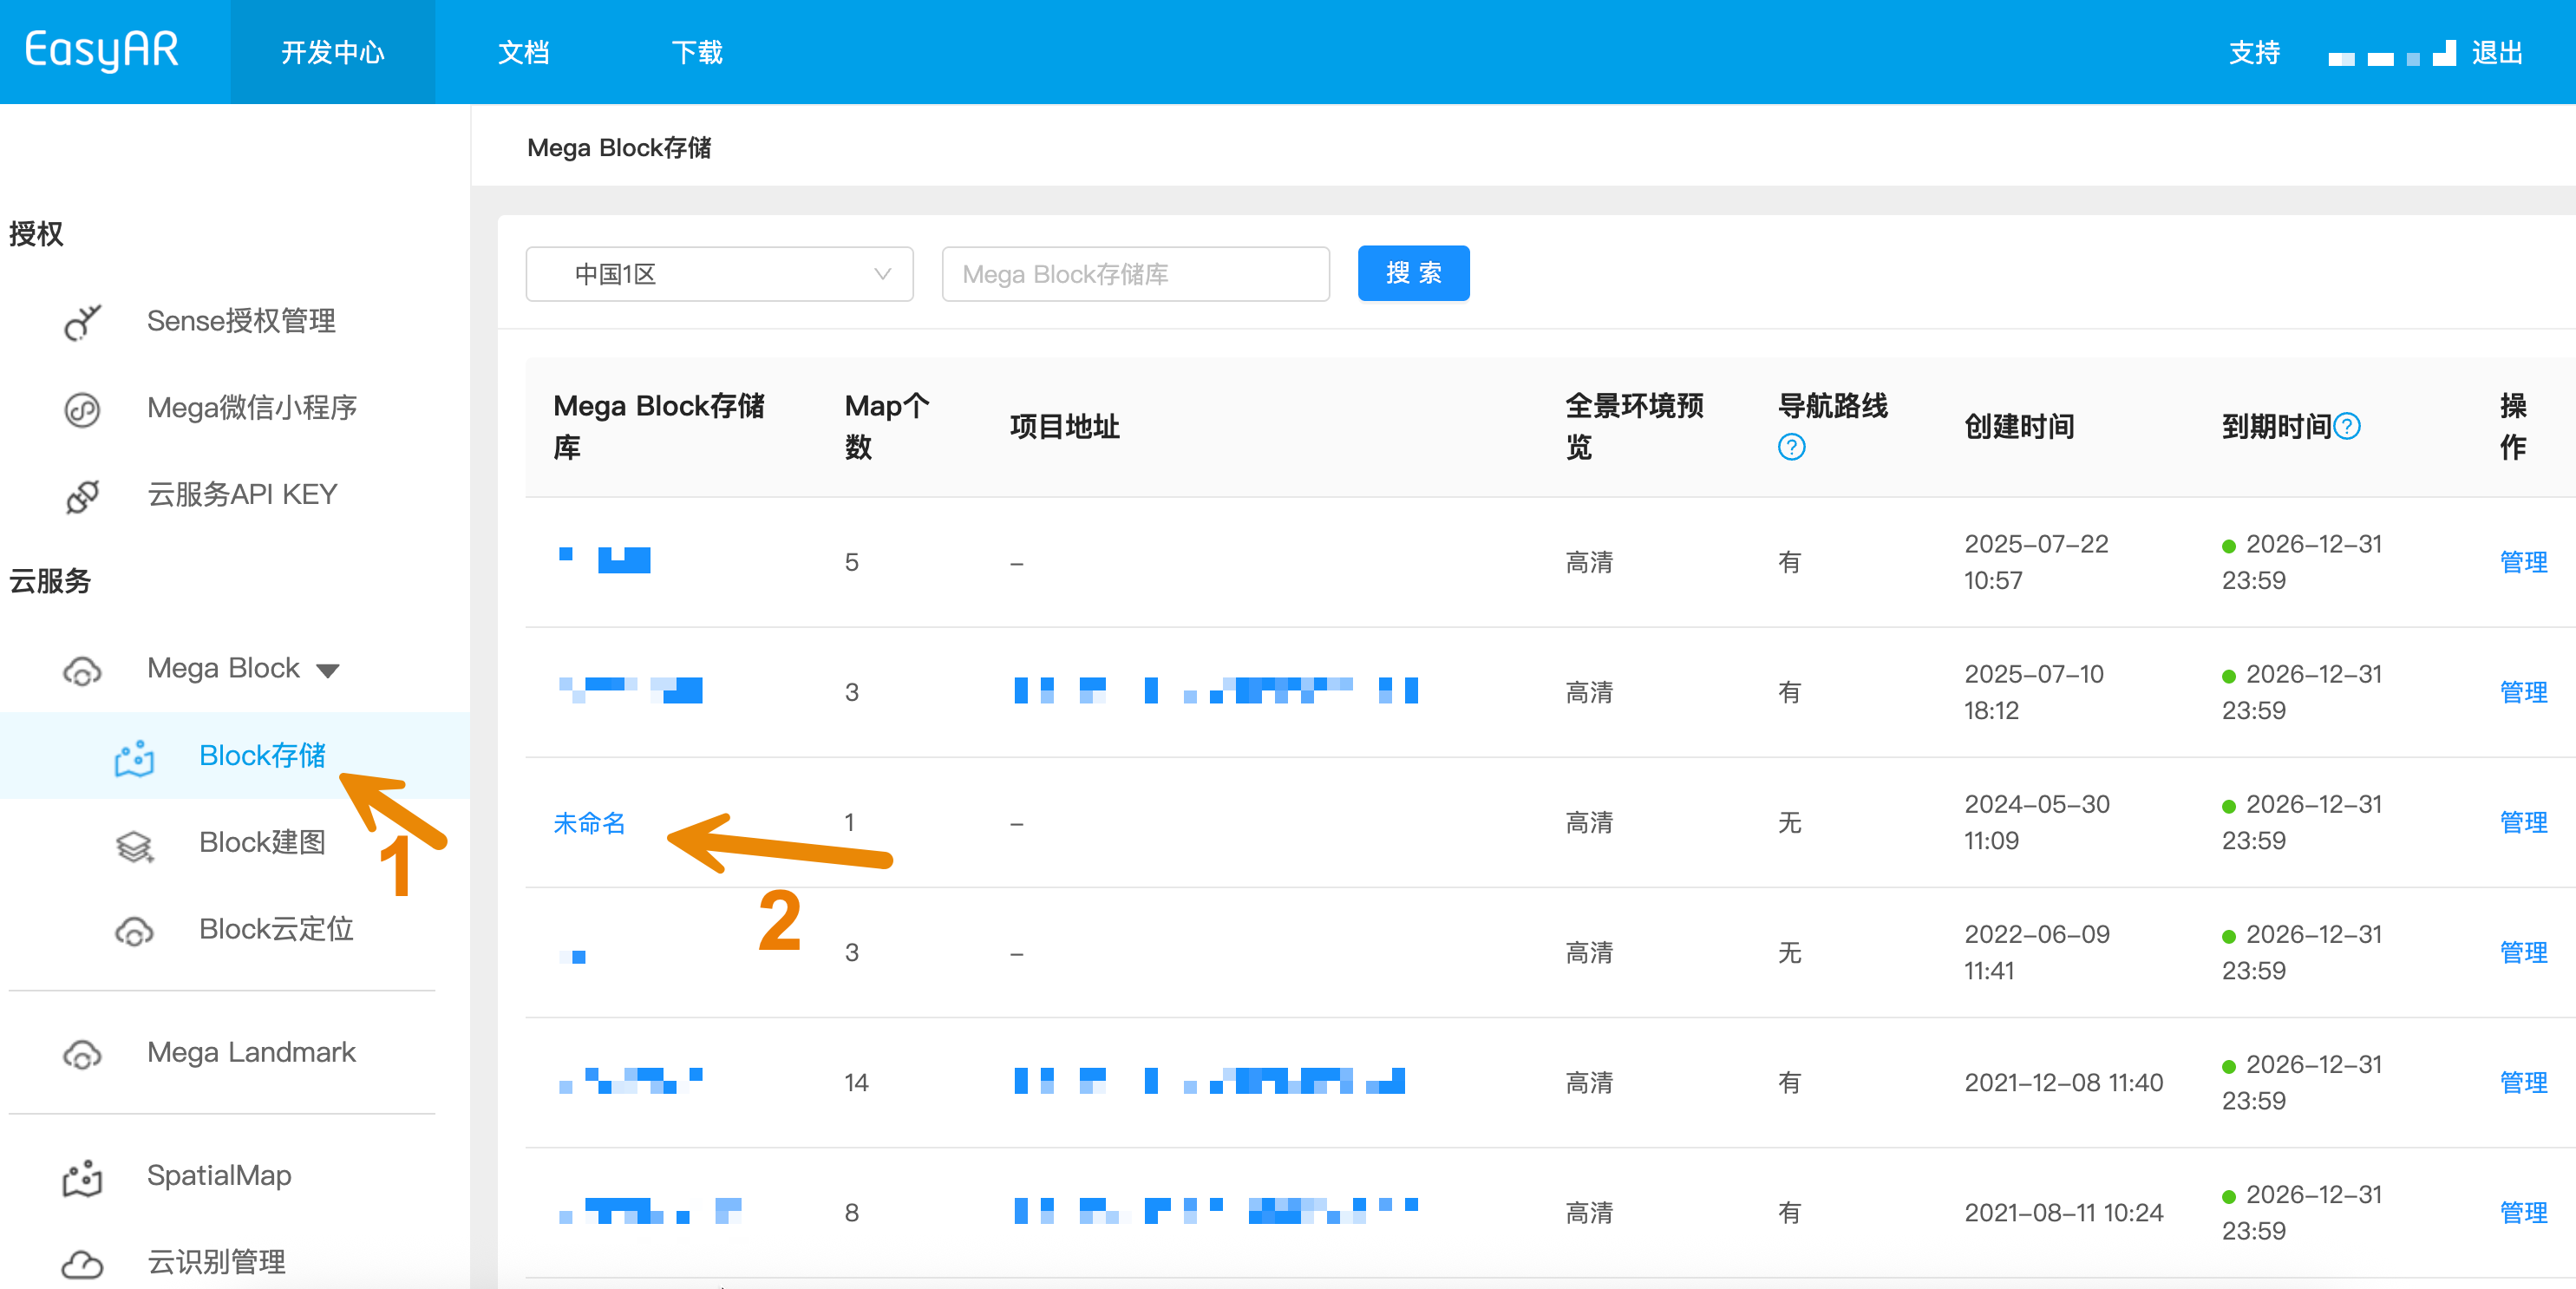
- View project details
- Select the corresponding project in the repository list
- Confirm that Mega Blocks have been successfully generated within the project
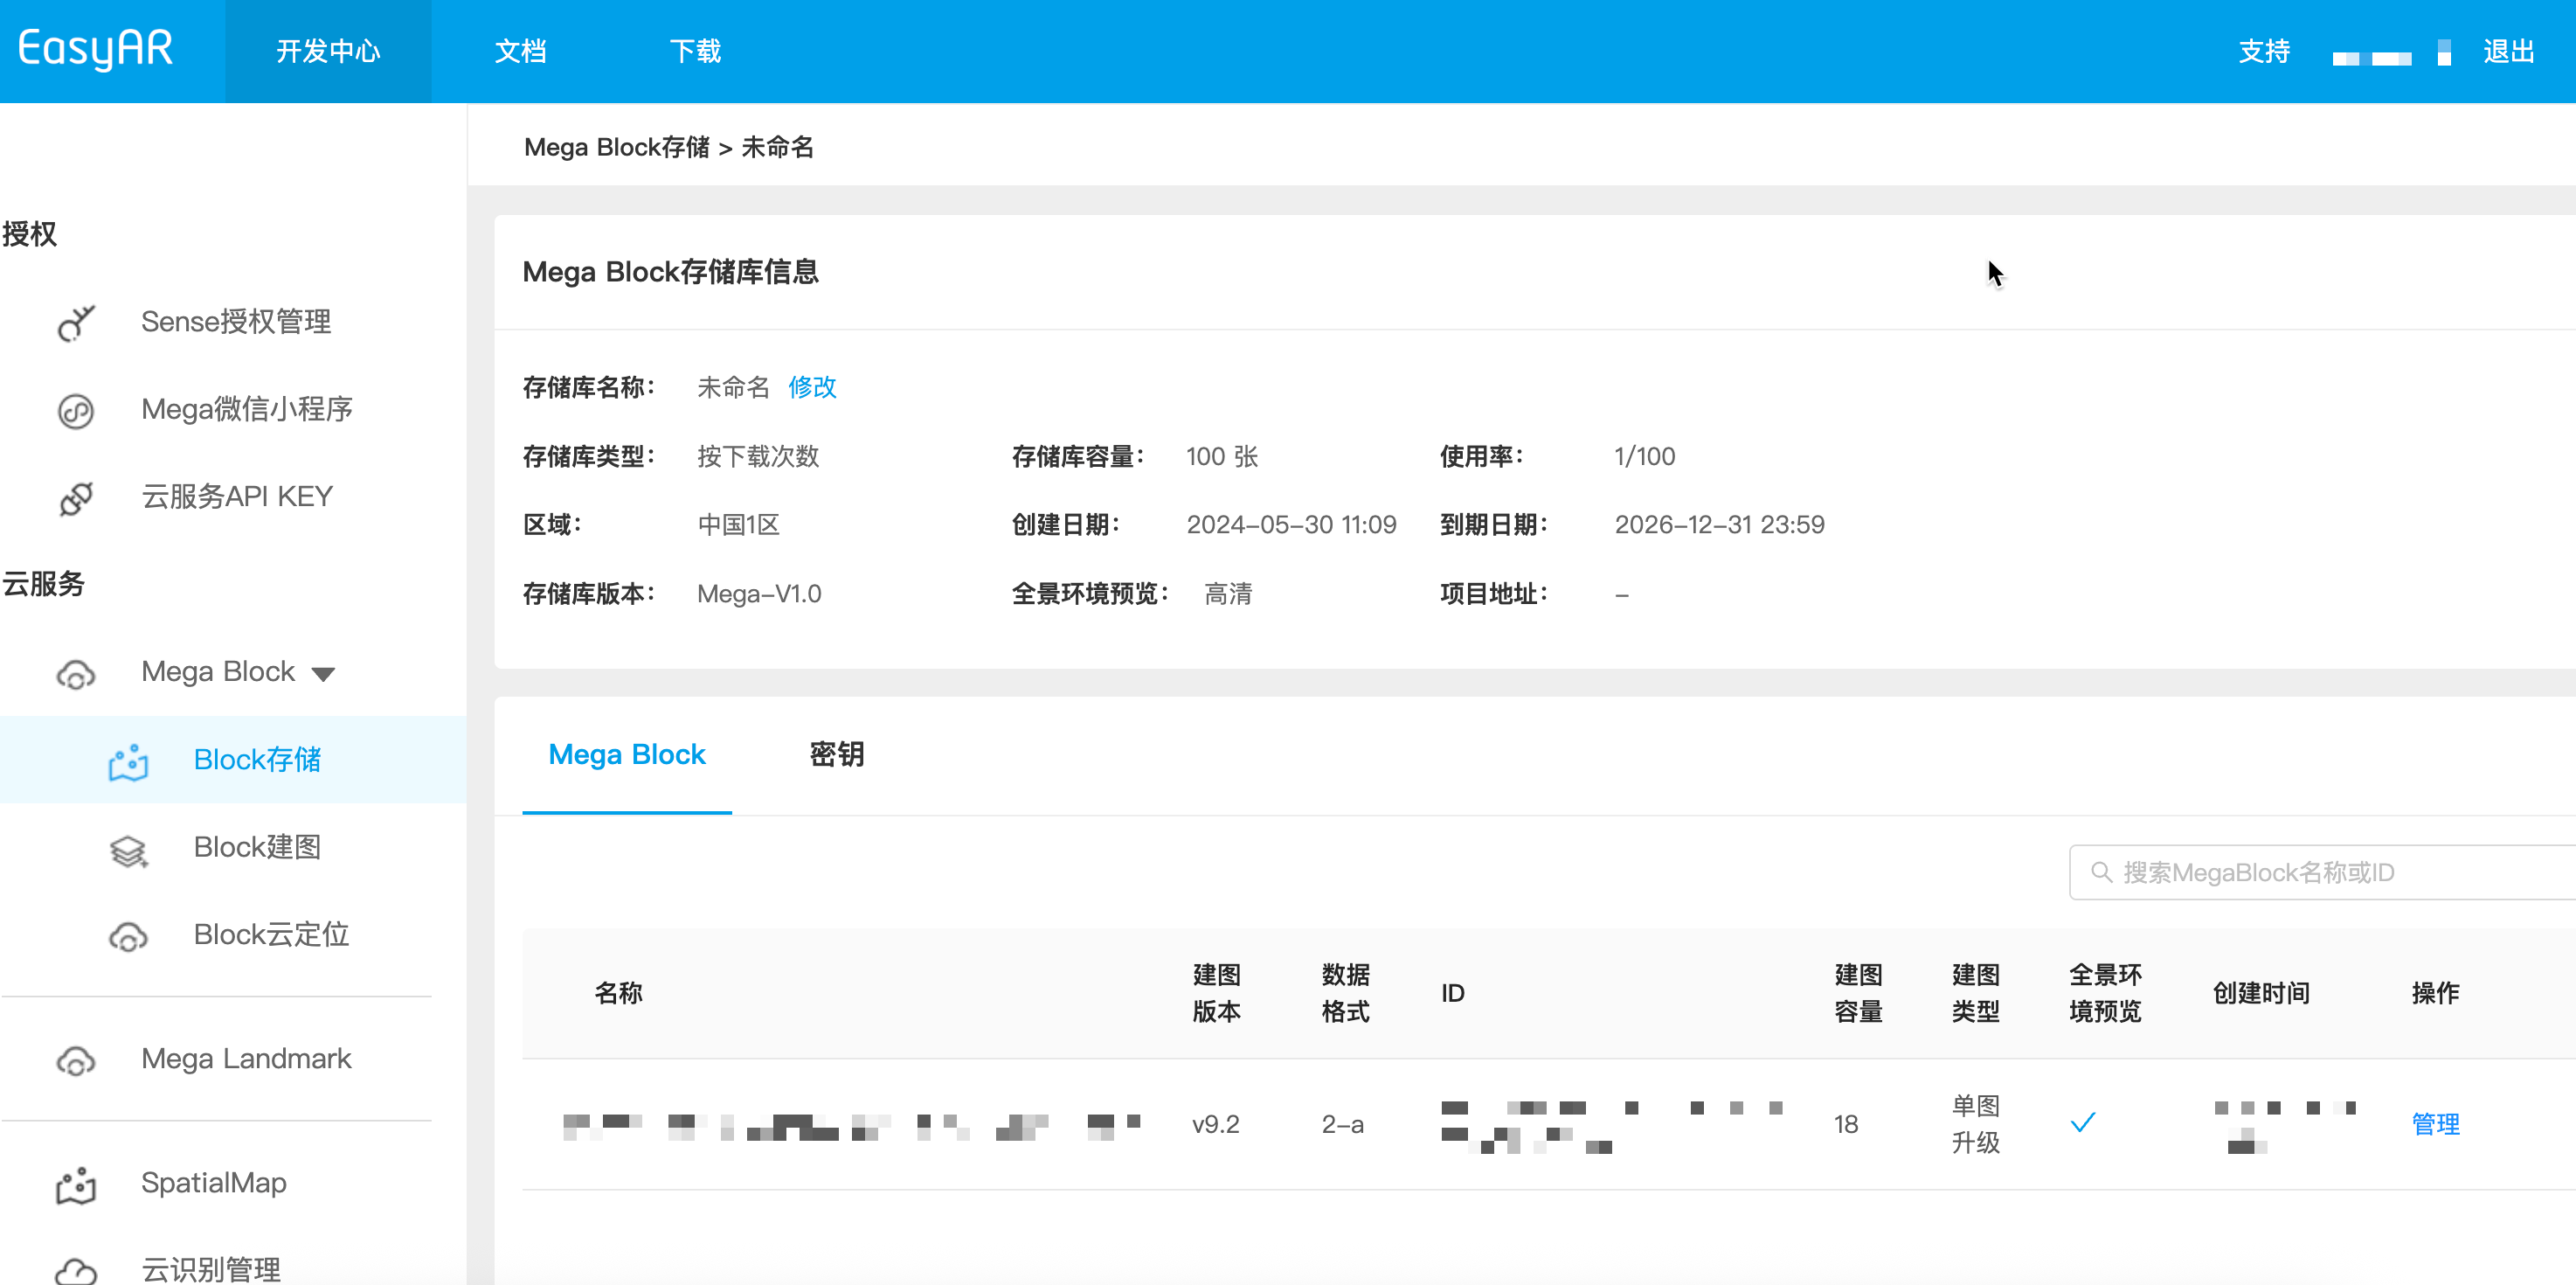
- Check Block status
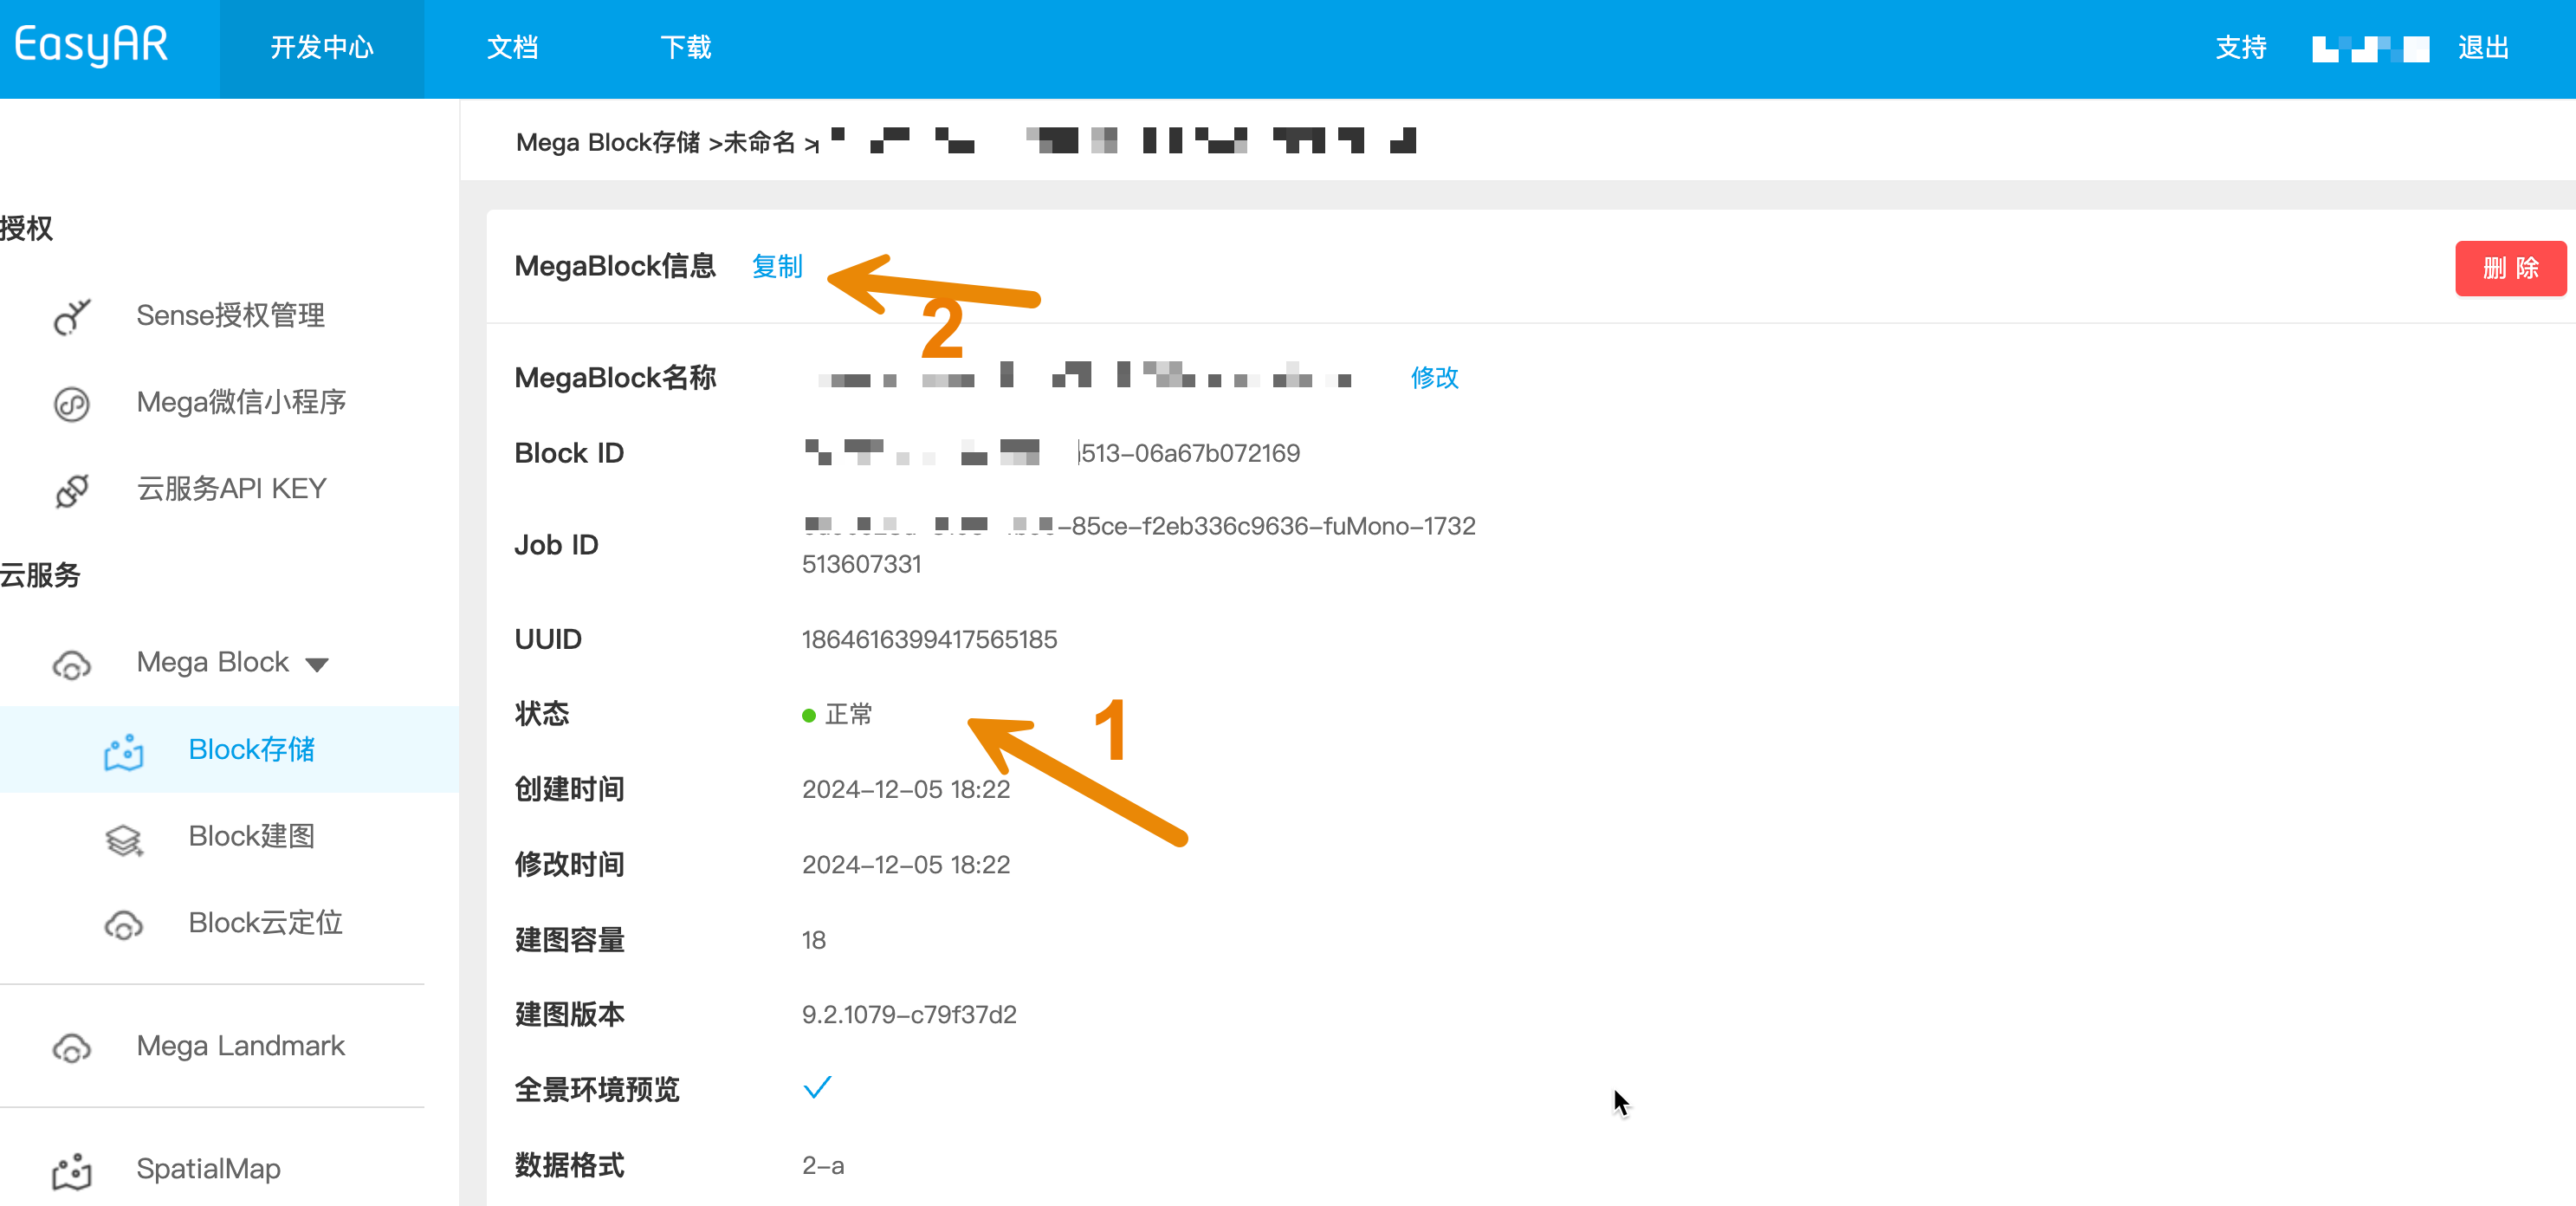
- Click the "Manage" button of the Mega Block record to view details
- Ensure the Mega Block status shows as "Normal"
- If abnormalities are found, click the "Copy" button to save Mega Block information. Before configuring the localization database, provide this information to technical support for analysis
Create cloud localization database
Navigate to Mega Block -> Block cloud localization
Create cloud localization service group
- If no existing service group exists, the list will appear empty
- Create through sales personnel or directly create online
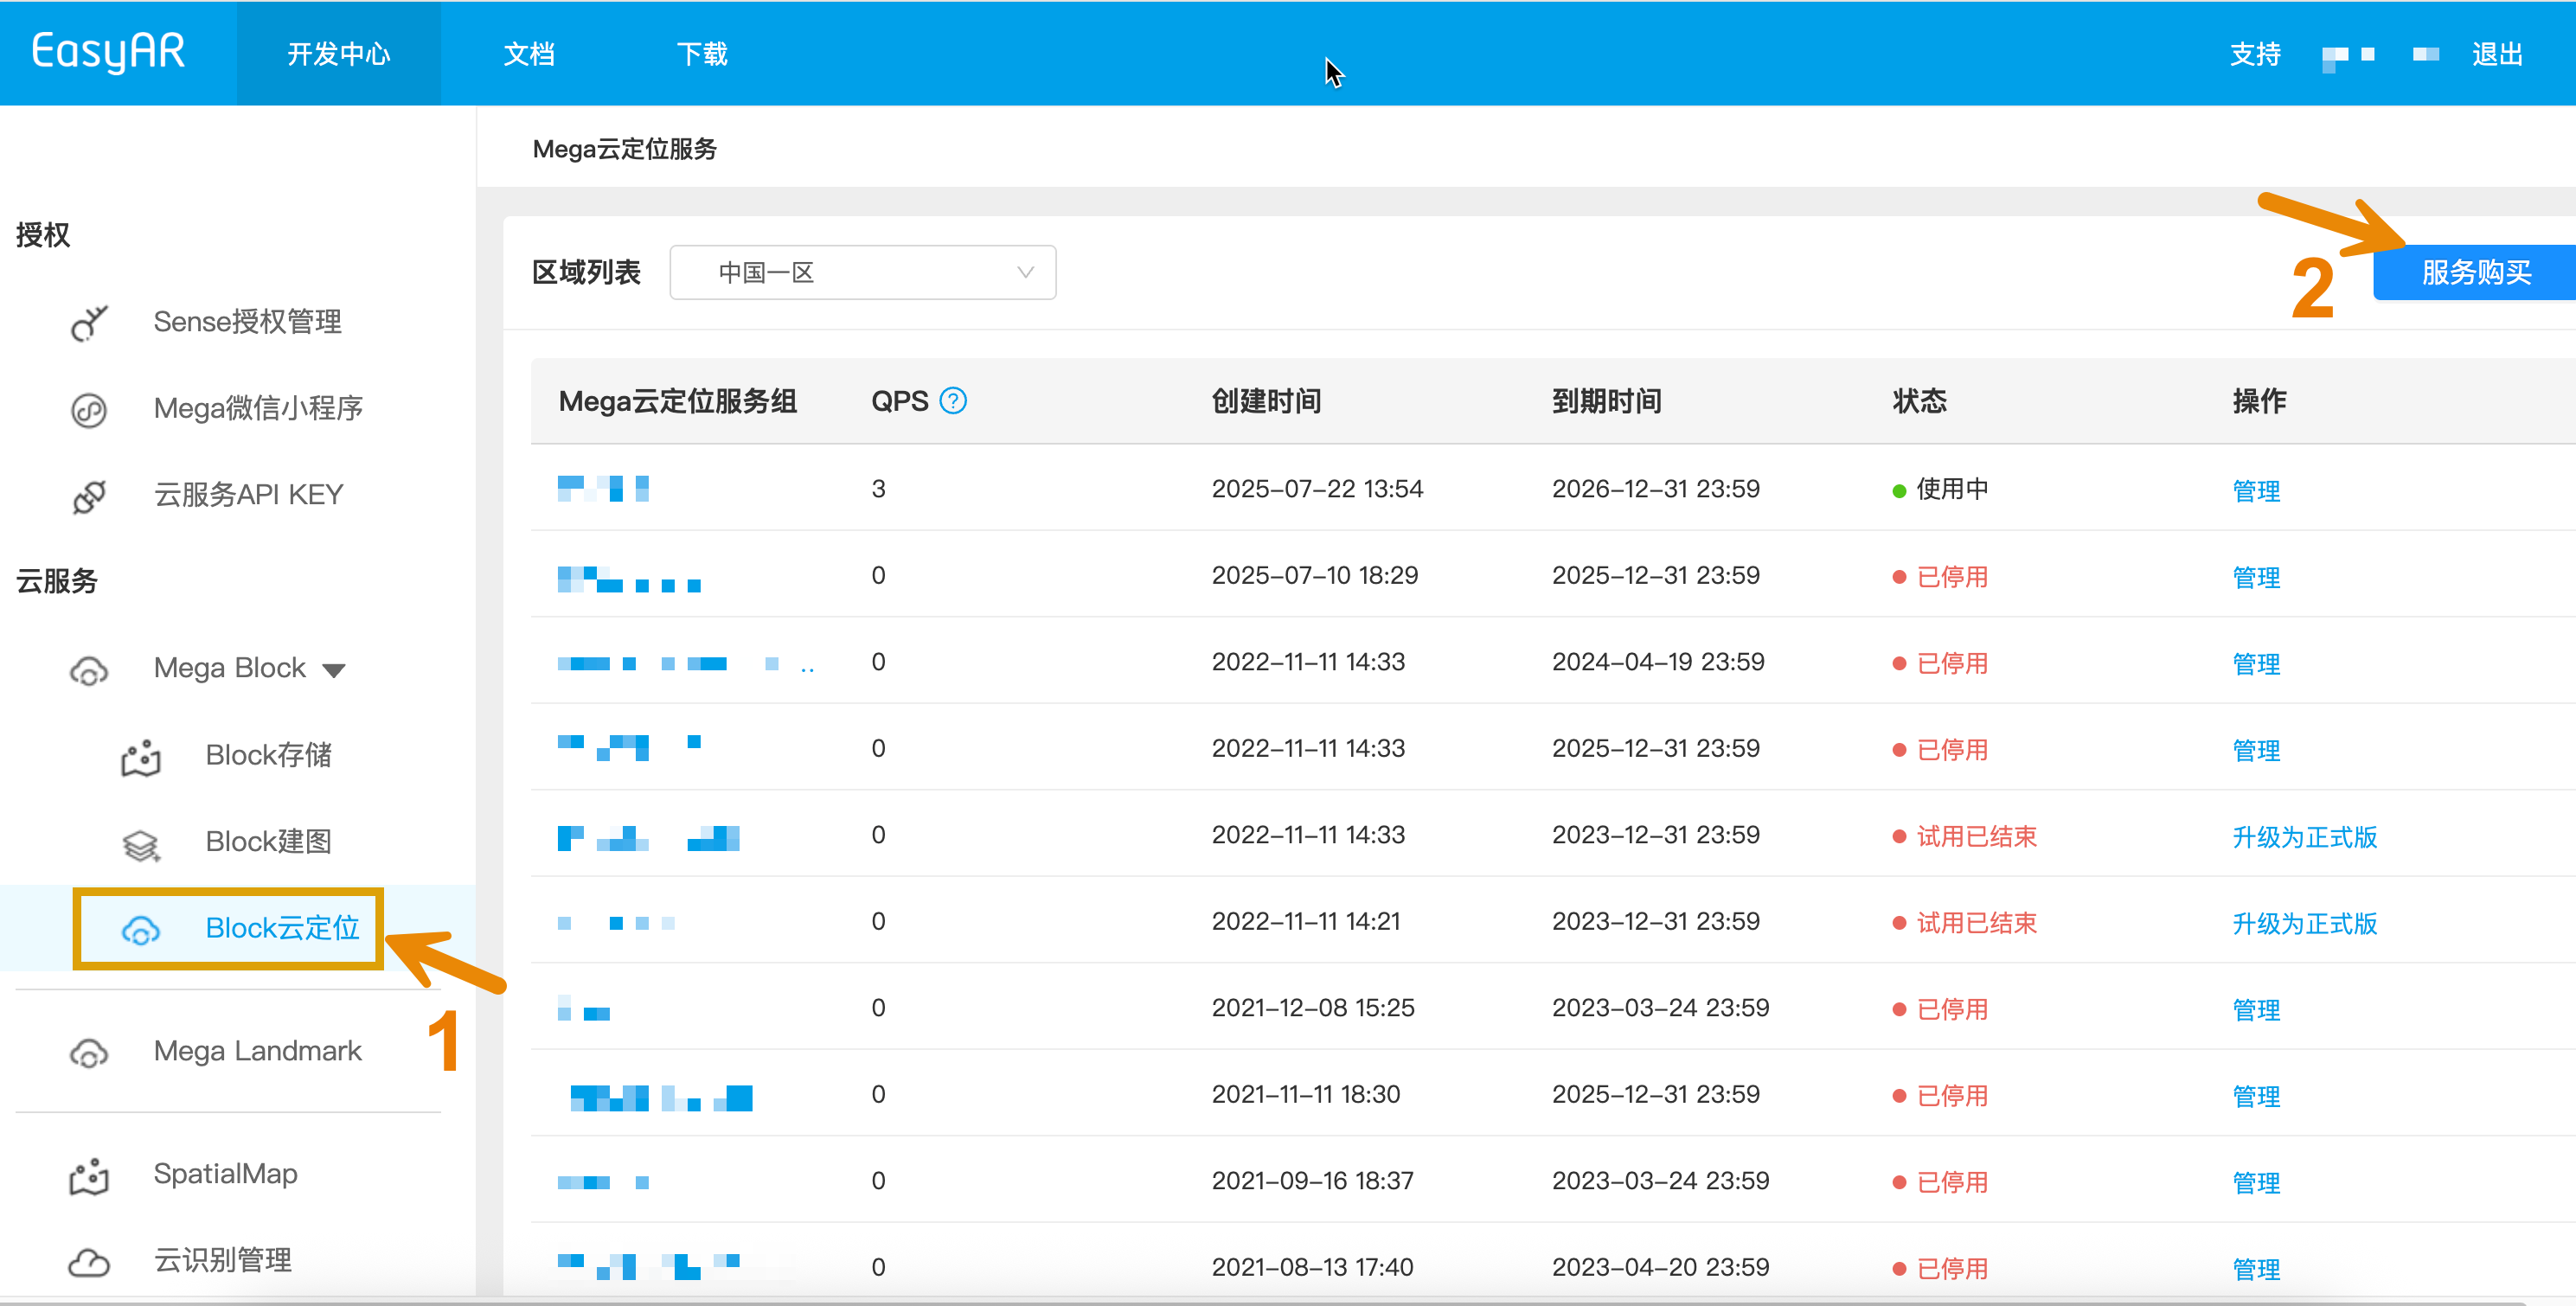
- Manage service group
- After successful creation, click "Manage" to enter the service group management interface
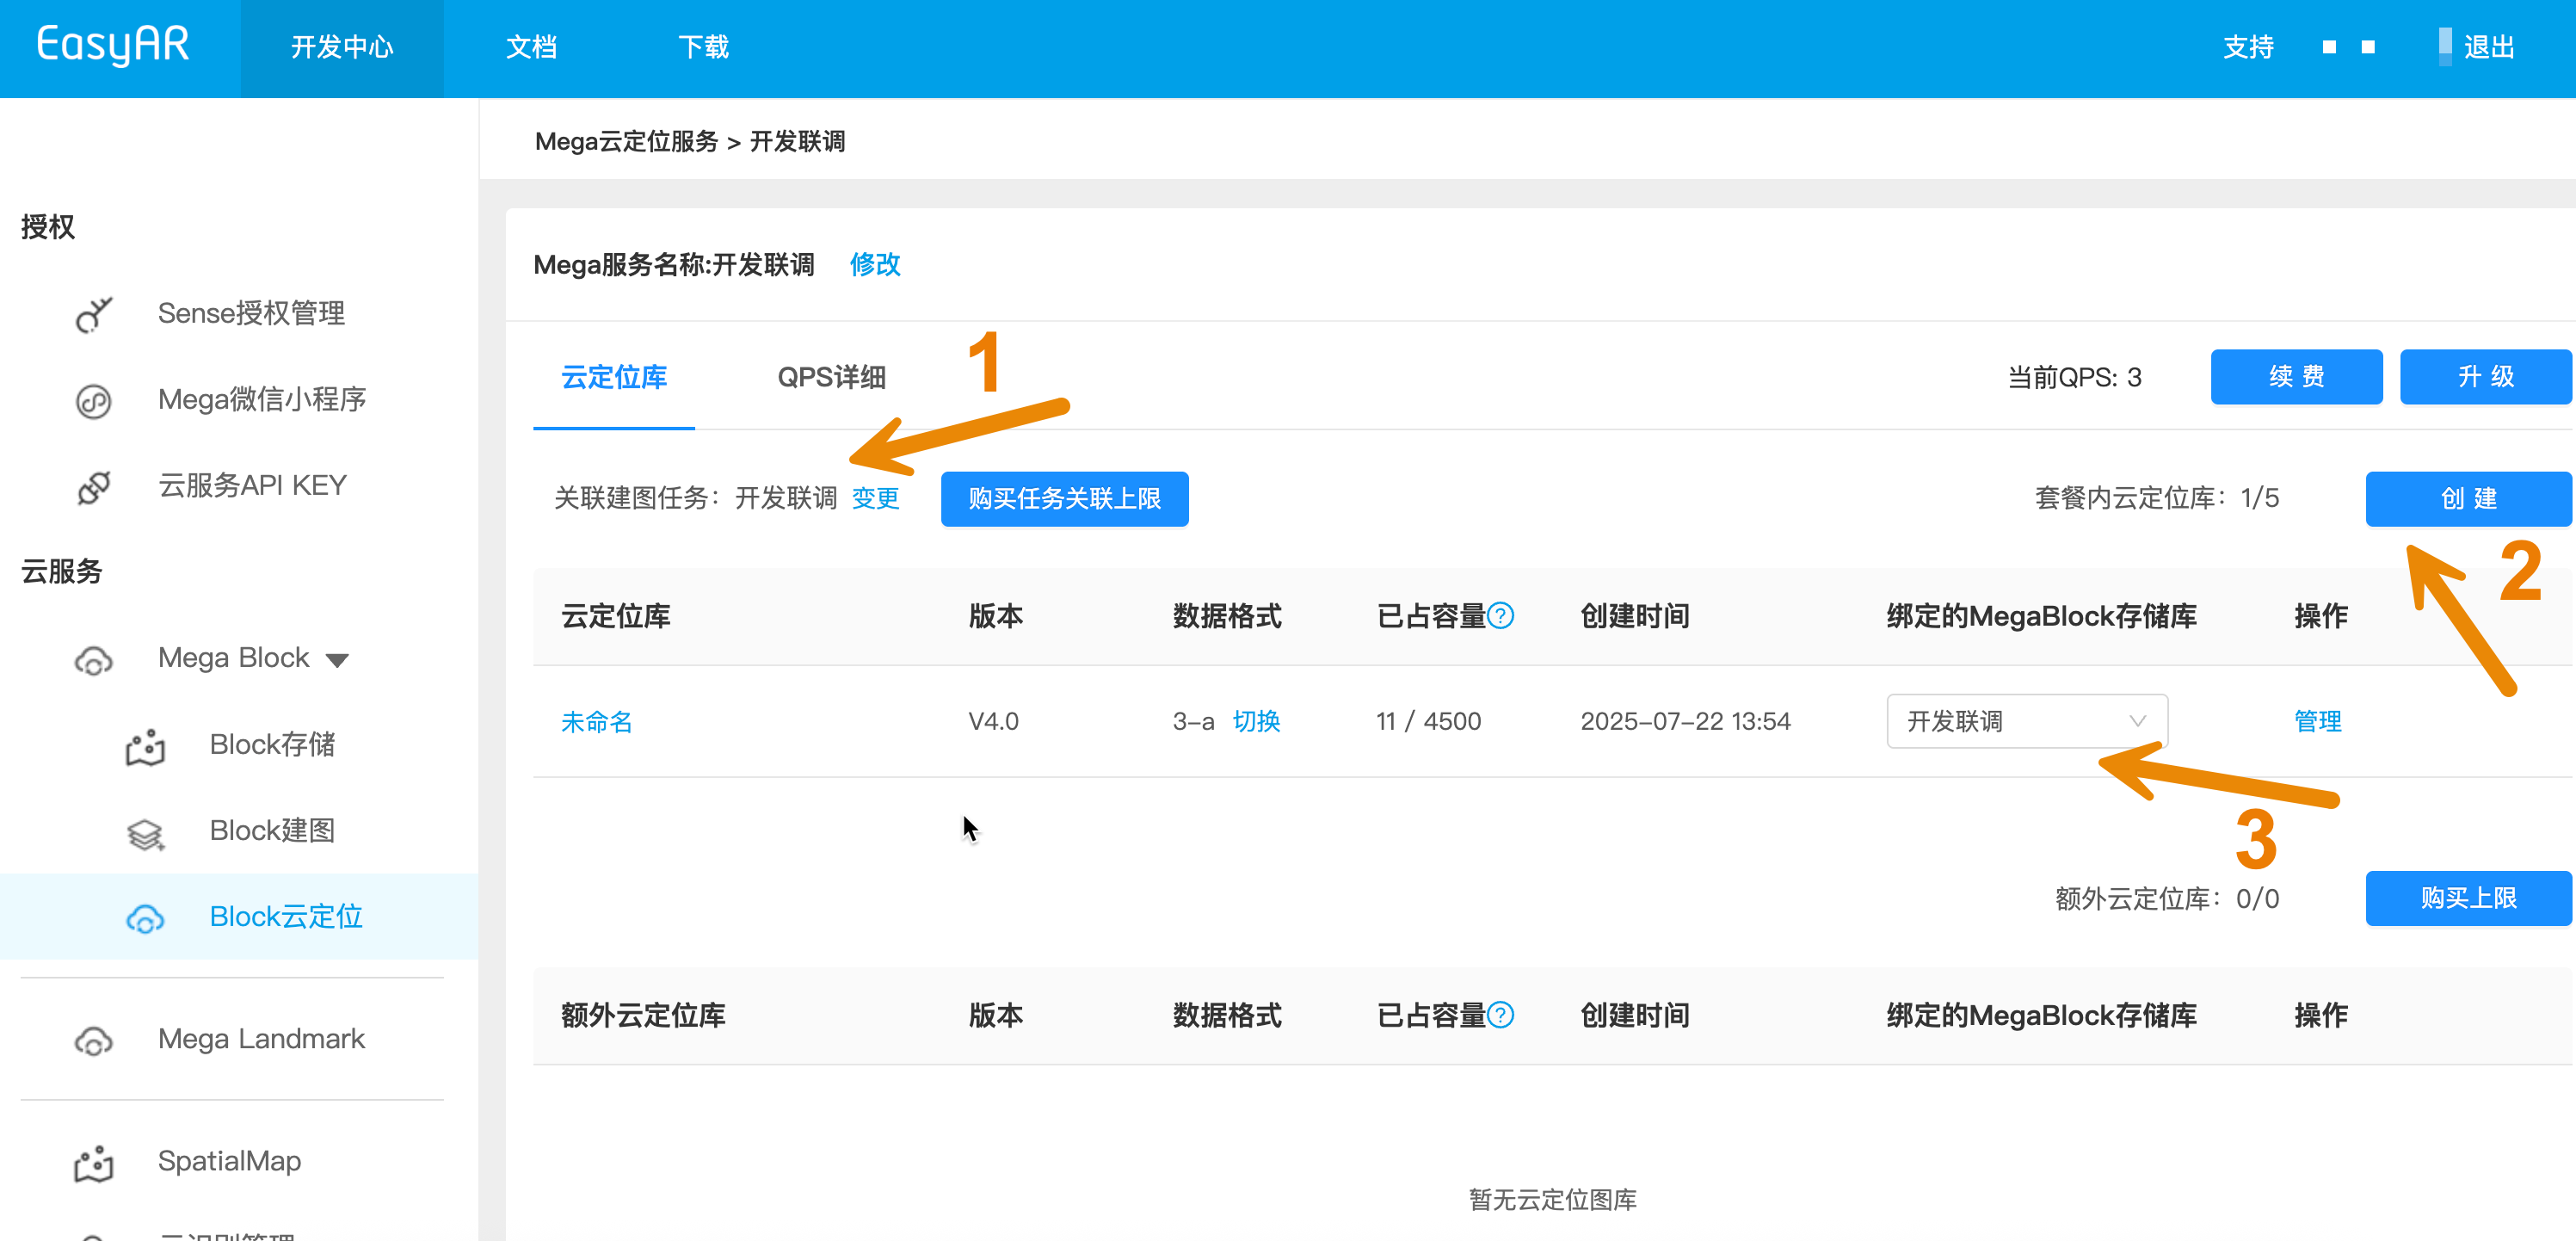
Basic configuration steps
- Project association: Bind the mapping project to the cloud localization service group (marked as 1 in figure)
- Instance creation: Create a new cloud localization database instance within the service group (marked as 2 in figure)
- Repository binding: Select the corresponding Mega Block storage repository to bind to the cloud localization database (marked as 3 in figure)
Enter instance management
- Click "Manage" to enter the detailed management interface of the cloud localization database
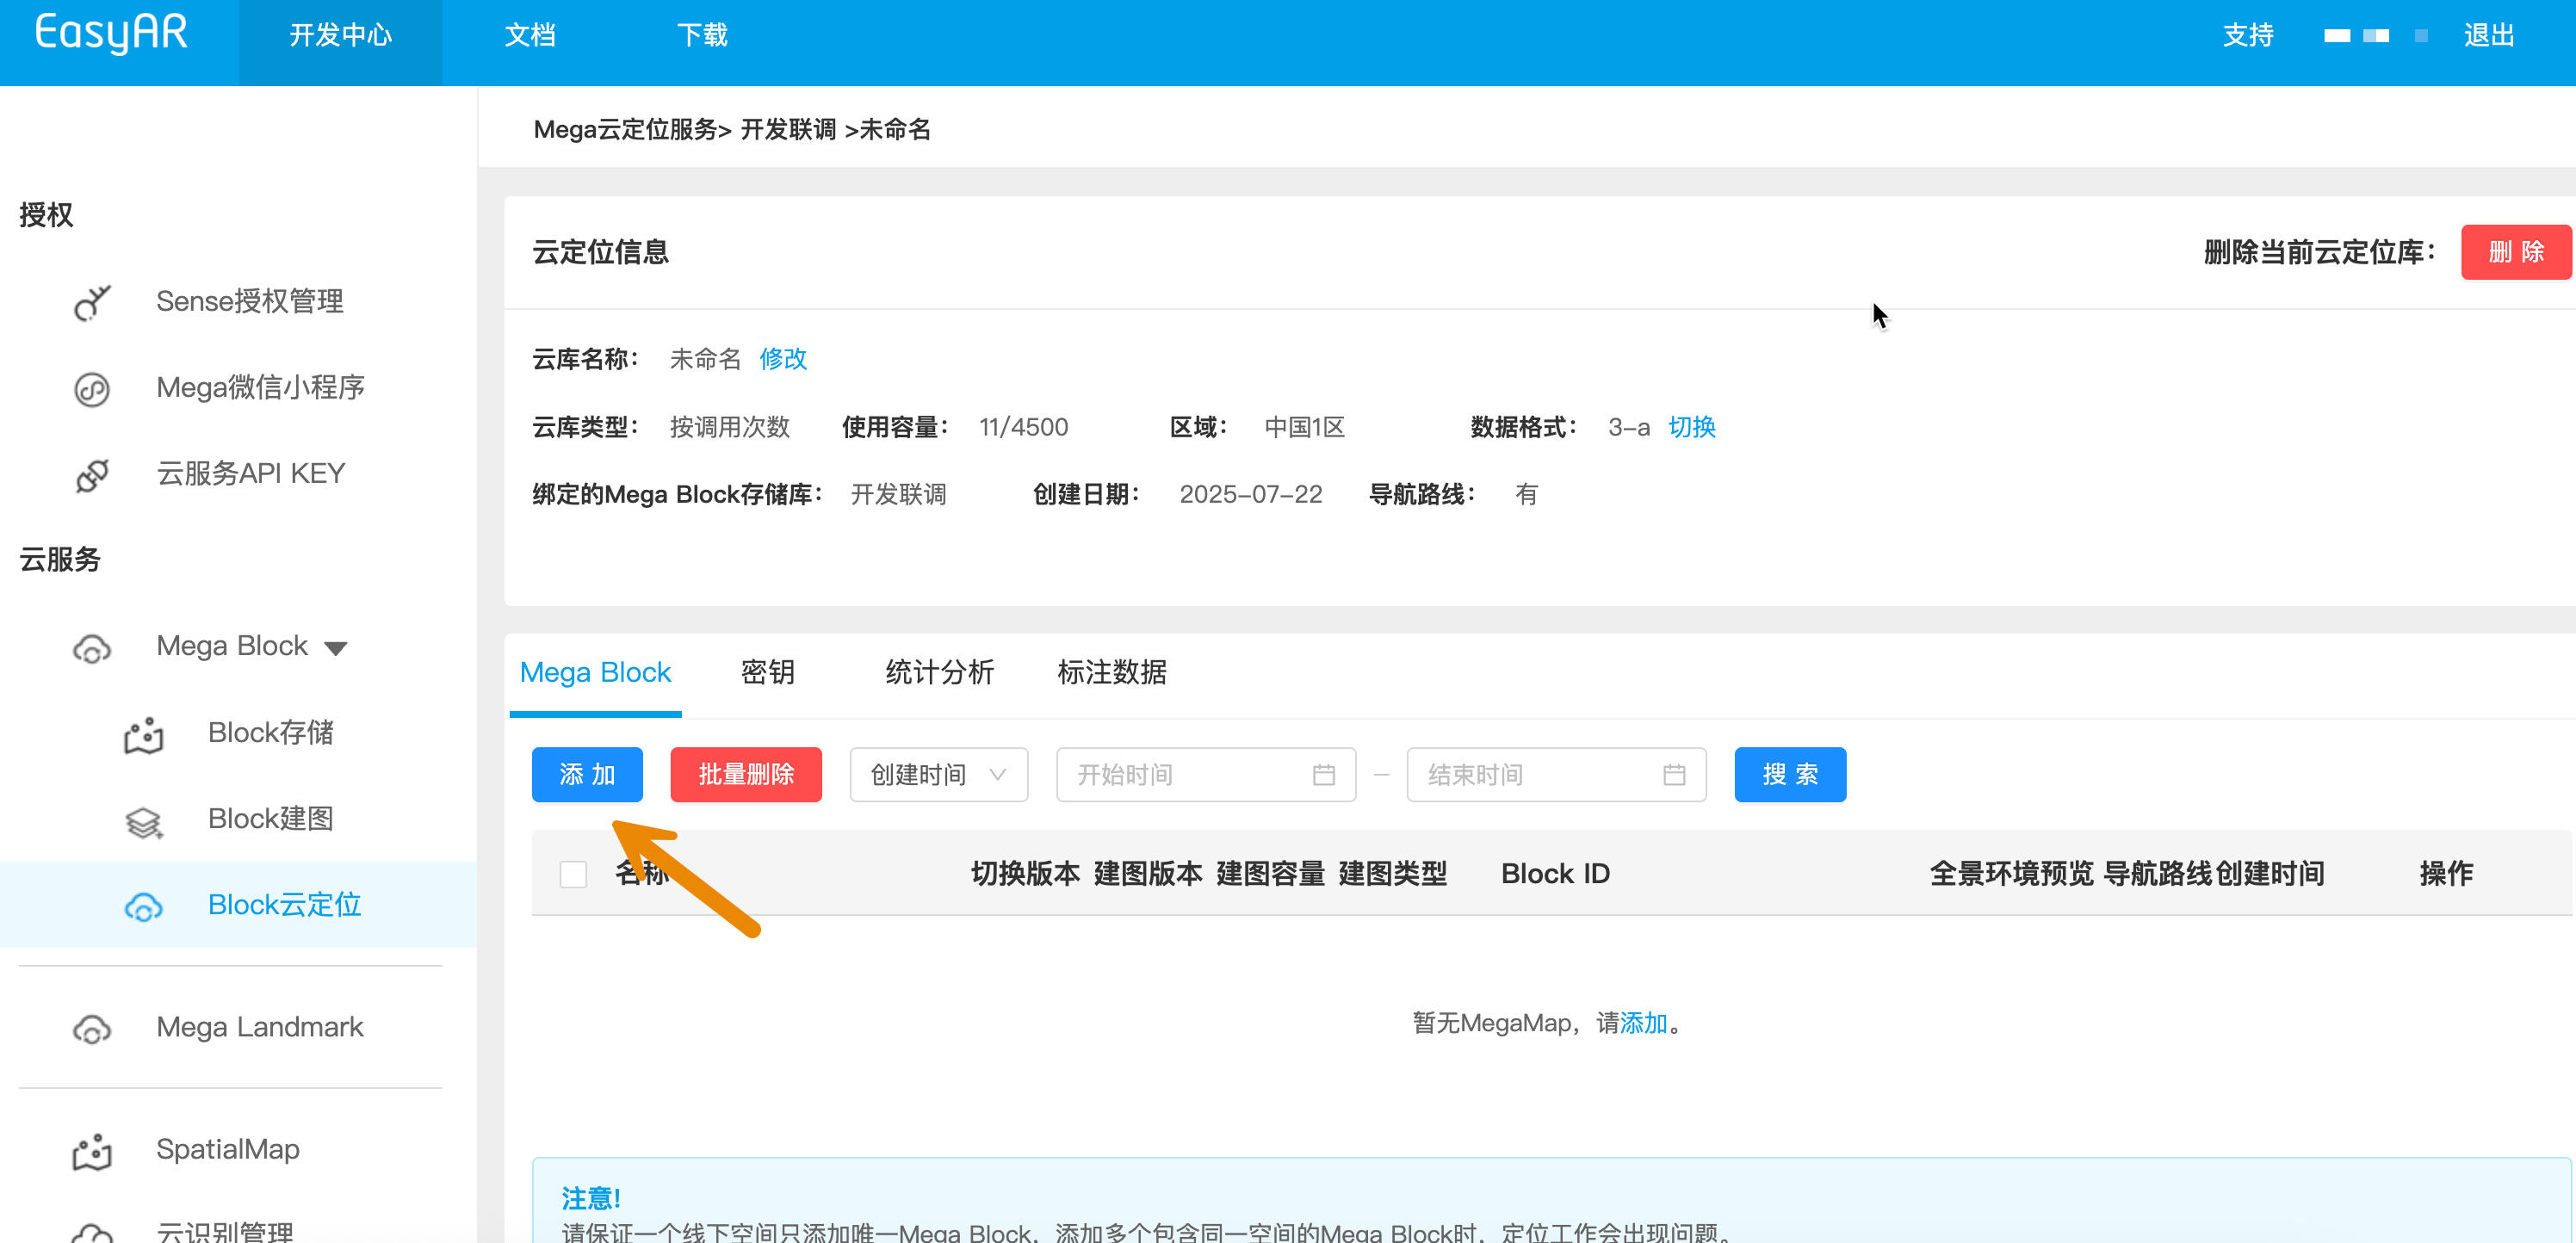
Configure Mega Blocks in the cloud localization database
- Click the "Add" button and select the required Mega Blocks from the list
- Confirm the selection to complete the addition
- Ensure the correct version is selected
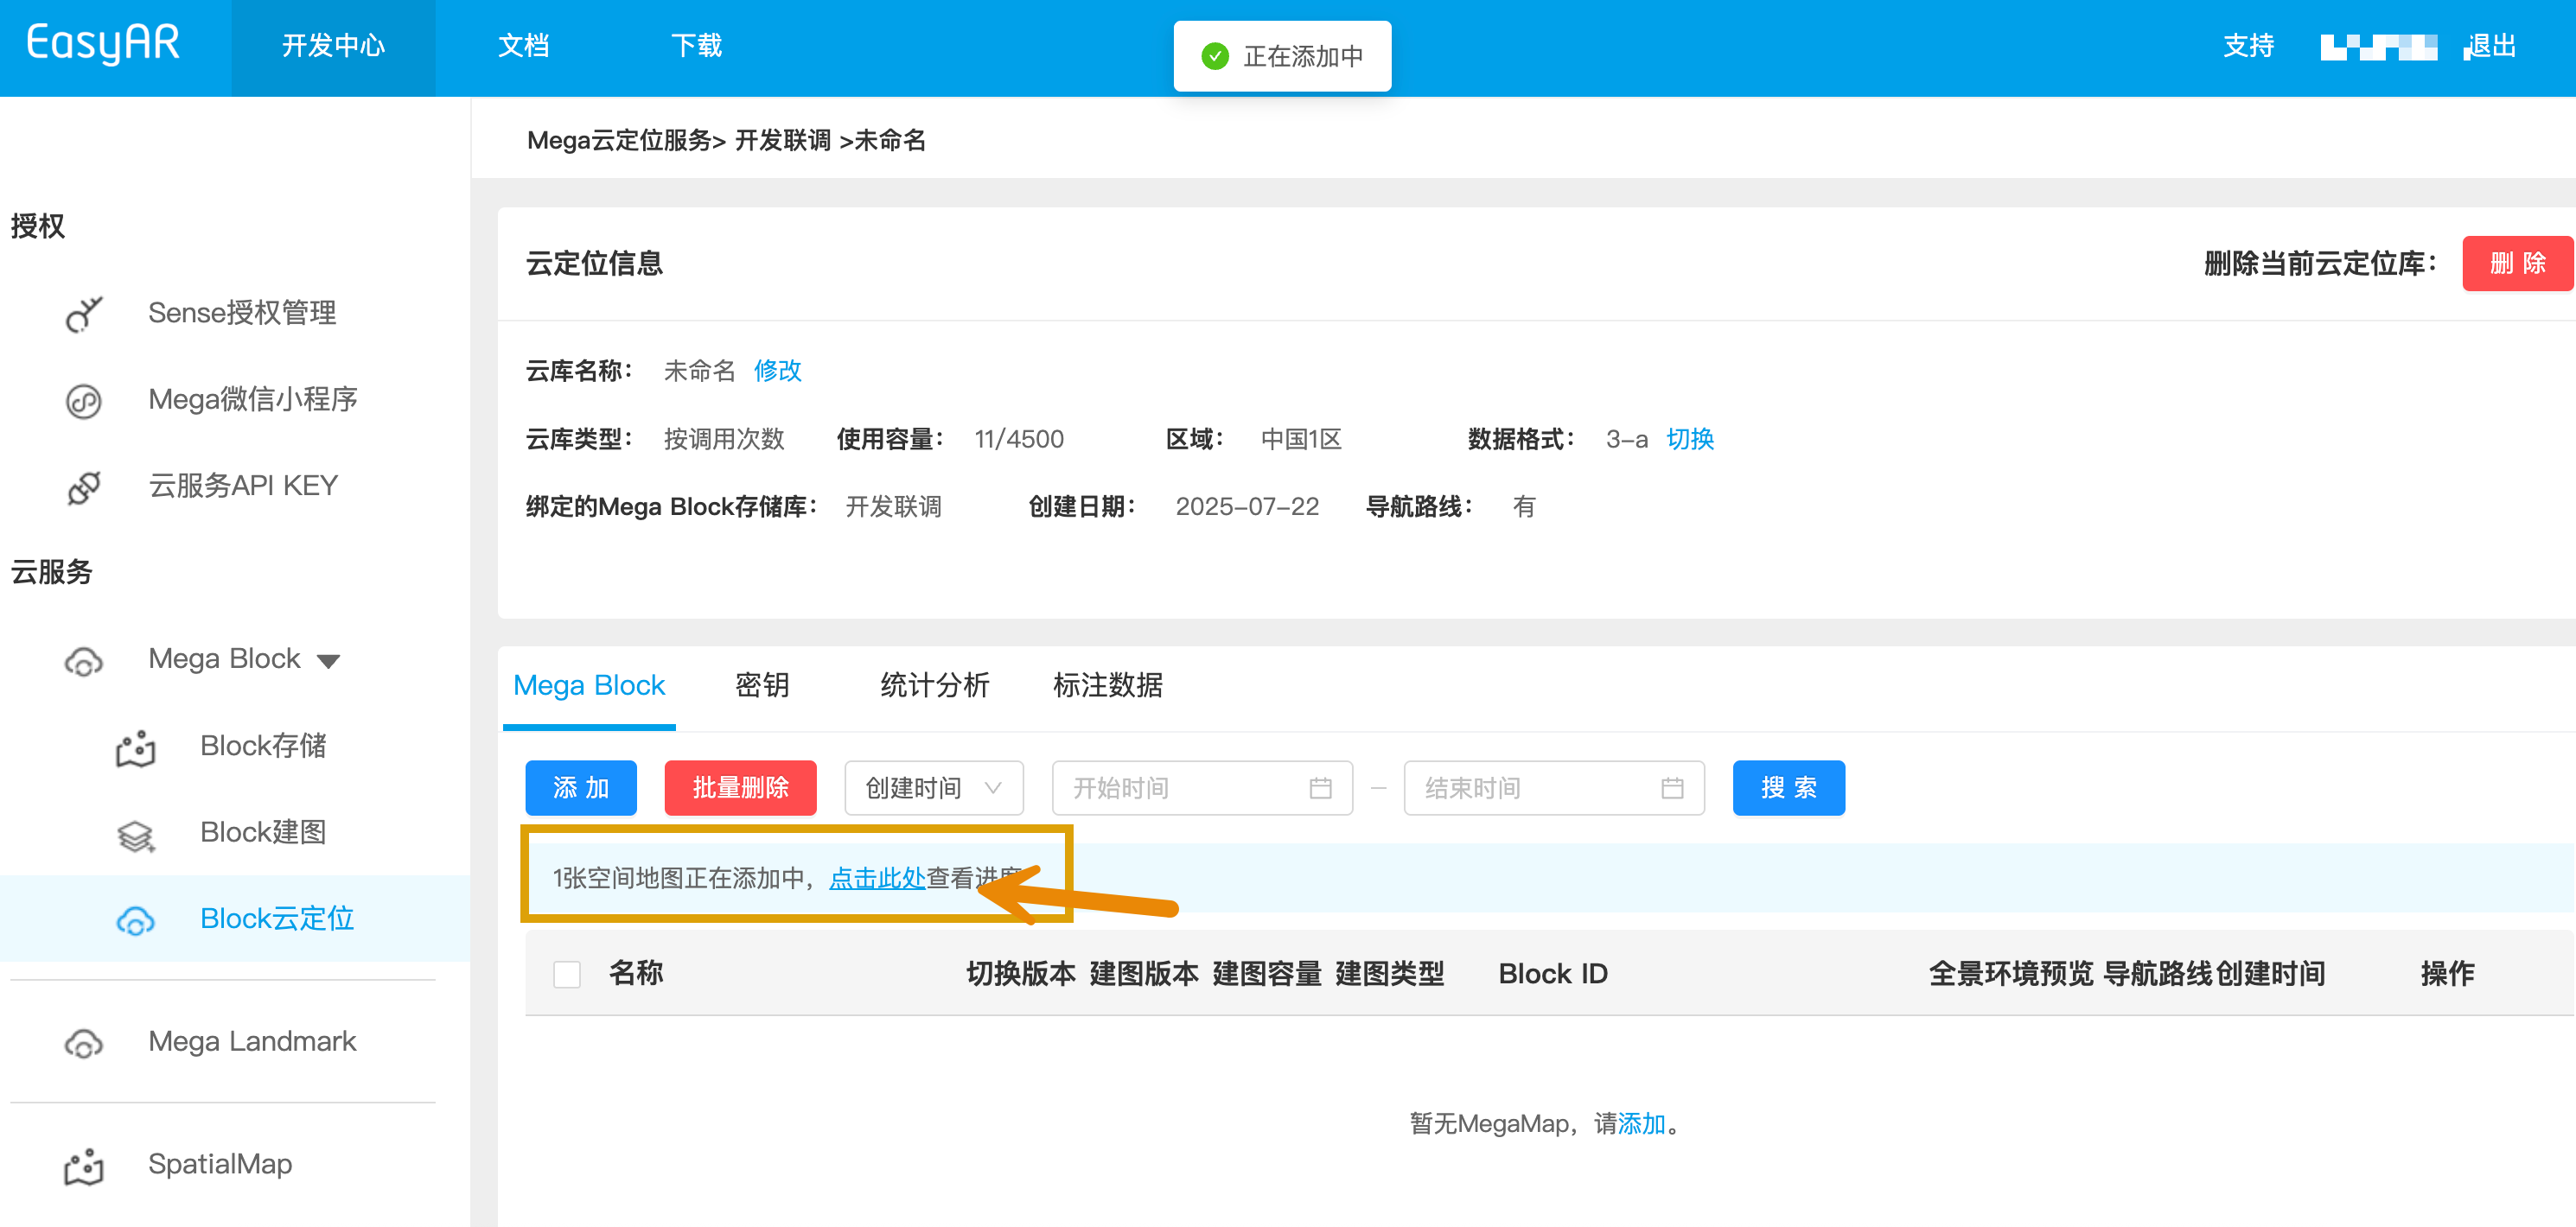
Monitor addition progress
- The system will display the addition progress status; wait patiently for processing to complete
Exception handling
- If addition fails, delete the progress and re-add when no conflicts exist
- If repeated failures occur, contact technical support
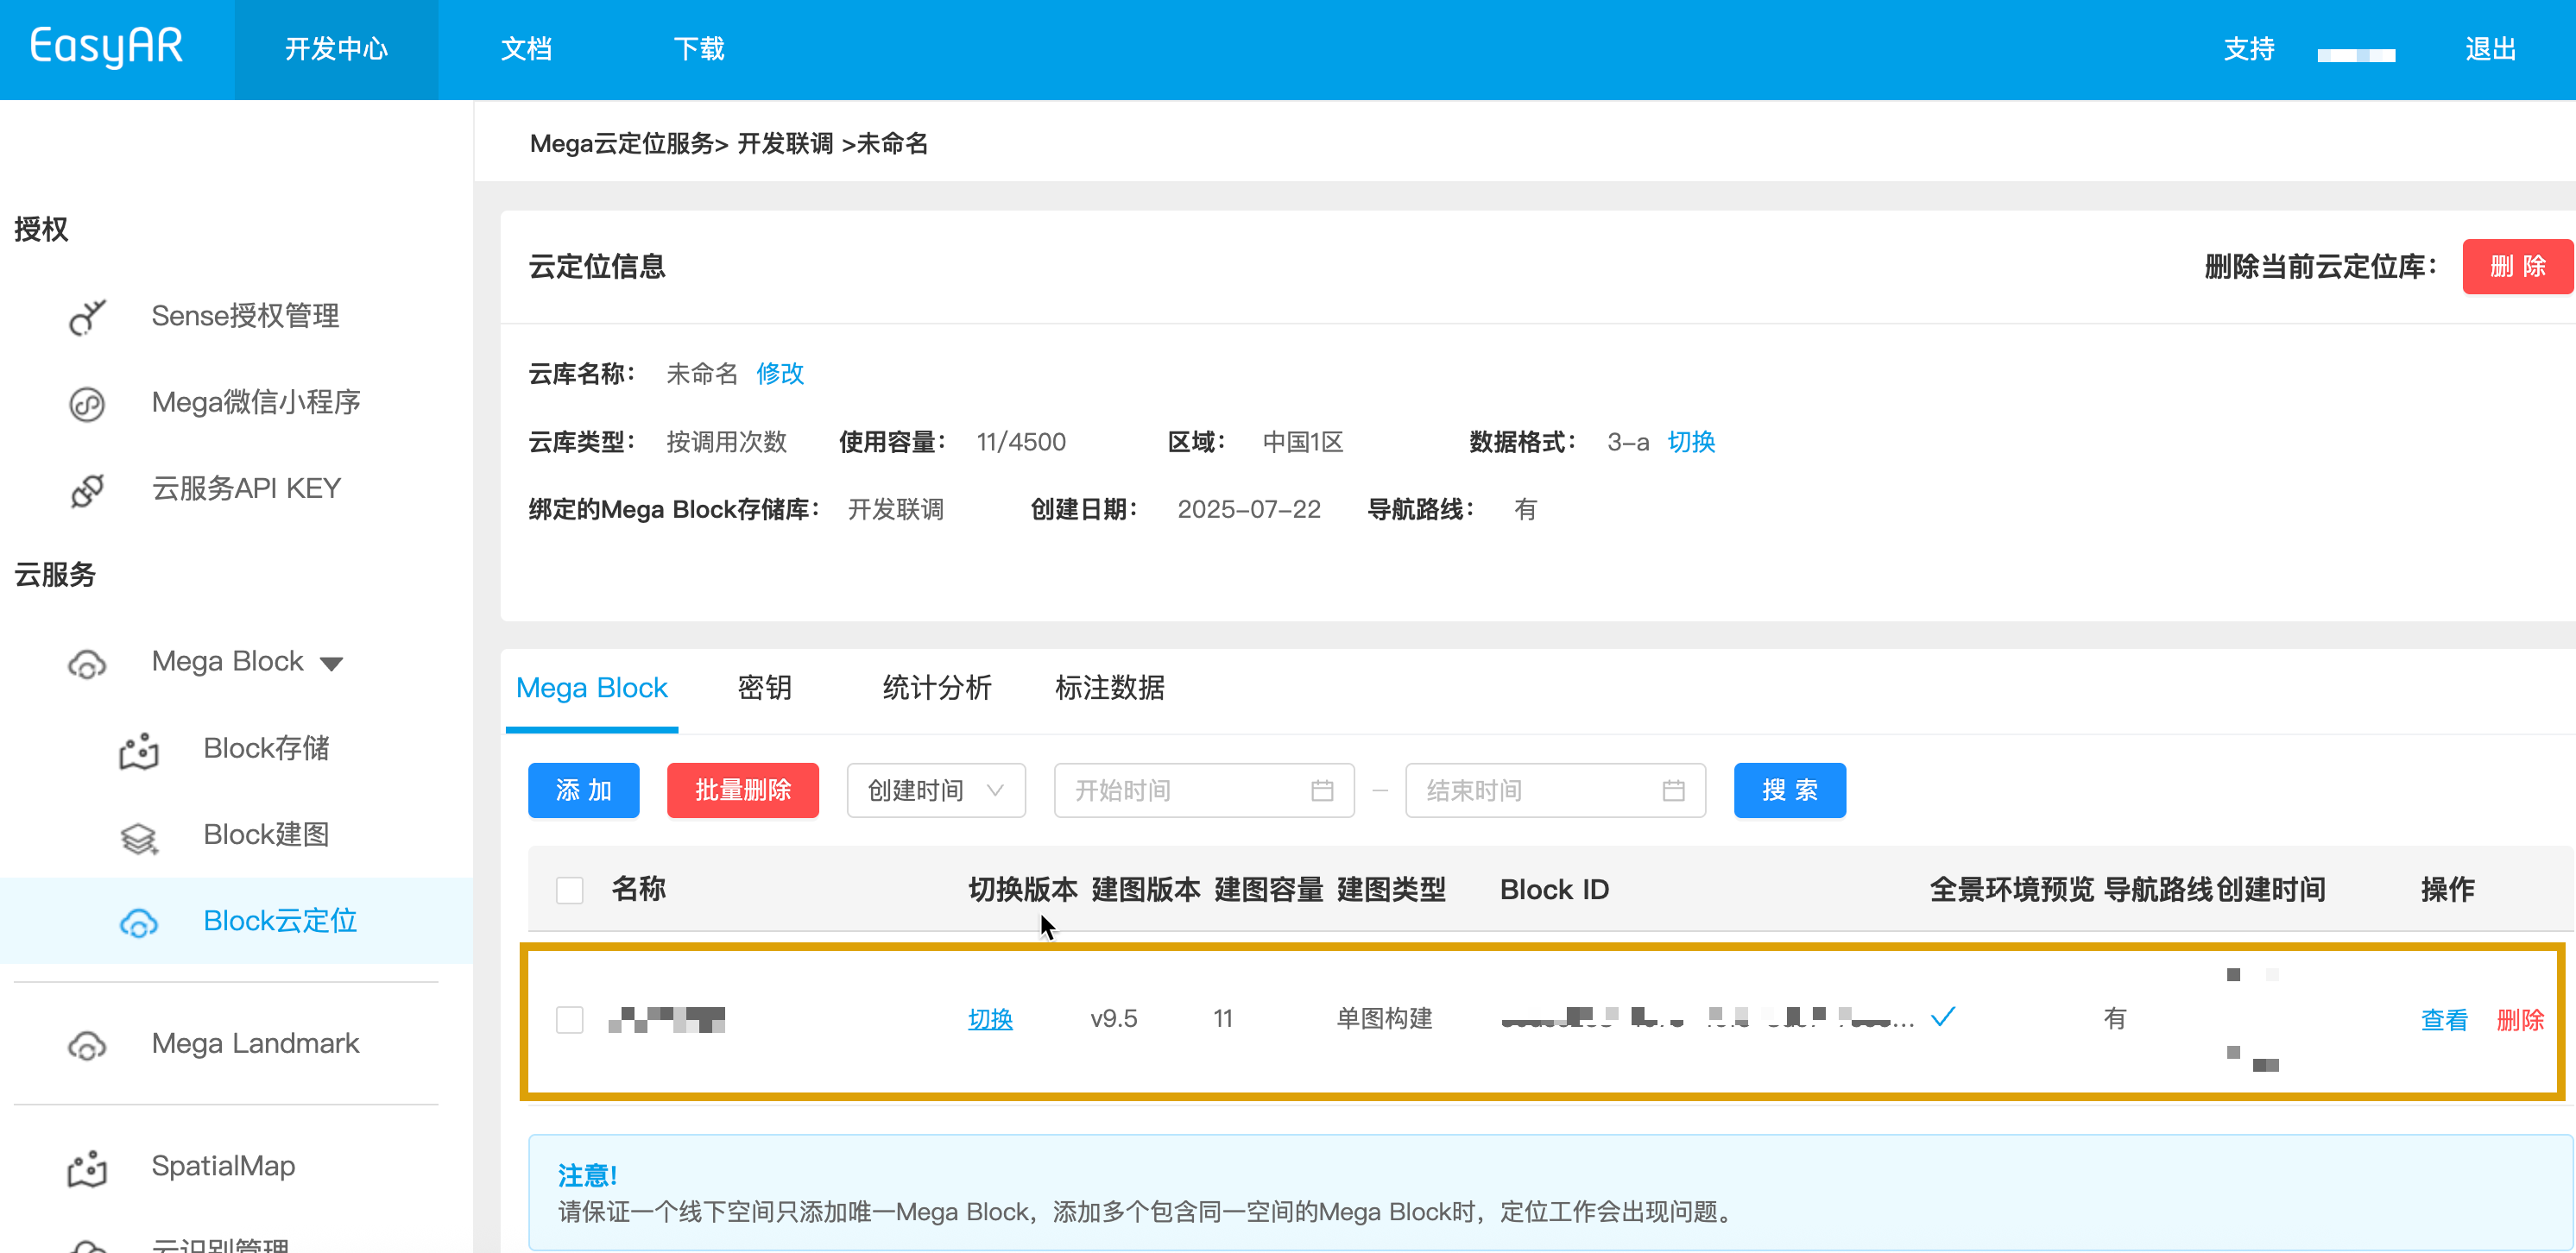
Completion confirmation
- After successful addition, the interface will display complete configuration information
Complete deployment
Congratulations! You have now completed all configuration work for the cloud localization database. Next, you can begin verification testing of cloud localization functionality and start your AR application development journey. 🎉