Quickly experience EasyAR samples with AllSamplesLauncher
AllSamplesLauncher is an integrated sample launcher that helps you quickly become familiar with the features of the EasyAR SDK. With this launcher, you can switch to and run all official sample scenes in a single Unity project with one click, without manually configuring multiple independent projects.
Preparation
Before you begin, make sure you have completed the following preparations:
- Unity Hub and Unity Editor are installed
- A new Unity project has been created
- EasyAR Sense Unity Plugin has been imported and all Samples have been imported
Follow the steps described in quick start.
Detailed steps
- Open all scenes in Samples.
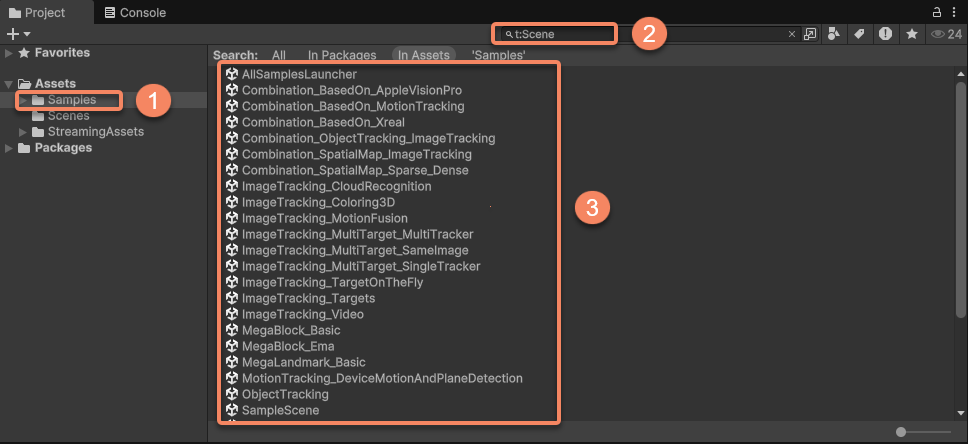
- Click the menu bar
File>Build SettingsorBuild Profiles>Scene List. - Drag all scenes into
Scene List. - Make sure AllSamplesLauncher is the first among all scenes. If not, drag it in the window.
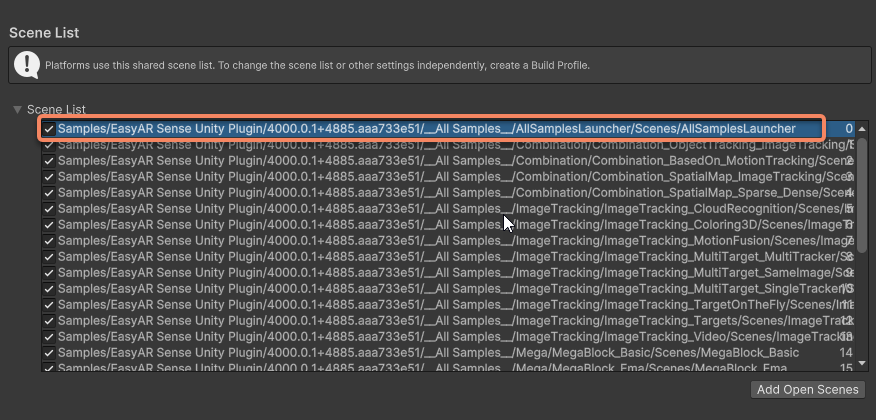
- Click the menu bar
File>Build And Runto build and run.
Note
When building to run on a phone, do not add headset scenes:
- Combination_BasedOn_AppleVisionPro
- Combination_BasedOn_Xreal
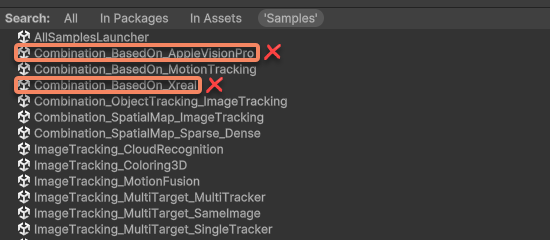
Problems during building
During compilation and building, you may encounter some errors. Common issues include:
| Error message | Cause | Solution |
|---|---|---|
| FileNotFoundException:EasyAR Settings Asset | License is not filled in | Click the menu bar EasyAR > Sense > Configuration, and fill in your License Key in EasyAR Sense License |
| Missing Prefab Asset: 'XR Interaction Setup' | Headset-related files are missing | Remove headset-related scenes from the build scene list. If you confirm that you need to build for a headset, follow the steps in use headset samples |
Using the launcher
After running, you will see a simple launcher interface.
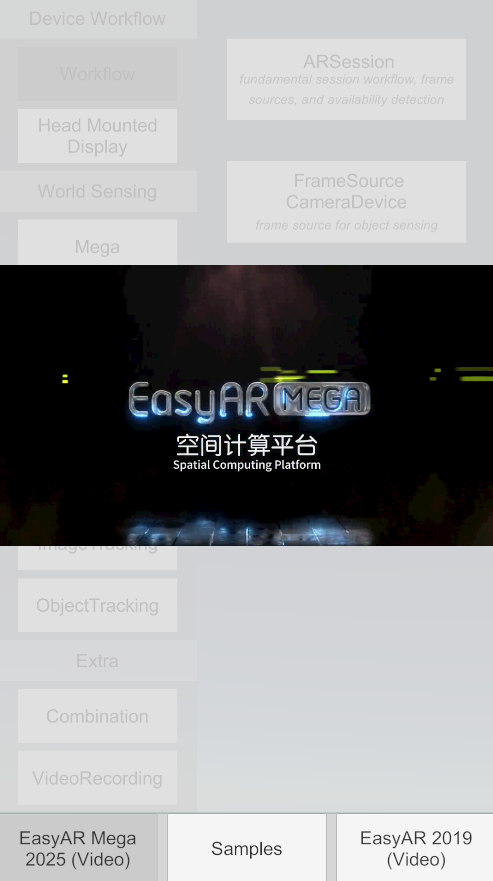
Click the Samples button in the middle at the bottom of the interface to enter samples for all features.
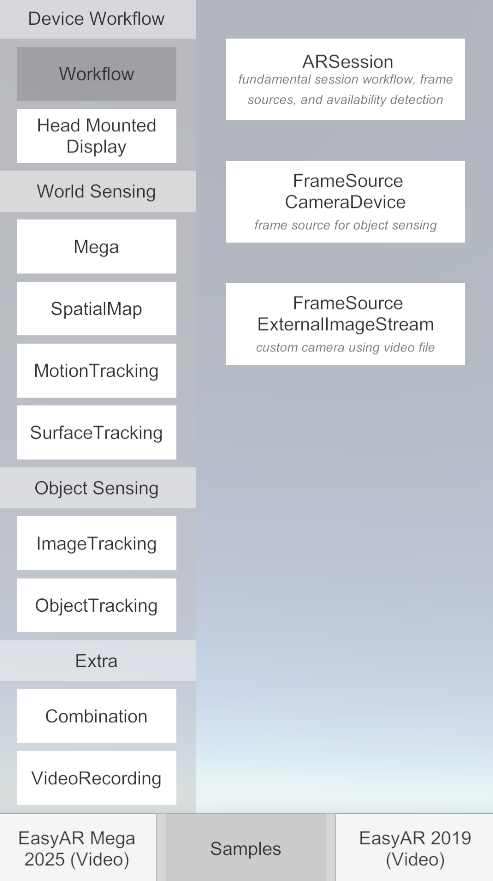
The left side of the interface shows feature categories, and the right side shows the list of scene samples under each feature. Click different sample scenes to experience all the different features provided by EasyAR.
At the bottom of the interface, feature demonstration videos for EasyAR Sense and EasyAR Mega are also provided, helping you better understand what features and effects EasyAR can provide.
Must-read before running samples
Before running a specific sample, you must complete the following key configurations; otherwise, the sample will not work properly:
Set your API Key
- Some samples, especially those involving cloud recognition and Mega cloud localization, require a valid API Key.
- In the menu bar
EasyAR>Sense>Configuration, find the place required by the corresponding sample. - Fill in the App ID, API Key, and API Secret that you applied for from EasyAR Developer Center.
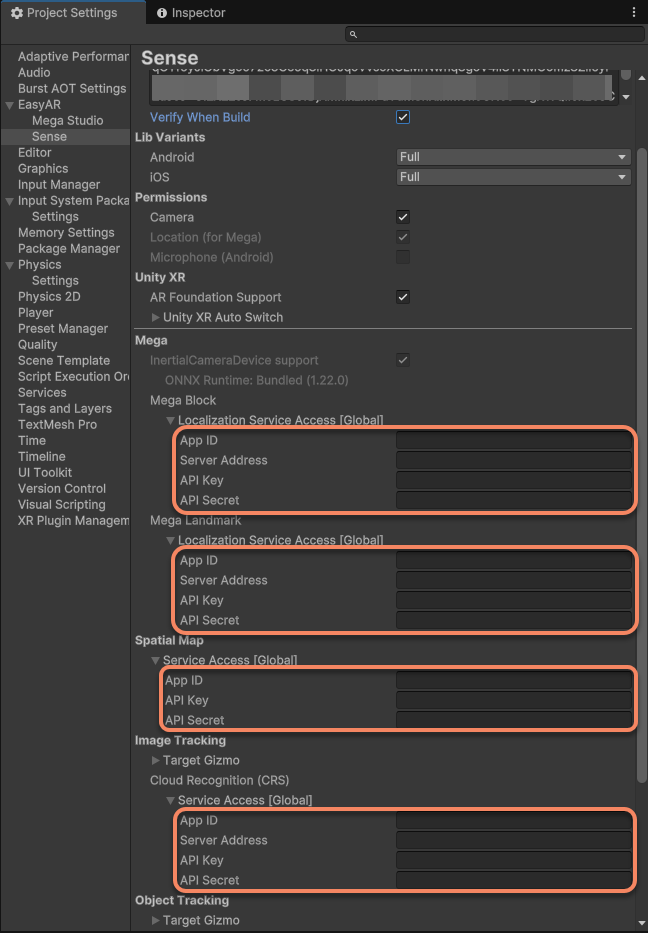
- Important: If you do not have an API Key yet, samples of some local features, such as image tracking, may still run, but cloud features will fail. Be sure to go to EasyAR Developer Center to create an application and obtain a Key.
Configure XR/platform support:
- If you are running headset-related samples, follow use headset samples.
- Make sure your device, such as a phone or headset, is correctly connected and in developer mode.
Explore samples in depth
The sample launcher is the best starting point for learning. We strongly recommend that you:
- Run first, then study: Quickly experience the effect of each sample through the launcher and build an intuitive understanding of EasyAR capabilities.
- Open scene source files: Each sample is an independent Unity scene file located under the
Assets/Samples/EasyAR Sense Unity Plugin/[version number]/__All Samples__/[feature name]/[sample name]/Scenesdirectory. - Study and read script code: In a sample scene, you can open the
*.csscripts included with the sample to see how we call the EasyAR API to implement specific features. This is the best way to learn API usage.
With the sample launcher, you can quickly build an understanding of the EasyAR SDK features. Enjoy exploring!