Quick start EasyAR Unity development using sample
This tutorial describes how to configure and run the EasyAR Unity sample to quickly start AR development.
Prepare empty unity project
Ensure you have installed a compatible Unity version (Unity 2021.3 or later), it is recommended to use the latest version of Unity 2022.3 or Unity 6.3.
Create an empty Unity project using the 3D (Built-in Render Pipeline) template:
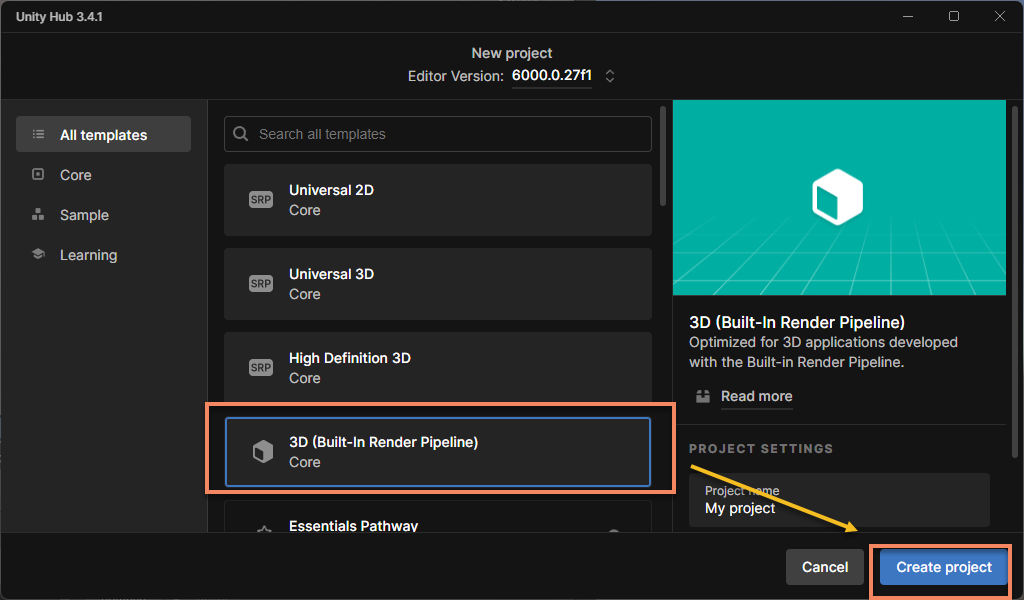
Note
Using URP is not recommended for first-time use.
If you are using Unity 6, you need to manually download and use the 3D (Built-In Render Pipeline) Template, which is located further down the template list by default.
Important
To use URP, you must follow the additional configuration in Universal Render Pipeline (URP), otherwise the camera image will not be displayed.
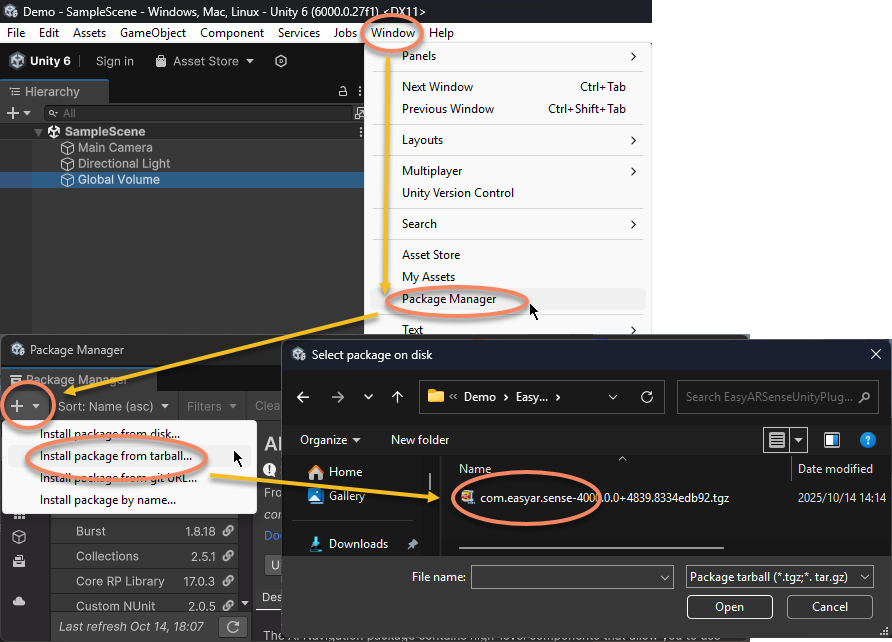
Import easyar sense unity plugin
- Download the plugin package
- Download the latest version of EasyAR Sense Unity Plugin, which includes samples.
- After unzipping the downloaded
zippackage, you will seereadmeand.tgzfiles. The.tgzfile can be directly imported into Unity and should not be unzipped. - Store the
.tgzfile in thePackagesfolder of your Unity project.
- Import the plugin package
- From the menu bar, click
Windowand selectPackage Manager. - In the pop-up window, click the
+sign in the top-left corner, then selectInstall Package from tarball .... - In the dialog box, select the aforementioned
.tgzfile.
- From the menu bar, click
Note
The .tgz file cannot be deleted or moved to another location after being imported into Unity. It is recommended to place this file in an appropriate location before import, typically within the Packages folder of the Unity project for convenient version control.
Import samples
Open Package Manager via Window > Package Manager, select EasyAR Sense Unity Plugin, then choose **All Samples** on the right to import all samples at once.
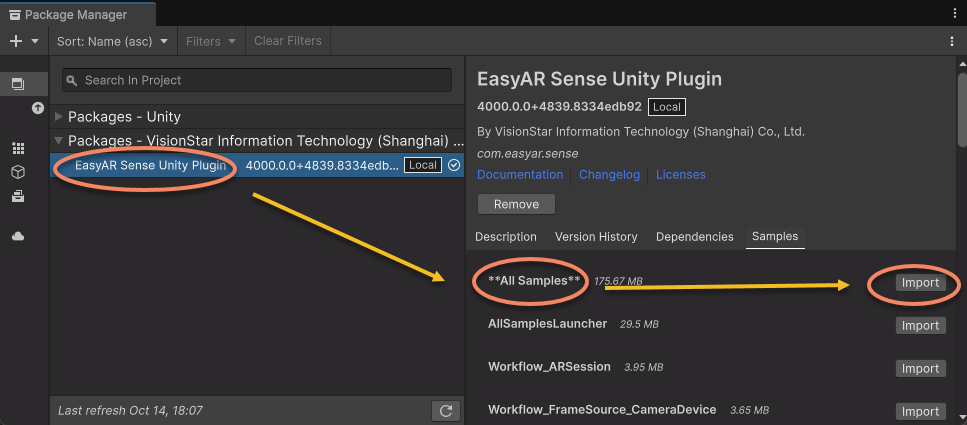
Caution
**All Samples** cannot be imported simultaneously with other samples, as duplicate assets may cause partial scene resources loss. If duplicate files are accidentally imported, delete them and re-import.
Modify scene list
Open Build Settings (or Build Profiles),
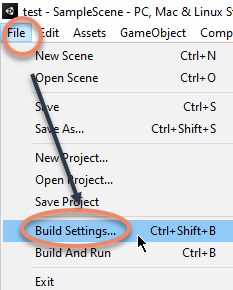

Add sample scenes from the Unity project to the Scene List in Build Settings or Build Profiles, and move the sample launcher scene (AllSamplesLauncher) to the first position among all scenes.


Caution
Do not add these head-mounted display scenes, otherwise the build may fail:
- Combination_BasedOn_AppleVisionPro.rst
- Combination_BasedOn_Xreal.rst

Fill in license key
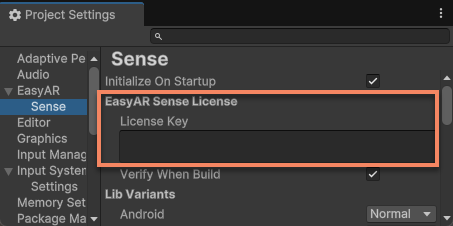
From the Unity menu, select EasyAR > Sense > Configuration to open the EasyAR Sense settings interface.

Fill in the EasyAR Sense License in the input box under EasyAR Sense License.
Tip
EasyAR Sense License can be created from the EasyAR Developer Center (中文, English). For first-time use, follow these steps:
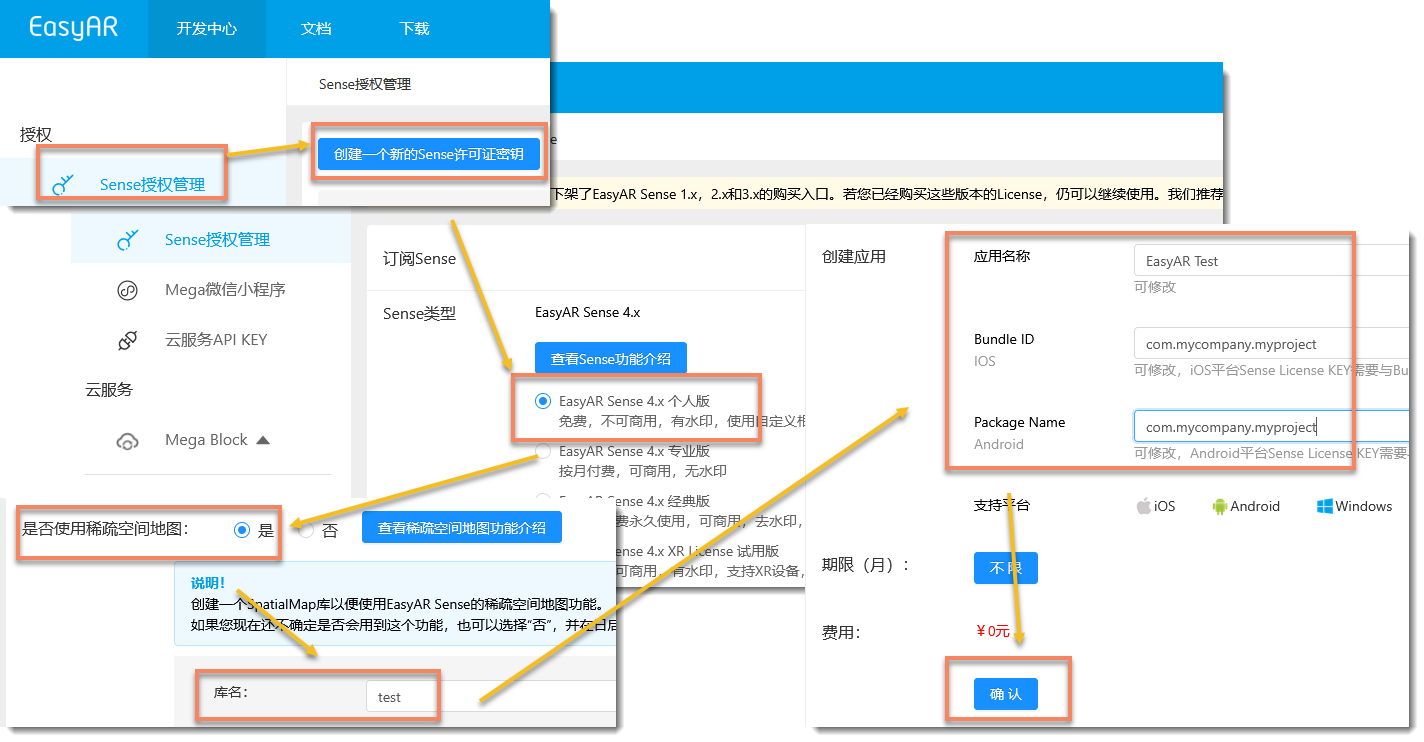
- Create
EasyAR Sense 4.x Personal - Select
Yesfor sparse-space-map, name can be arbitrary - Application name can be arbitrary, fill in
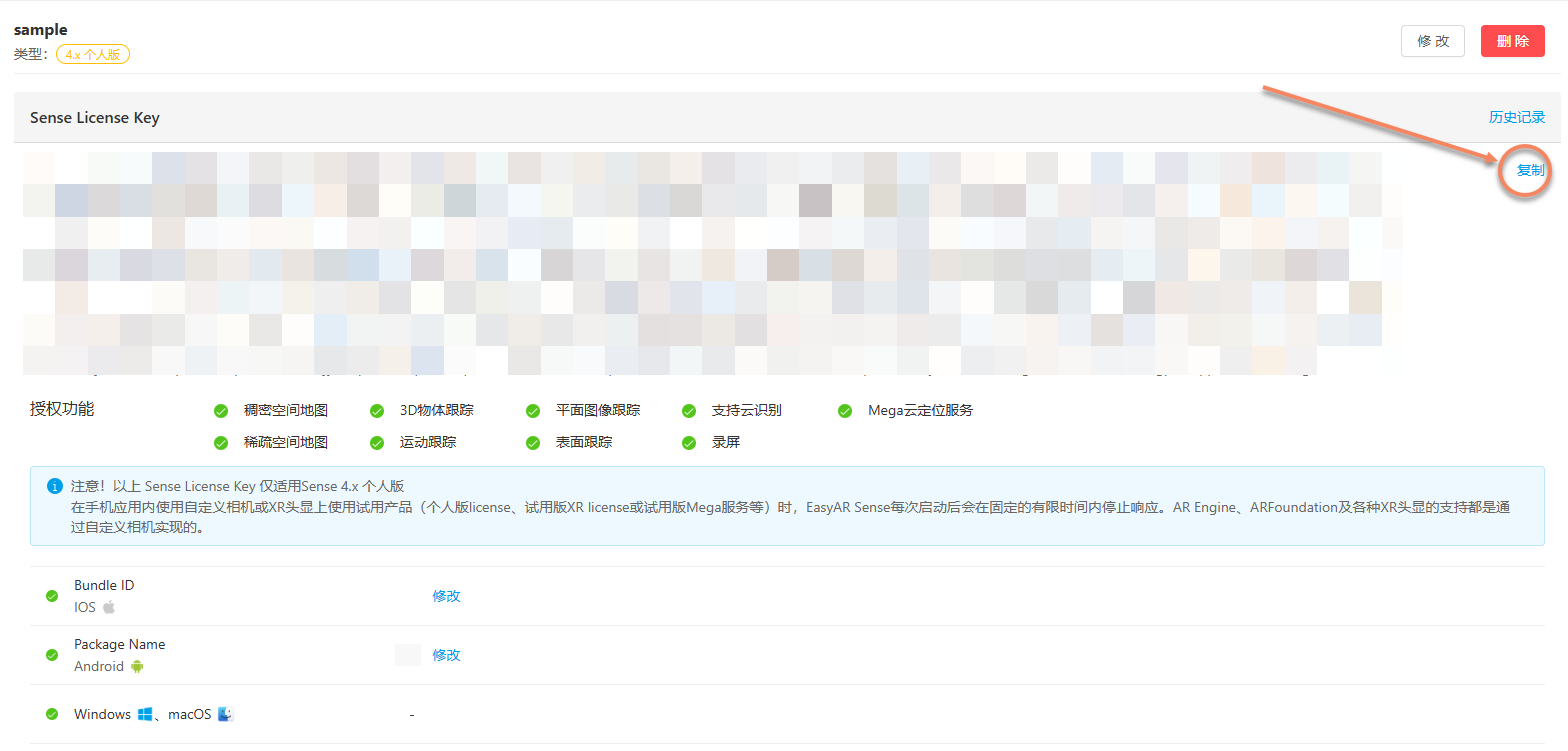
com.mycompany.myprojectfor Bundle ID and Package Name - Select the newly created License, then click the copy button on the right
Note
Bundle ID and Package Name can be changed later, but the number of changes is limited. If you have a specific application package name, you can fill in your own.
No limit on creating personal licenses. Other types can be created as needed for official use.
Running in the editor
Running in the editor requires a camera connected to your computer.
Confirm system camera is working
Open the system camera app:
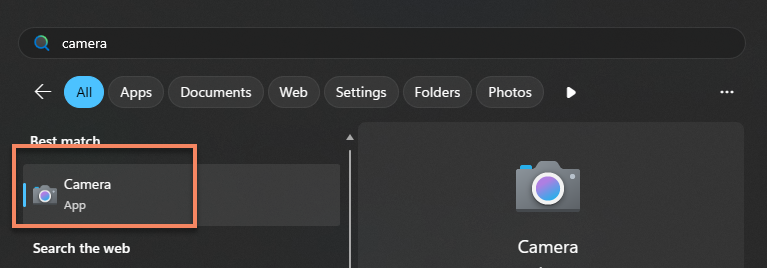
Confirm the camera is working properly:
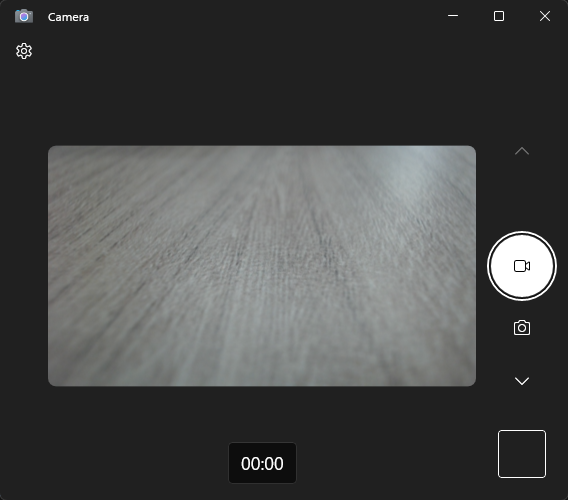
Finally, remember to close the camera app to avoid conflicts when running samples.
Note
EasyAR only uses the interface provided by the system to open the camera. Ensure the system camera app can open the camera and display normally.
Running example
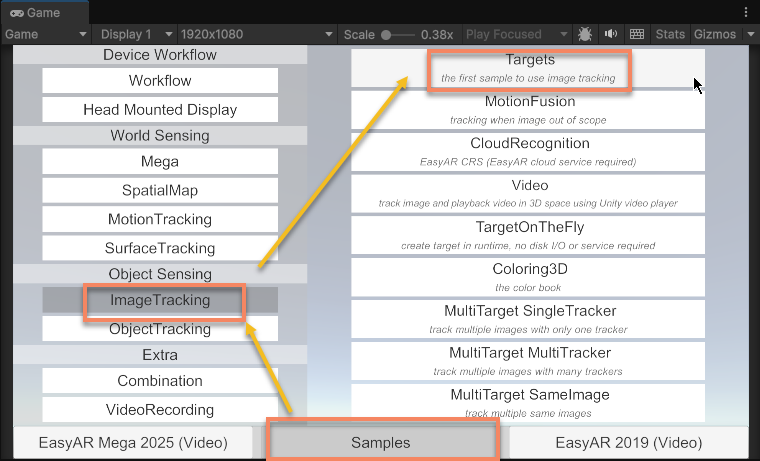
The following uses the image tracking example
ImageTracking_Targetsas an example. Other examples are run similarly.
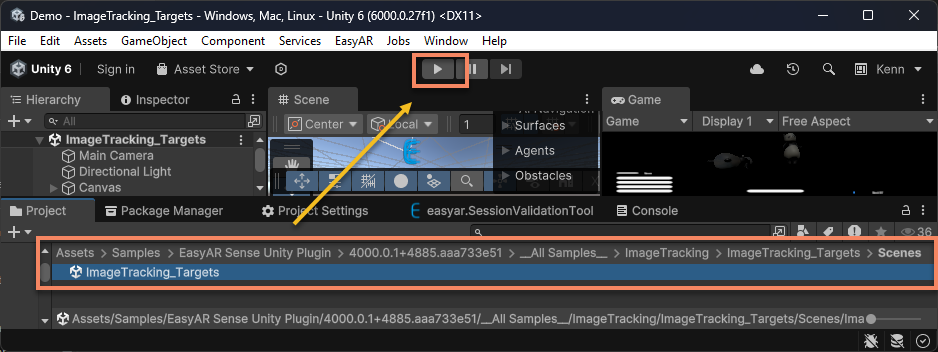
Open the sample launcher scene and click the Play button at the top of the Unity editor.
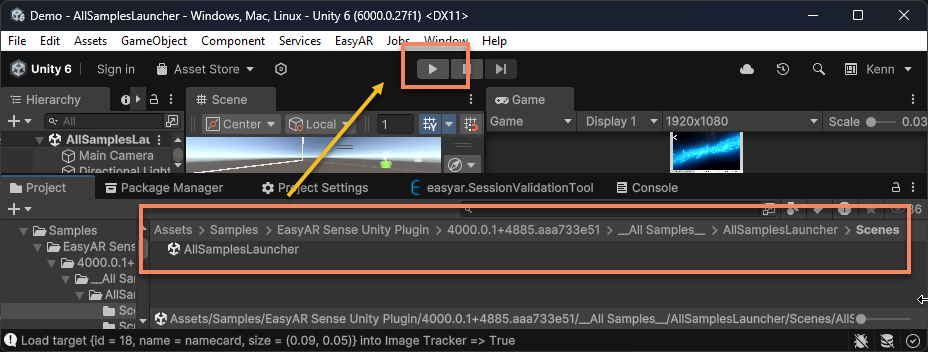
Enter the ImageTracking_Targets scene.
Tip
You can also open the ImageTracking_Targets scene directly and execute it.
Point the camera at the following target image:
Download address: 🔗 namecard

EasyAR will recognize and track this image, overlaying virtual objects.
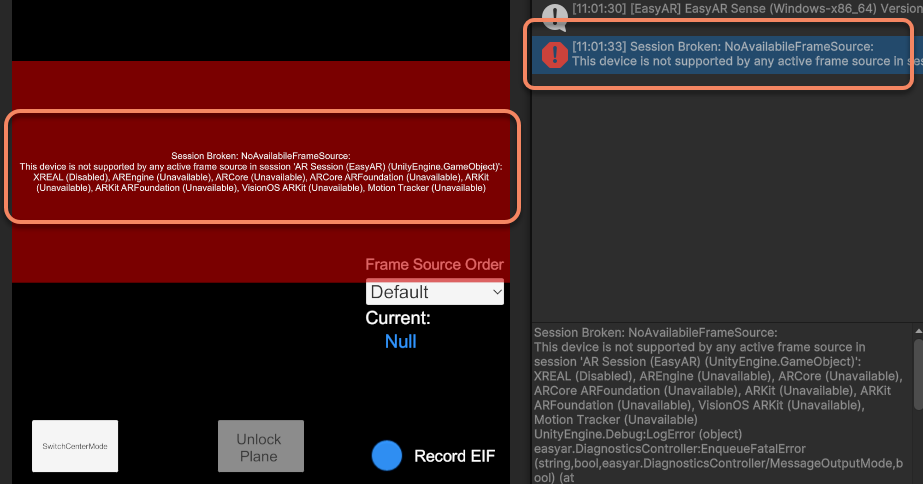
Note
Some features cannot connect to the camera in the editor but can run on mobile devices. Examples unusable in the editor will display a startup failure popup.
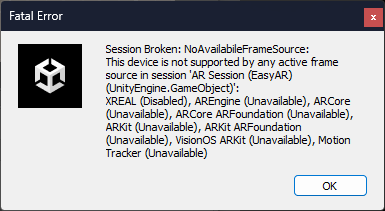
Error messages and logs will also be output.
Running on mobile phones
To run on mobile phones, packaging is required. Before packaging, the Player configuration needs to be modified.
Modify player configuration
In the Unity menu File > Build Settings > Player Settings, click the Android icon to access Android platform settings.

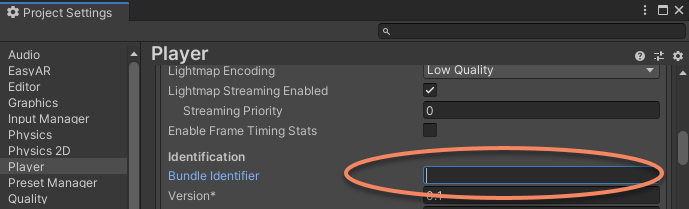
Modify Package Name to match the Package Name displayed on the License Key page
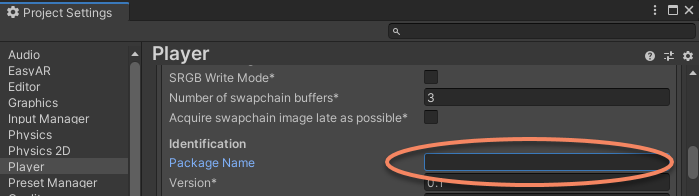
Tip
For example, if the Package Name entered when creating the License Key was
com.mycompany.myproject, you must set the Package Name here tocom.mycompany.myproject, otherwise runtime failure will occur.Modify Minimum API Level to
API Level 21or higher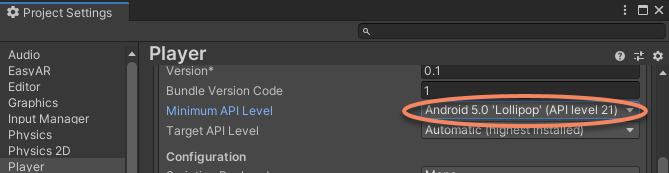
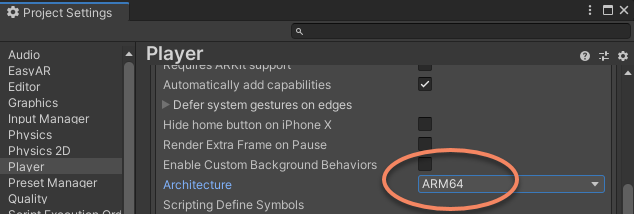
Modify Scripting Backend to
IL2CPP, and checkARM64underTarget Architecture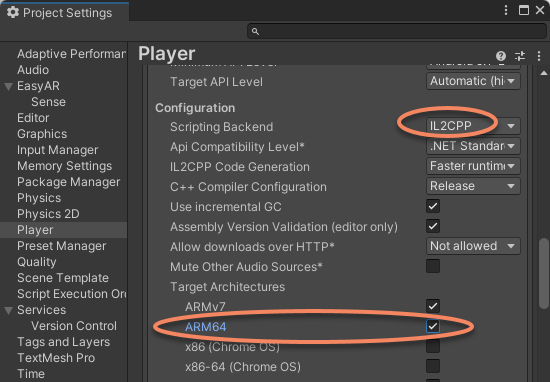

Build application
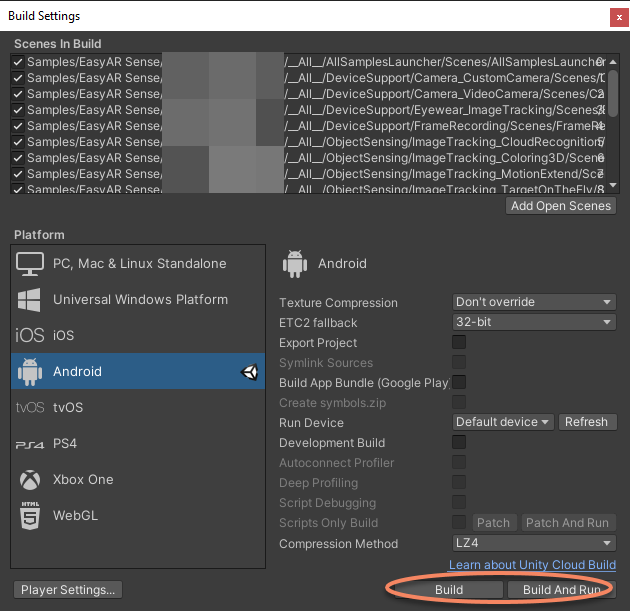
Select File > Build Settings, choose the target platform (Android/iOS), then select switch platform.
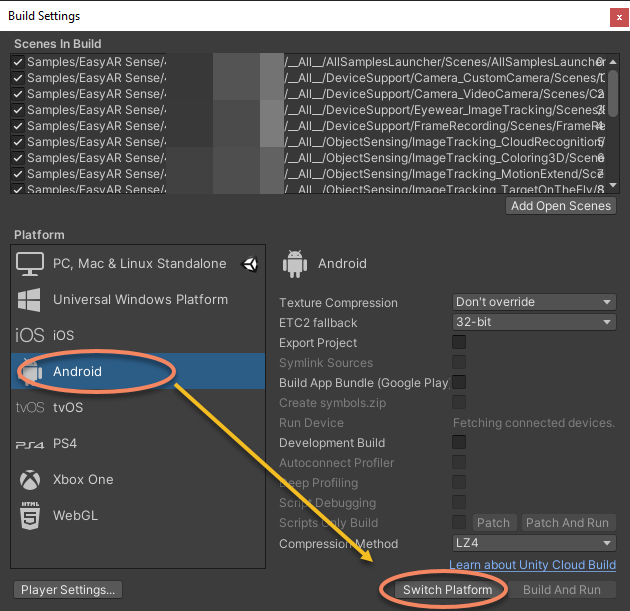
Select Build or Build And Run to compile the project and install it on the phone. Grant relevant permissions when running.
Running example
The following uses the image tracking sample
ImageTracking_Targetsas an example. Other samples operate similarly.
After running, the sample launcher scene should start.
Tip
If it doesn't enter the sample launcher scene upon opening, check whether the scene list in Build Settings or Build Profiles is correctly set, ensuring AllSamplesLauncher is moved to the first position.
Enter the ImageTracking_Targets scene.
Point the phone's camera at the following target image:
Download link: 🔗 namecard
EasyAR will recognize and track this image, overlaying virtual objects.
Next steps
You have successfully run the Unity AR sample and may be interested in how the AR scene demonstrated in the sample was created. You can read the following getting started guides in order:
For detailed usage instructions on the sample launcher, refer to:
If you wish to understand the complete project configuration, you can refer to the following:
If you want to further explore how to use EasyAR, start here: