Simulate the operation of an AR project using Mega capabilities with the session verification tool
This article aims to guide developers on how to use the session verification tool in the Unity editor to load recorded EIF data and simulate the operation of an AR project using Mega capabilities.
Before you start
- Complete the Quick Start to understand how to run a Unity application with Mega features.
- Understand what EIF is.
- Learn how to collect simulation operation data.
Why using the session verification tool for simulation is a good idea
Remote development: You don't need to be on-site in hot or cold weather. With EIF data, you can develop large-scale geospatial AR applications in the office.
Cross - platform debugging: You don't need to connect various mobile devices frequently. You can simulate the positioning and tracking effects of different terminals such as mobile phones and headsets on a PC.
The "gold standard" for problem feedback: A reproducible EIF file with anomalies is the key basis for the EasyAR team to solve positioning and tracking problems.
Note
Although EIF data is recorded very accurately, there may still be differences between the simulation effect and the actual usage effect.
And the simulation data has limited coverage of the site. Be sure to conduct on - site tests before the final release.
Prepare the on - site recorded EIF file
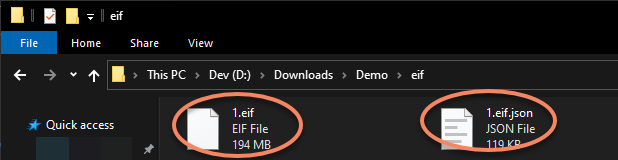
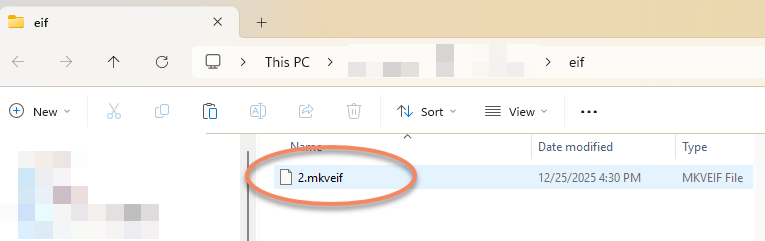
Depending on the selected recording format, the recorded EIF data should be a .mkveif file (or a .eif file and a .eif.json file, both of which are required).
.eif and .eif.json:
.mkveif:
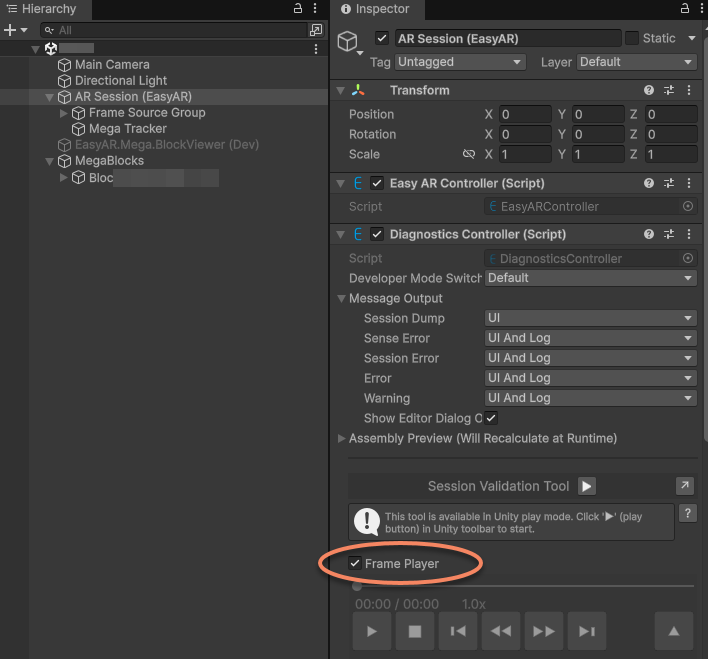
Turn on the session verification tool
Click on AR Session (EasyAR) in the scene > Confirm that the Frame Player on its Inspector panel is turned on.
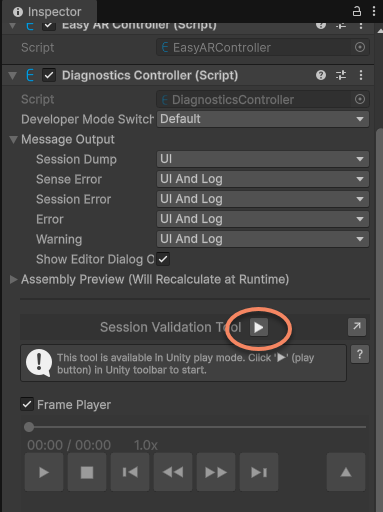
Run
Click the toolbar button or the run button on the Session Validation Tool to start running the current scene in the Unity editor.
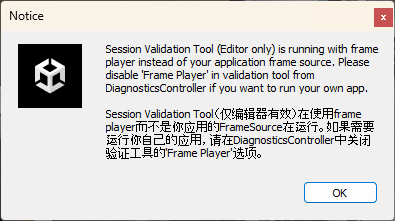
After running, a prompt box will pop up. This is normal. It just reminds you that you are using the Frame Player.
Click the button on the tool to open the EIF file.
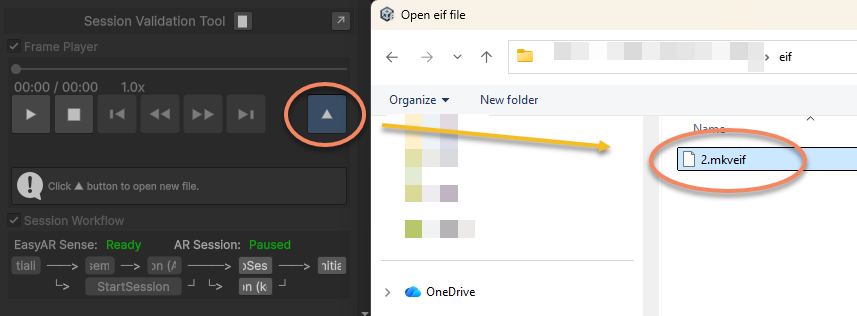
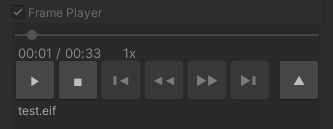
After opening it normally, it will play automatically. You can use the toolbar to pause/continue, etc. A properly recorded mkveif file supports progress bar jumping.
Operation effect:
If a block dense model is loaded, the block dense model will also remain displayed. This is useful for position comparison or checking the positioning effect in places where no model is placed.
If you turn off the block model display, you will see the effect of virtual objects overlaid on the real - world scene.
Important
When using it, you will definitely notice the diagnostic information text displayed on the screen or in front of your eyes during operation. Read UI Message Output carefully, and carefully consider what configuration should be adopted and what control switches should be retained during the development stage, testing stage, and after the application is launched. Communication with EasyAR usually requires providing this information. It is recommended to make good use of it rather than closing it immediately.
Under the default settings, after startup, the content will not be displayed until the block is located for the first time.
After it is located, the active of the block node will become true, and the content will be displayed and its position will be continuously updated.
You can control this behavior through the ActiveController component options.
[Optional] Use the panorama
Note
Some data does not support panoramas.
During runtime, you can click the Panorama Preview Marker selection box to display the panorama markers.
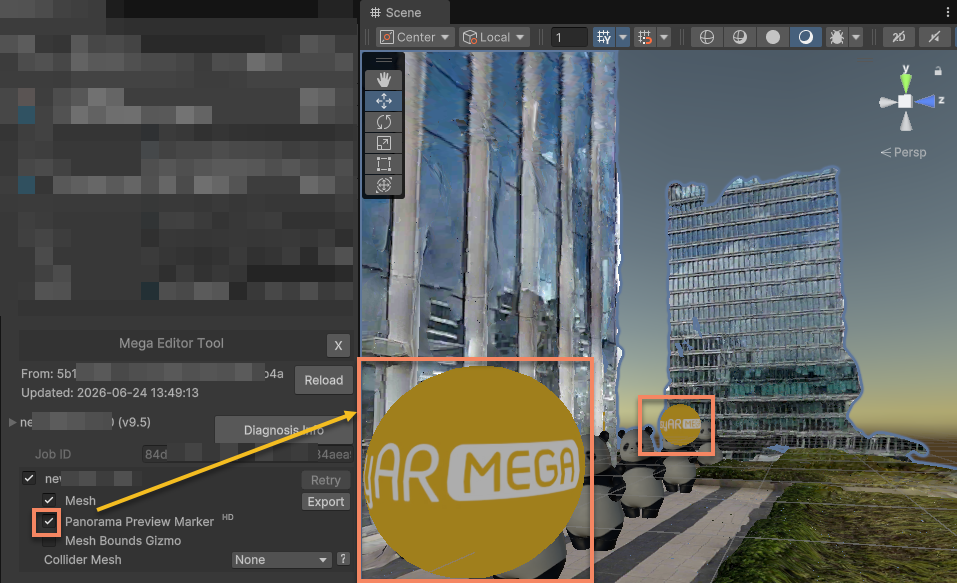
Click any panorama marker to see the preview effect of the panorama.
Tip
- After the editor enters the play mode, the occlusion of the mesh - based spatial model is still effective, but the accuracy is affected by the LOD switching disable.
- In the panorama window, you can operate the camera to rotate, but you cannot zoom or move.
- In the panorama window, you can move to the panorama views at different positions.
[Optional] Use LCC 3D Gaussian splatting
Note
This section applies to the usage scenario after using Qiyuyu devices for data collection and map building. The map - building results of other devices do not contain LCC 3DGS data.
If you use the LCC 3D Gaussian splatting (Qiyuyu LCC) function, you can render the 3DGS results simultaneously during the simulation operation to view the alignment effect between the model and 3DGS.
First, you need to load the LCC data and align it with the Mesh.
If there is a SceneGameCameraSync script on the Camera, you need to Disable it.
The effect of playing the EIF file while rendering 3DGS for simulation operation is as follows: