Use a mobile phone to collect small-area spatial data
In the Mega spatial data acquisition solution, in addition to using professional panoramic cameras, spatial data can also be collected with a smartphone. The mobile phone acquisition solution does not require extra devices. You only need to install the Mega Toolbox app on the phone to start acquisition, which greatly lowers the barrier to data collection. Because of the phone's limited field of view, mobile phone acquisition only supports small areas such as rooms and small squares. Before using a mobile phone to collect data, carefully read the following data acquisition instructions.
Important
If the spatial area to be collected is too large, use GoPro Max/Max2 for Mega Block spatial data acquisition.
Acquisition preparation
Before starting data acquisition, choose a suitable lighting environment and plan the acquisition route. Thorough preparation is the key to obtaining high-quality map data. Before each acquisition, prepare according to the acquisition checklist.
Acquisition environment
- The area to be collected should be a small or medium-sized scene, such as a shop, exhibition hall, or office.
- The ambient light should be sufficient and even. Avoid areas that are too dark or overexposed, such as direct sunlight.
- The scene should have relatively fixed texture features, such as posters, decorative paintings, or distinctive building structures. Avoid areas with very few textures, such as plain white rooms or glass mazes.
Plan the acquisition route
Plan the route before acquisition and make sure the start point overlaps the end point. The following are route planning requirements for three different types of scenes:
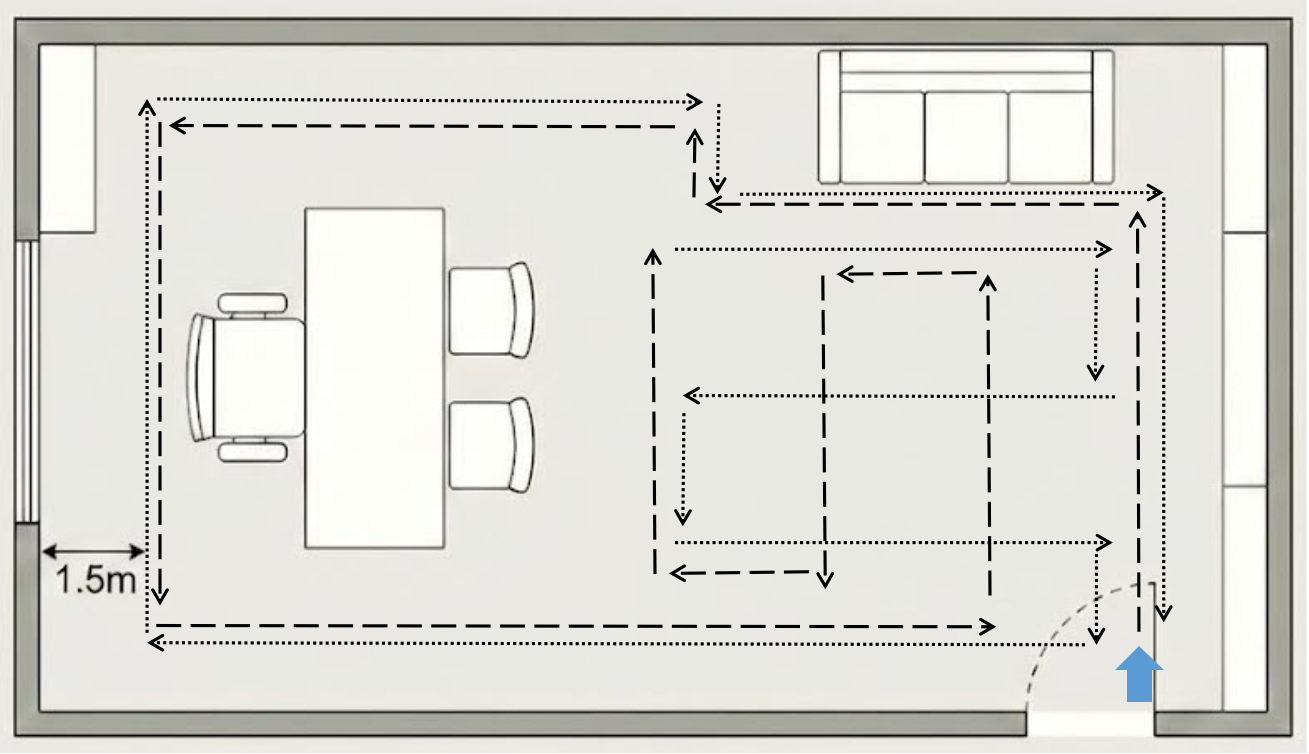
Indoor room: Use different strategies according to the room size. If the room is small, walking once around the room edge, about 1-2 meters away from the wall, is enough. If the room area is large, deploy the route in a grid pattern to ensure that all blind spots are covered.
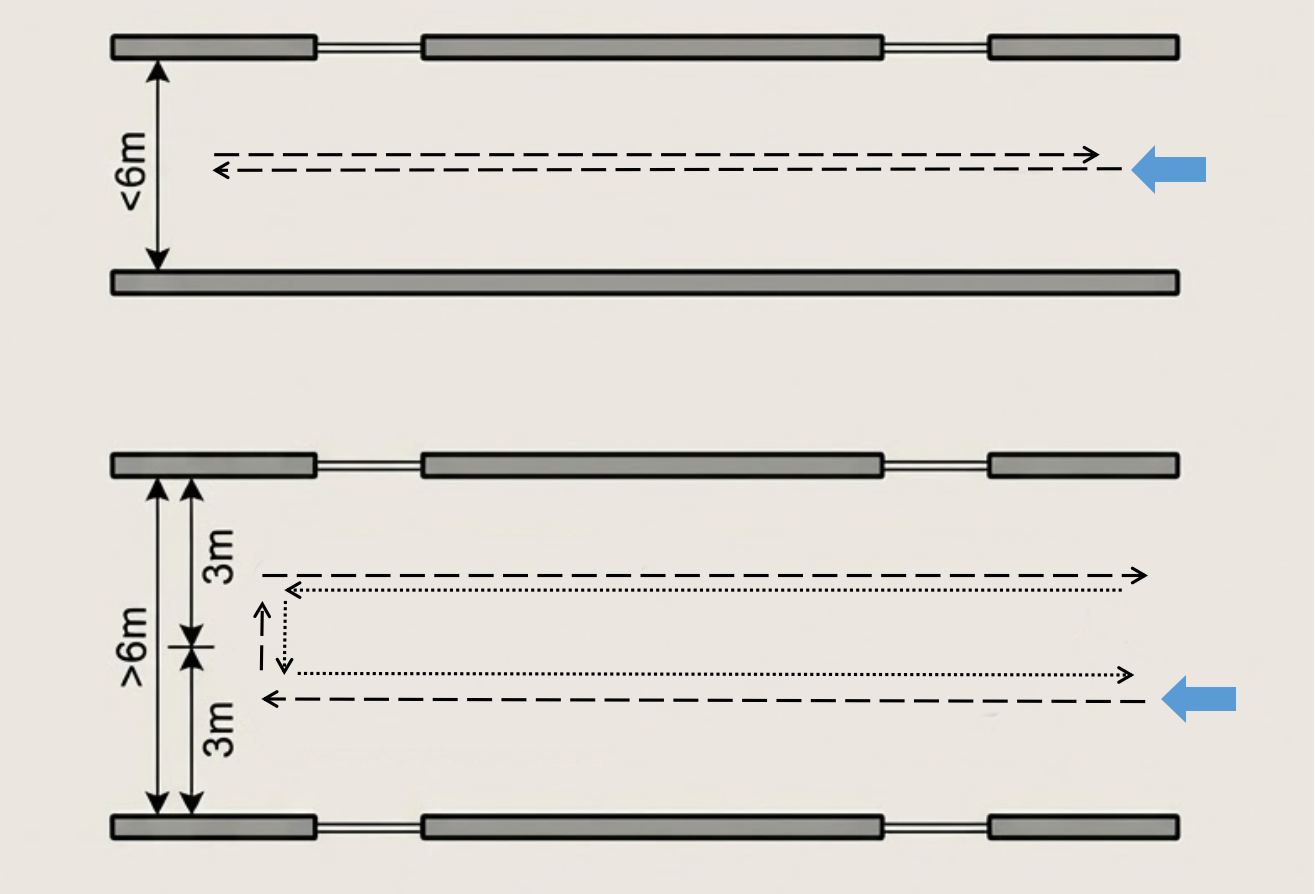
Corridor: If the corridor is no more than 6 meters wide, walk directly through the middle. If it is wider than 6 meters, walk twice near both sides, about 3 meters away from the adjacent wall each time. Shoot once in both directions.
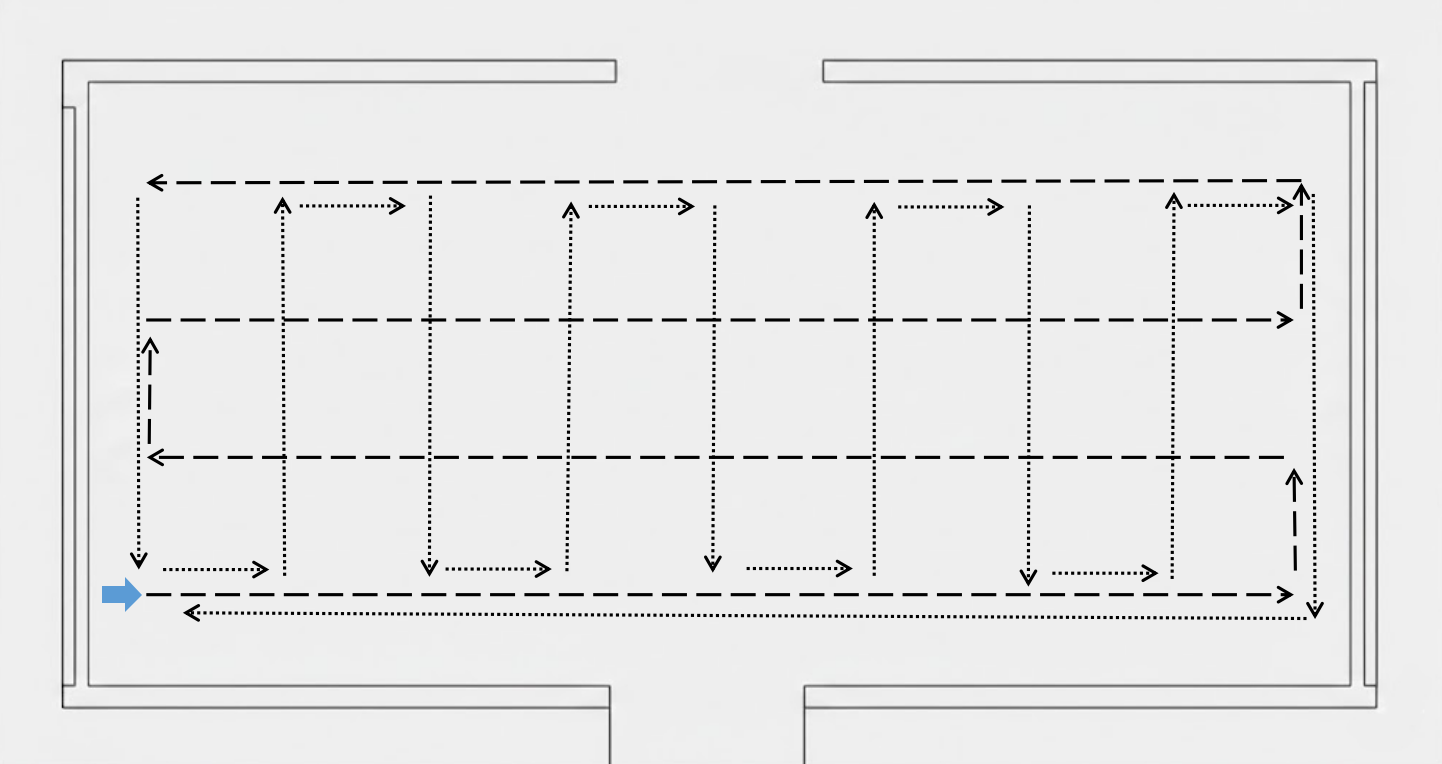
Small squares and other open areas: Deploy the route in a grid pattern, with grid spacing set to 3 meters.
Select a suitable phone model
Before starting acquisition, make sure your device meets the following requirements:
- iPhone users: iPhone 11 or later.
- Android users: ARCore-supported devices, except devices disabled by EasyAR. View supported device details.
Note
Note that on ARCore-supported models, the additional "Google Play Services for AR APP" must be installed to run ARCore features. It may be preinstalled on some models, while on others you need to search for it in the app store and install it yourself.
Install the acquisition tool
Download and install the Mega Toolbox data acquisition tool app package:
- iPhone users: Search for Mega Toolbox in the App Store, then download and install it.
- Android users: On the EasyAR download page, find the "Development tools" section and download the Mega Toolbox Android installation package. After the download is complete, copy the installation package to the phone and install it directly, or use
adb install EasyARMegaToolbox_***.apkon a computer.
Acquisition process
The acquisition process consists of three stages: starting Mega Toolbox, scanning and acquiring the route onsite, and saving the data.
Start MegaToolbox
Open the installed
Mega Toolboxon the phone, tap theMapping data acquisition toolbutton, and enter data acquisition mode.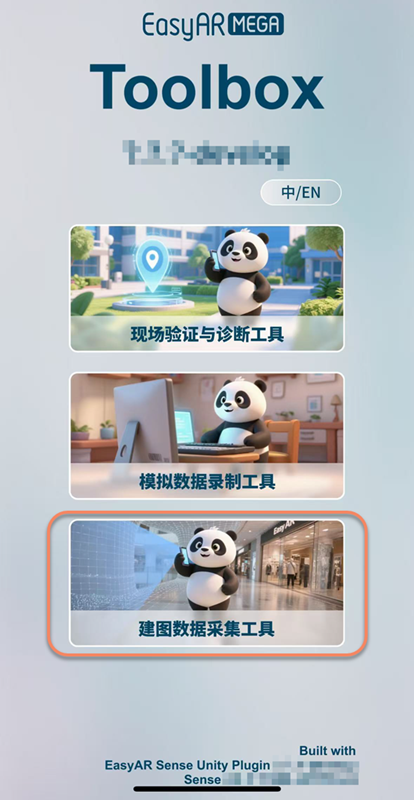
Tap the blue
+at the bottom to enter the acquisition page.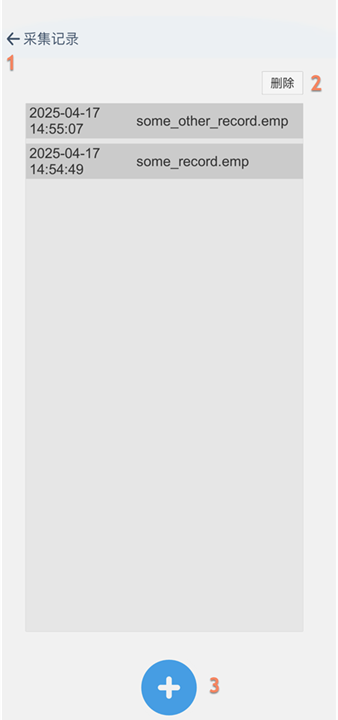
Function description
- Return to the main screen
- Delete record
- Enter the acquisition page
During the first acquisition, allow MegaToolbox to access your camera.
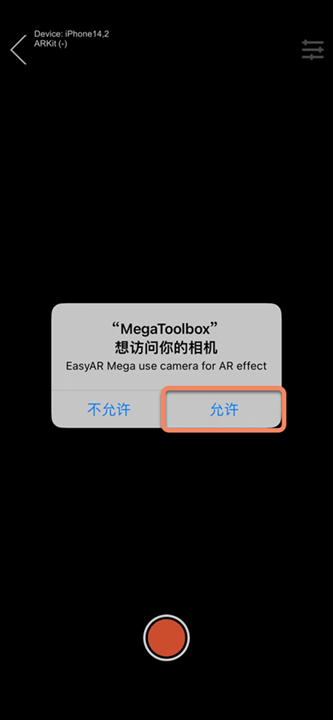
Device initialization
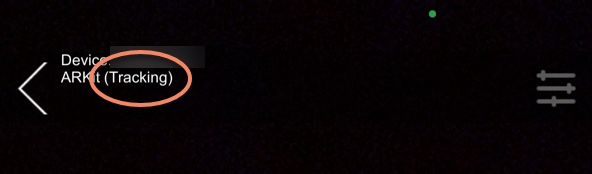
After entering the acquisition screen, first aim the camera at a nearby area with rich textures and slowly pan to initialize. After observing that the status in the upper-left corner of the panel changes to Tracking, raise the phone toward the location to be collected and tap the start acquisition button.
Perform acquisition
After entering the shooting screen, move slowly along the planned acquisition route and acquire data by scanning while walking to build a complete visual map.
- Panoramic scanning: During acquisition, keep the phone at a horizontal viewing angle. After moving forward one meter, briefly stop, rotate the phone 90 degrees to the left from the forward view and hold for 1 second, return to the forward view, then rotate 90 degrees to the right and hold for 1 second. Repeat this cycle to ensure coverage of the views on both sides.
- High-place acquisition: If there are tall buildings or landmarks in the space and the camera cannot capture the full view, keep your position, tilt the camera upward, and acquire once more.
Tip
- Acquisition should be a single continuous acquisition. Do not interrupt it during the process.
- Move slowly during acquisition and avoid quick turns or running.
- Be sure to return to the starting position at the end to complete a closed route loop.
- The trajectory line displayed in real time during acquisition can help determine whether the acquisition route is closed and whether the target area is covered.
Finish and save
After completing acquisition from all viewpoints, stop recording and persistently save the data to the device.
After acquisition is complete, tap the red button in the middle at the bottom to stop acquisition and enter the save page.

On the save page, enter a name for the acquisition data (English letters and numbers only), then tap the
Savebutton. The acquisition data will be saved to the phone.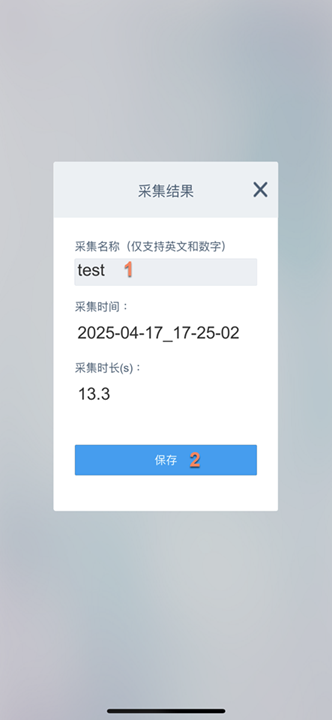
Notes
- The entire acquisition process must remain in the
Trackingstate. Keep acquisition stable throughout and avoid quick turns or sudden stops. - Acquisition duration cannot exceed
15 minutes. If it exceeds15 minutes, acquisition will be forcibly ended and the save page will be opened. - Do not switch the app to the background during acquisition. Switching to the background will cause acquisition to fail.
- Make sure the ambient light is sufficient, even, and stable, and avoid areas that are too dark or overexposed.
- Do not keep aiming at plain-color surfaces such as white walls or metal for a long time, or at reflective and transparent glass areas.
- If acquisition fails, restart acquisition.
Next steps
After acquisition is complete, refer to export data to export the data, and create a small-area mobile acquisition task in Mega Developer Center for mapping.