Create a Super-Large-Scale Fusion Task
This article details the complete operation process for a super-large-scale multi-map fusion task, including task creation, data preparation, data upload, mapping operation, and result viewing, ensuring that users can efficiently meet the mapping requirements for complex scenarios.
The super-large-scale multi-map fusion function requires consultation with the business team for activation. We will conduct a review based on the project requirements and environmental space. Upon successful review, the fusion mapping permission will be unlocked. After obtaining the permission, you can manually create a multi-map fusion task in the mapping task section.
Create a Multi-Map Fusion Task
After completing Create a Project, follow these steps to create a multi-map fusion task:
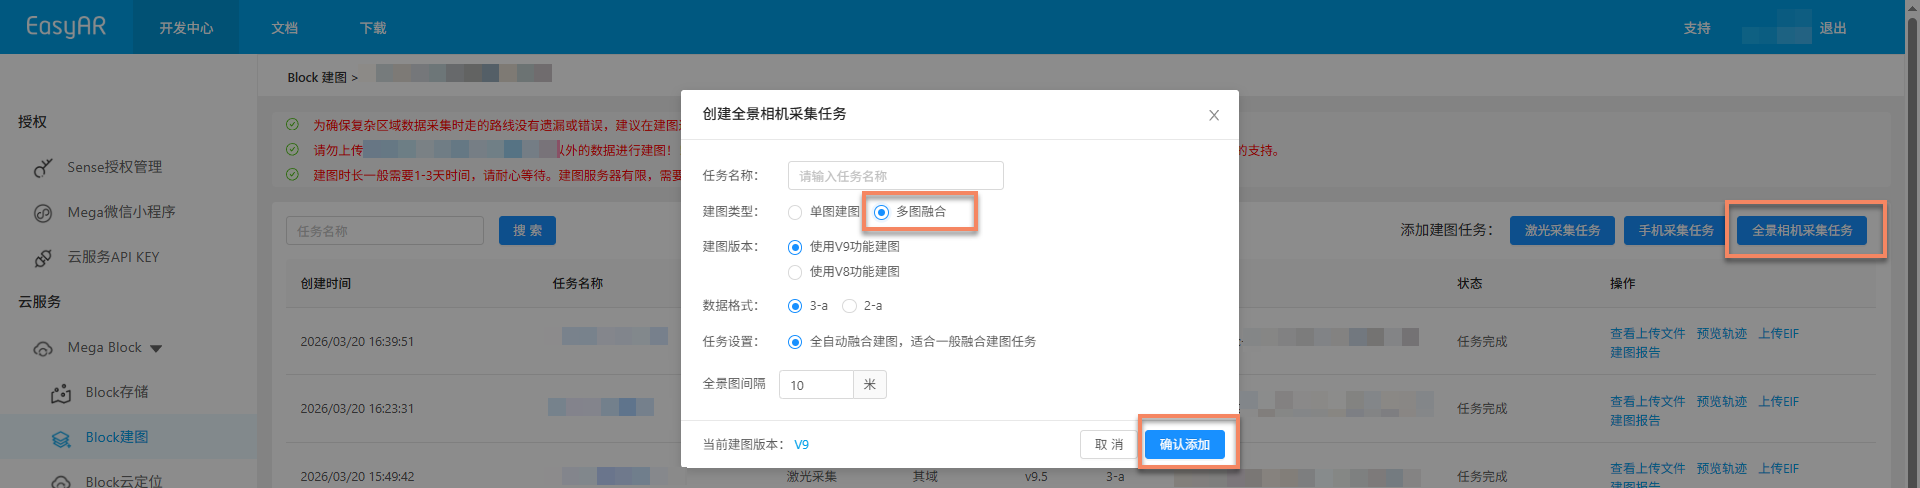
- Click
Manageto enter the mapping task management interface. - Click the
Panoramic Camera Acquisition Taskbutton in the top right corner. - Fill in the task information in the pop-up dialog box:
- Task Name: Enter a custom task name.
- Mapping Type: Select
Multi-Map Fusion(requires the permission for multi-map fusion mapping). - Mapping Version and Data Format: It is recommended to use the latest version.
- Click
Confirm and Addto complete the creation.
Note
The super-large-scale multi-map fusion function requires contacting the business team to activate the permission. Only after successful review can you create a multi-map fusion task in the mapping task section.
Add Subordinate Mapping Tasks
After the multi-map fusion task is created, you need to add subordinate mapping tasks for each independent acquisition area.
- Click
Multi-Map Fusion Managementto enter the corresponding multi-map fusion management interface.
- Click
Add Subordinate Mapping, enter the task name, and clickConfirmto create a sub-map. Note that each independent acquisition area requires the creation of a subordinate mapping task.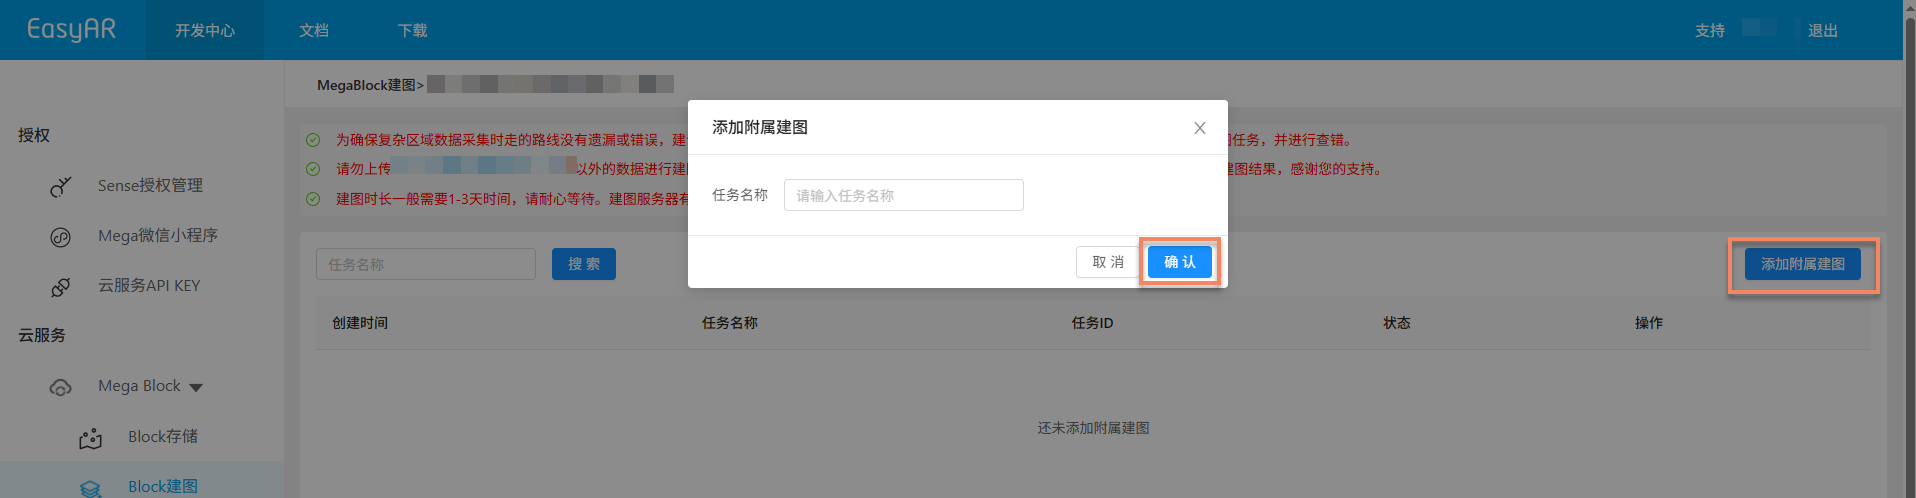
Data Preparation
Before starting the mapping task, you need to ensure that the collected spatial data meets the requirements and is organized and stored according to the specifications. The data preparation specifications are basically the same as those for single-map mapping tasks, with only differences in the acquisition method.
Data Acquisition and Export
Use a panoramic camera to collect spatial data. For relevant device configurations and acquisition key points, please refer to:
- GoPro Max Device Configuration
- GoPro Max2 Device Configuration
- Acquisition Route Planning
- Super-Large-Space Data Acquisition Method
- Acquisition Key Points Checklist
- GoPro Max/Max2 Data Export
Other Data Specifications
- Data Folder Naming
- Data Storage Location
- Data File Structure Specification
- Data File Naming Specification
Upload Data
The rules for uploading data are the same as those for single-map tasks. Please upload the data under the corresponding task. For details about data upload, please refer to Upload Data for Single-Map Tasks.
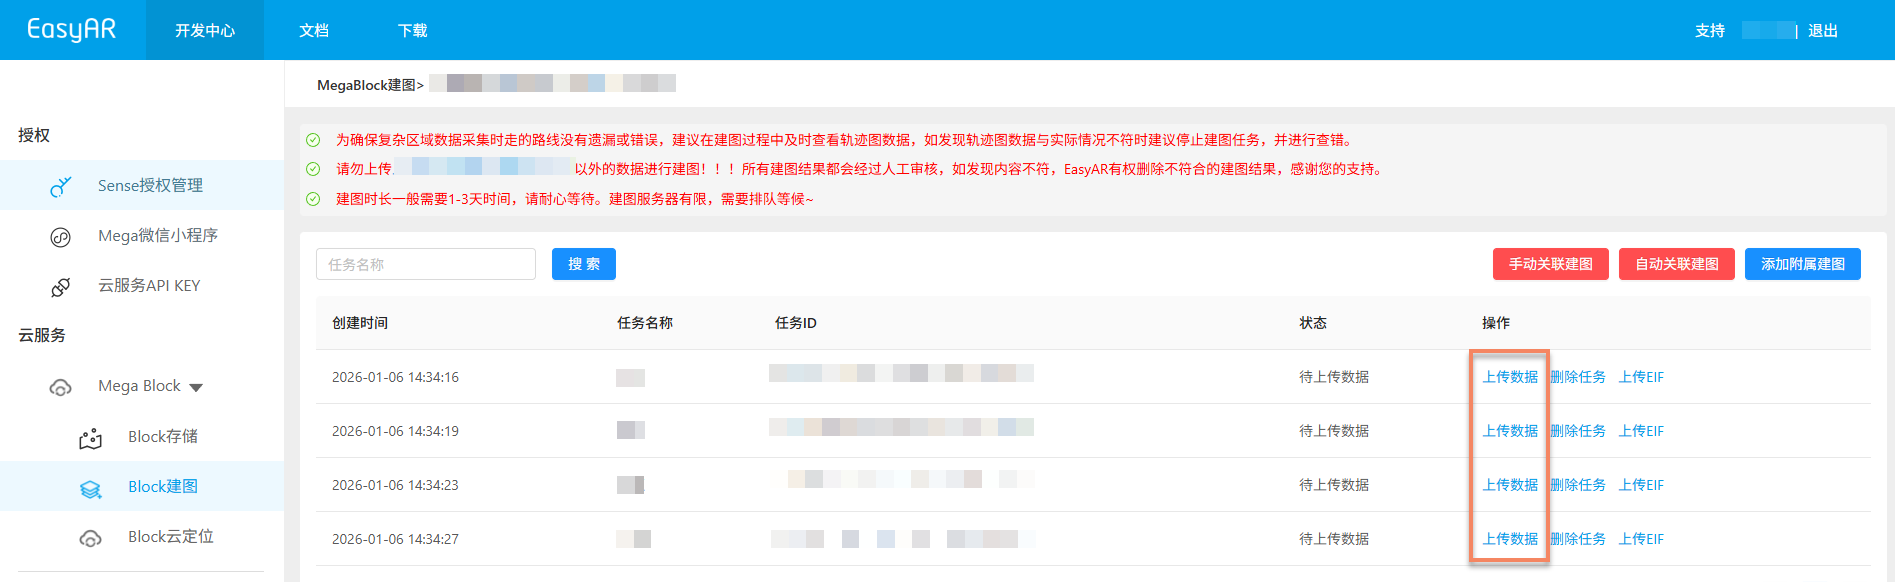
Start Multi-Map Mapping
After all task data has been uploaded, click Auto-Associate Mapping or Manual-Associate Mapping to start mapping. Please be patient at this time as the mapping time for a multi-map fusion task is relatively long. If the task is not completed after a long time, please contact the business team.
Auto-Associate Mapping
- Suitable for most scenarios.
Manual-Associate Mapping
- Suitable for cases where the mapping results do not meet expectations.
- Steps for manually specifying the multi-map acquisition relationship:
- Arrange the sub-task blocks according to the relative position relationship of the actual acquisition areas.
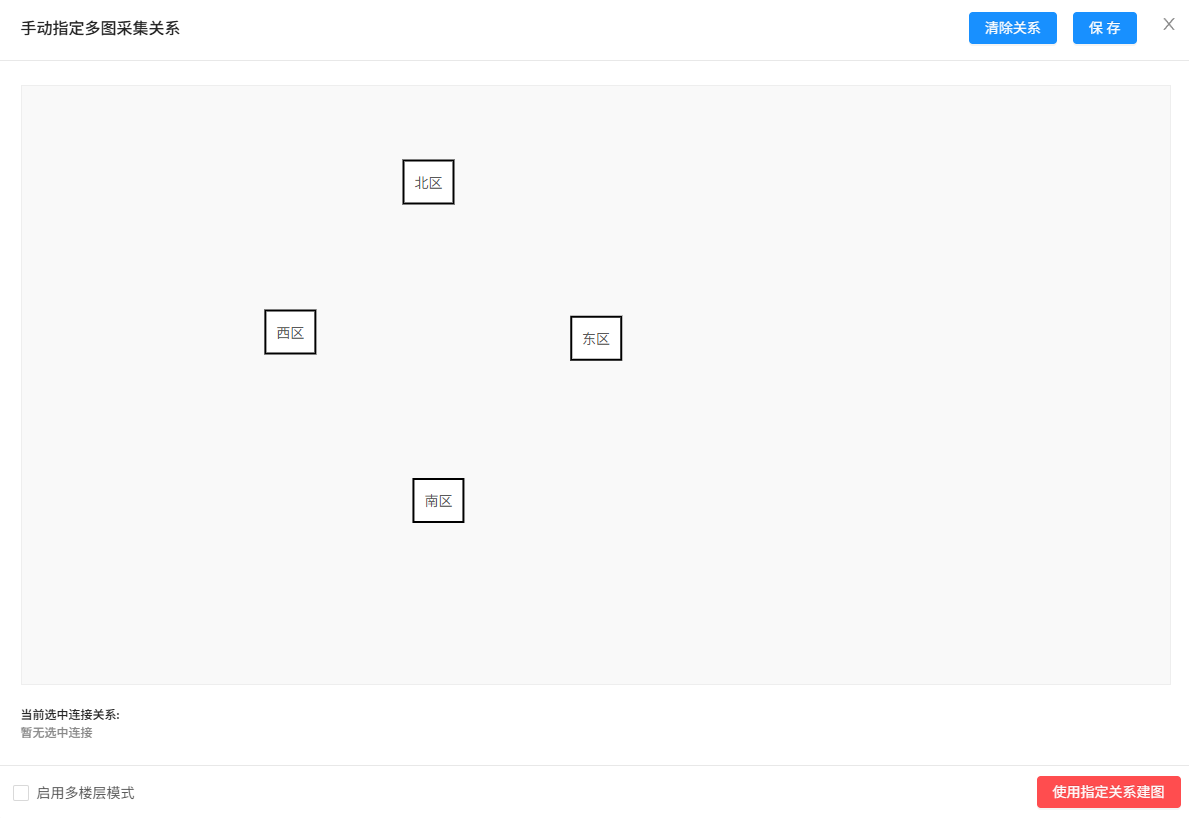
- Create connection relationships between sub-tasks.
Principle: Add a connection line when the acquisition data of sub-tasks have overlapping parts.
Operation steps:
- Click one sub-task and then click another sub-task that needs to be connected to create a connection.
- Handling of misoperations: Click the connection line to make it turn red, and then click the
Delete Connectionbutton to delete the current connection line. - Delete all connections: Click the
Clear Relationshipbutton in the top right corner. - Temporary save: If you need to view the uploaded data, click
Savein the top right corner, and you can continue the operation next time.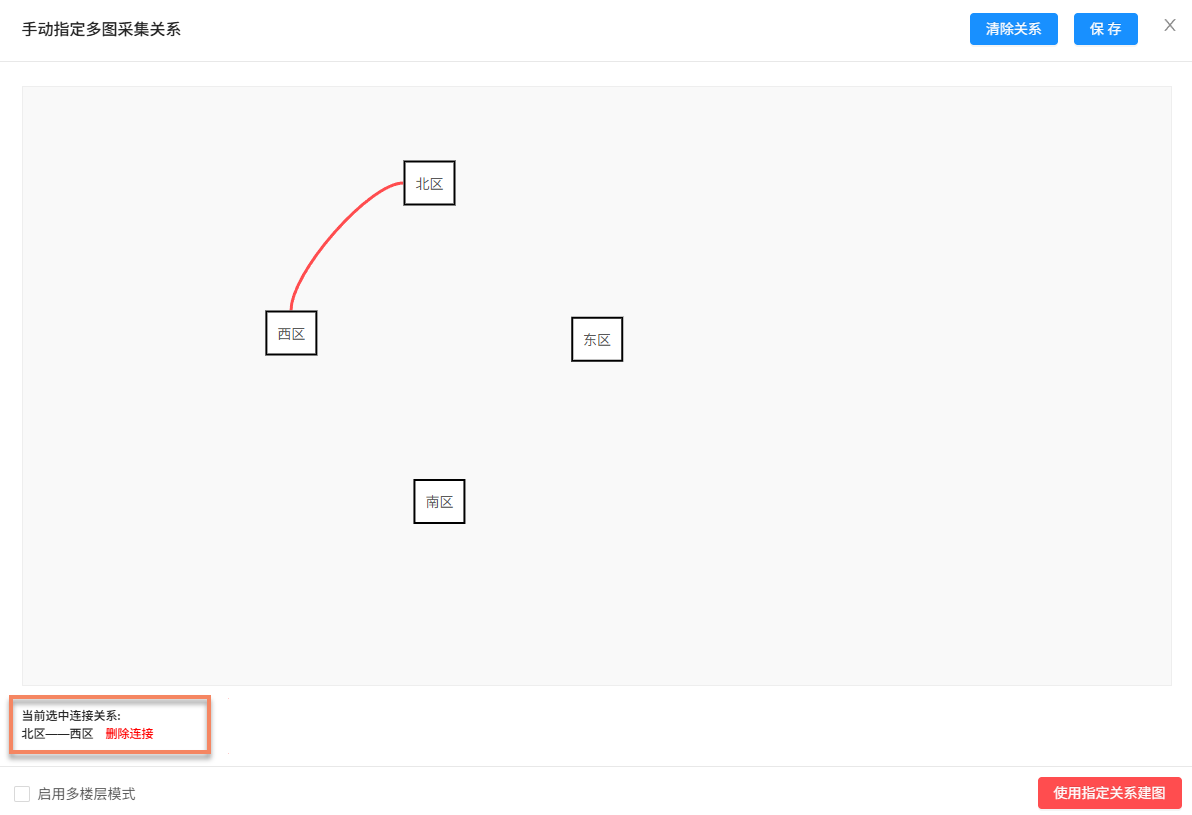
- If there is a cross-floor acquisition scenario, enable the multi-floor mode to assign floor information to sub-maps:
a. Check the
Enable Multi-Floor Modeoption. b. ClickSpecify Floorin each sub-map box to add floor information to the current sub-map.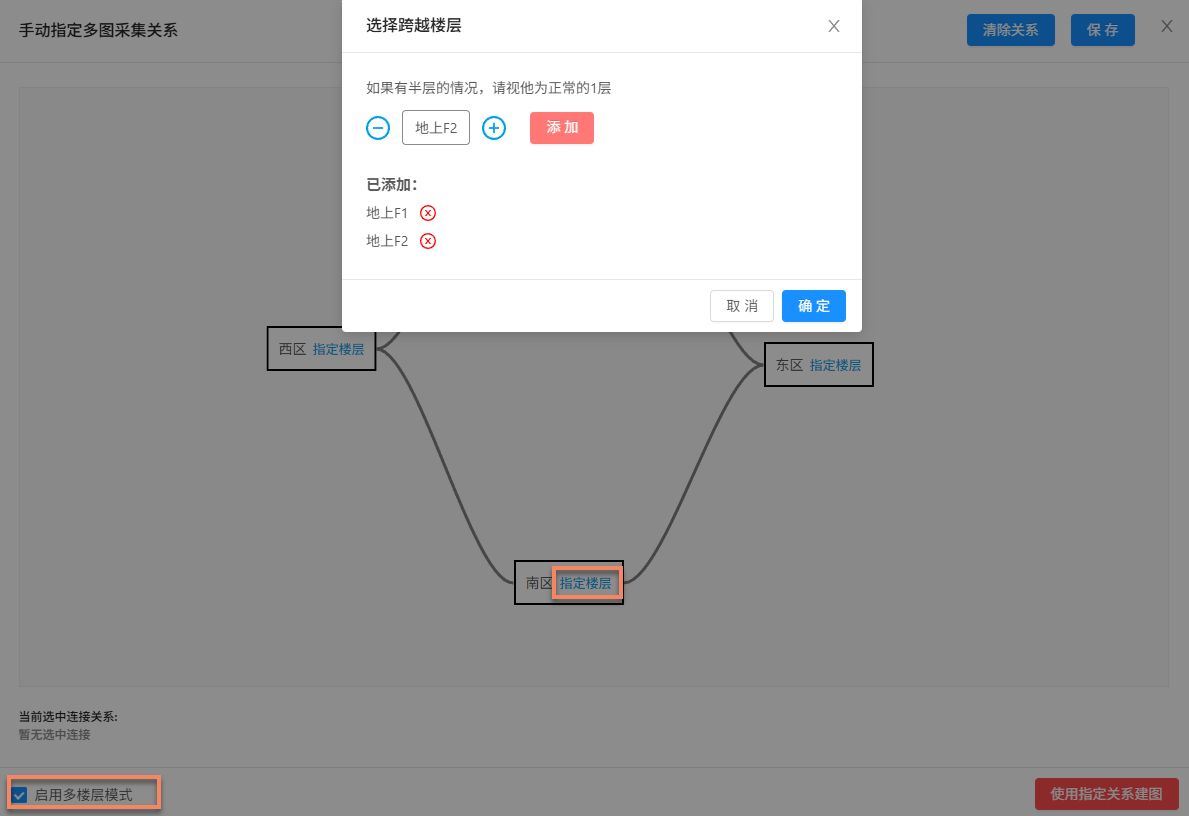
- After checking and confirming that all connection relationships between sub-tasks are correct, click the
Map with Specified Relationshipsbutton in the bottom right corner to start mapping.
- Arrange the sub-task blocks according to the relative position relationship of the actual acquisition areas.
Auxiliary Functions
The following functions can help you better manage and operate mapping tasks and improve work efficiency:
View Uploaded Files
Used to check whether the uploaded mapping files are complete and avoid mapping failures caused by missing files.
- Click the
Multi-Map Fusion Managementbutton in the operation bar to enter the corresponding multi-map fusion management interface. Click theView Uploaded Filesbutton and view the list of uploaded files for the corresponding subordinate mapping in the pop-up window to confirm whether the files have been uploaded completely.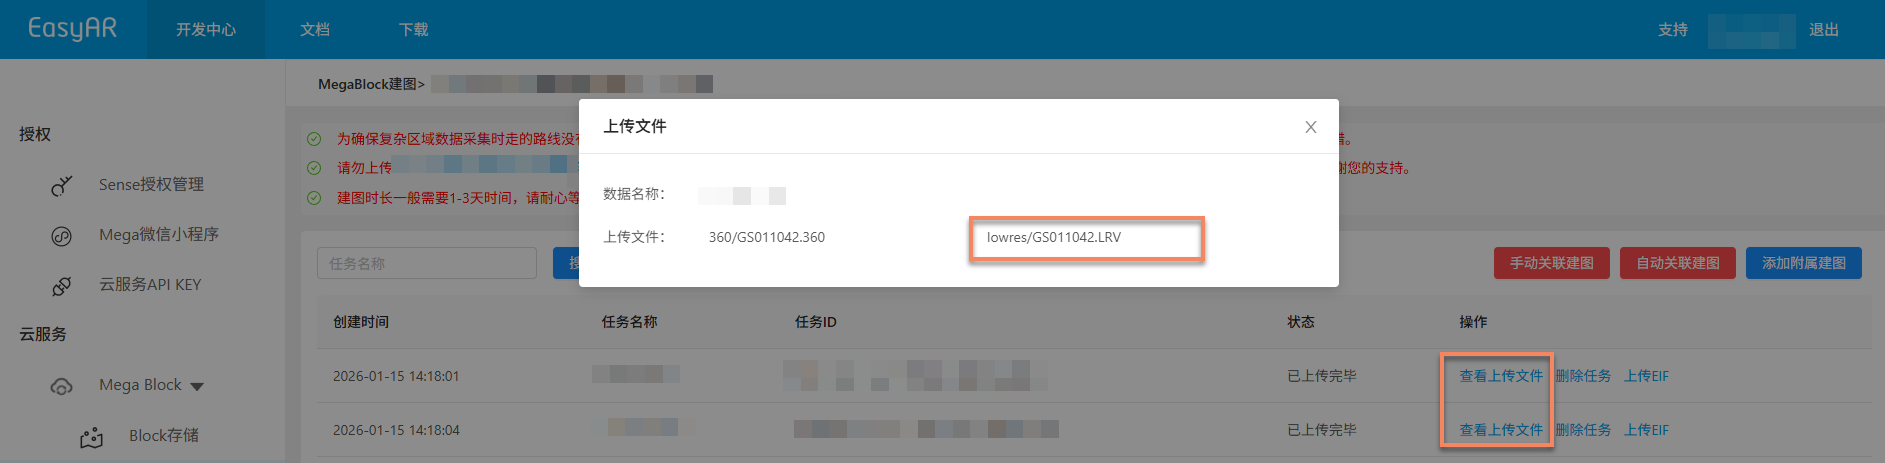
- China Region 1: You can click on a specific
LRV fileto preview the video online and check whether the quality of the collected data meets the requirements.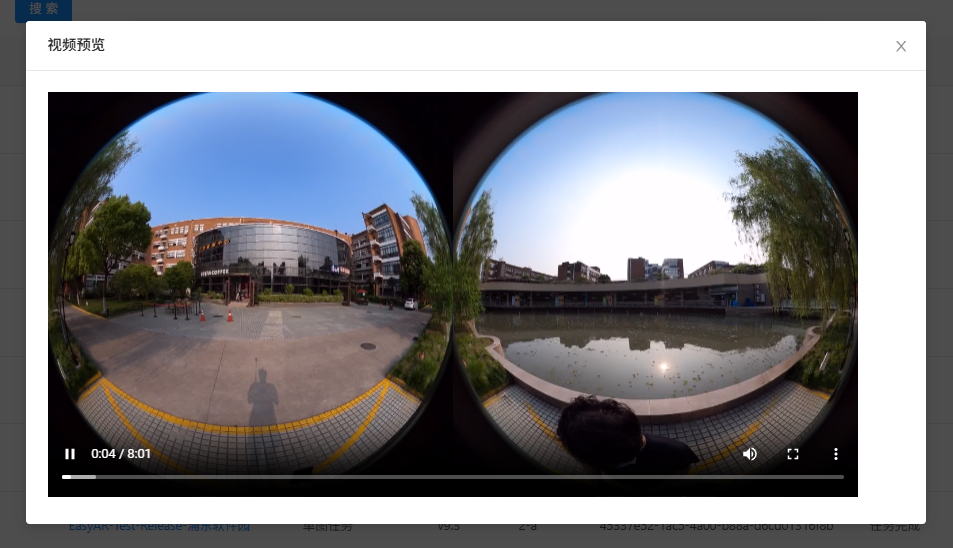
Stop Mapping
Before the multi-map fusion mapping task is completed, if you find that the wrong data has been uploaded or the trajectory map data does not match the actual situation, you can click the Stop Mapping button and click Confirm in the secondary confirmation pop-up window to stop mapping.

Delete a Task
If the current mapping task fails to generate or is no longer needed, you can click the Delete Task button to delete the task. Click Delete in the secondary confirmation pop-up window to complete the deletion operation.

Confirm Mapping Results
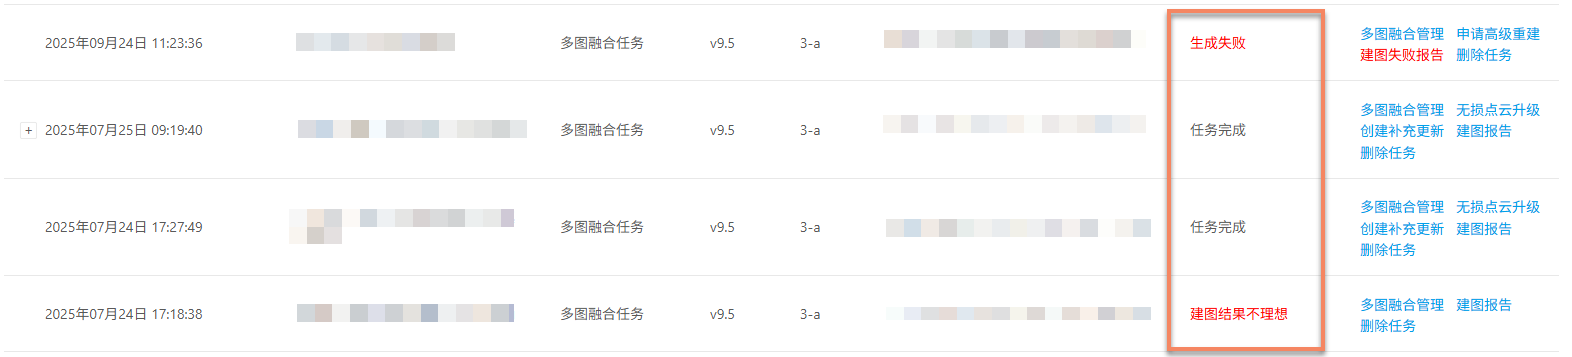
After the task enters the mapping process, you can determine whether the mapping task is completed through the Task Status. When the status of the multi-map fusion task shows Task Completed, Mapping Results Are Not Ideal, or Generation Failed, it means that the mapping task has ended.
Mapping Succeeded
When the task status shows Task Completed or Mapping Results Are Not Ideal, it means that the mapping is successful and the mapping results have been generated. After multi-map mapping is completed, the results will be displayed in the multi-map fusion management interface.
Explanation of mapping results:
Task Completed: Mapping is completed and fusion is successful. The mapping result is a complete Mega Block.
Mapping Results Are Not Ideal: Mapping is completed but fusion is poor. The mapping result consists of multiple Mega Blocks.
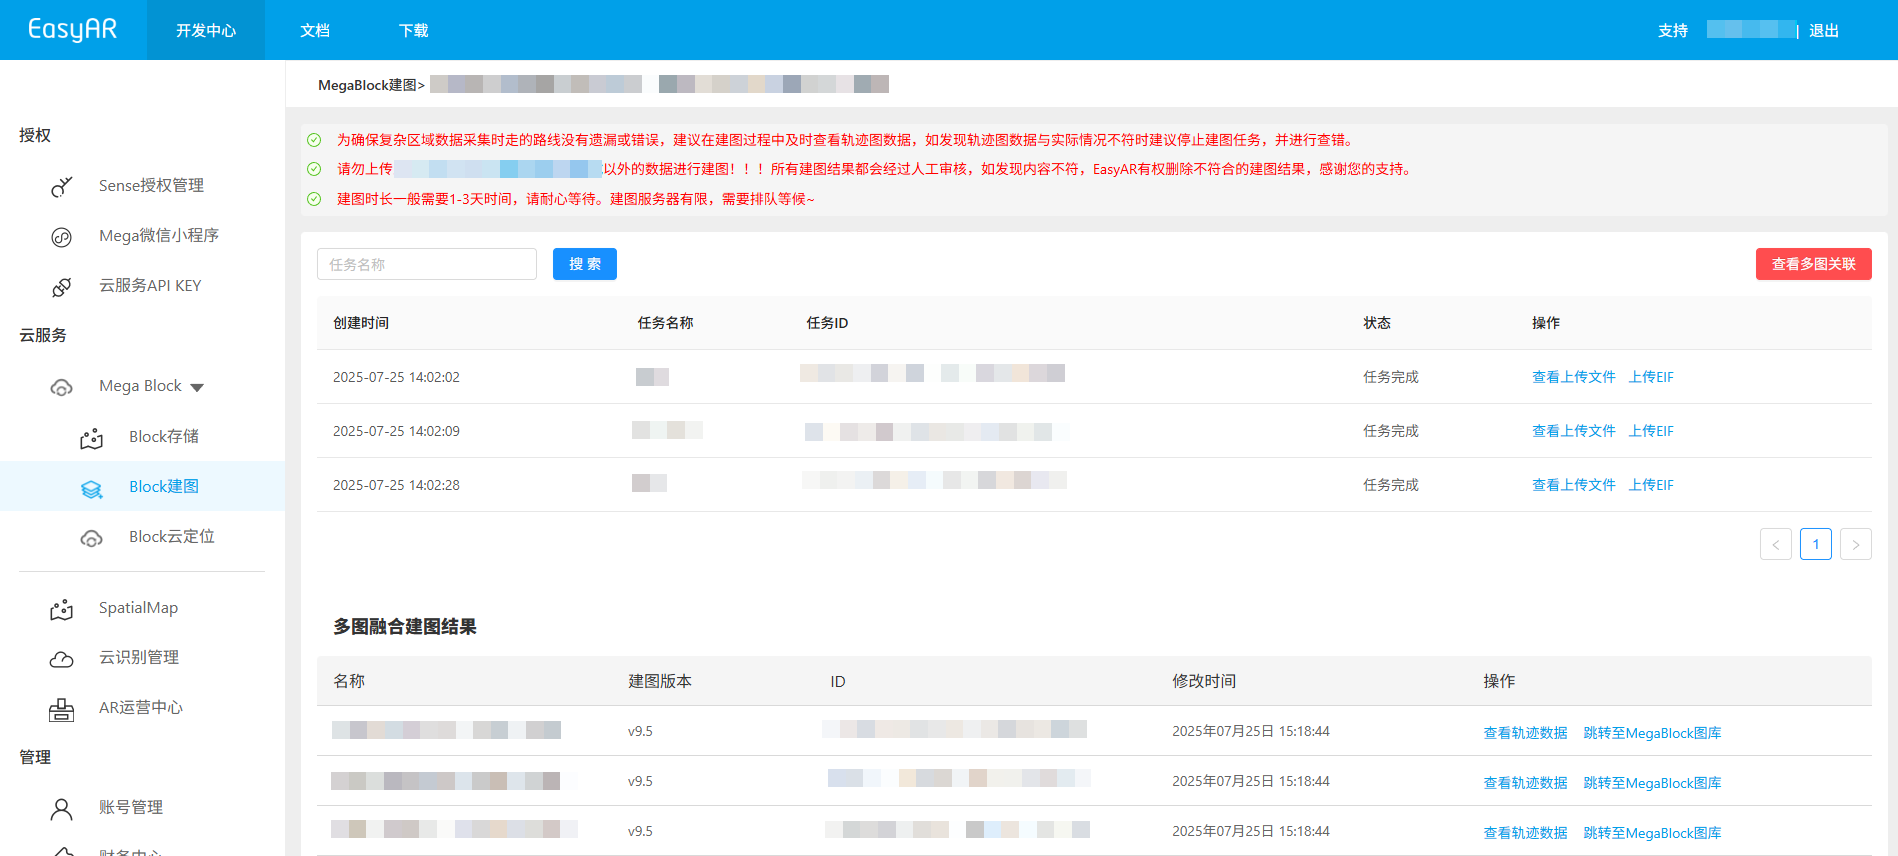
When the status
Mapping Results Are Not Idealappears, it is recommended to conduct the following checks and verifications:- Acquisition route specification: Ensure that the acquisition route complies with the specifications and that different sub-maps meet the overlap requirements. (Reference: Acquisition Specifications)
- File upload completeness: Ensure that all files have been uploaded without omission. (Reference: Preview Uploaded Files)
- Acquisition area coverage: Ensure that the acquisition area covers all requirements without missing any areas. (Reference: Review the Acquisition Route)
- Accuracy of manual association: If manual association mapping has been performed, ensure that the sub-map relationships are specified accurately. (Reference: Manual-Associate Mapping)
If any of the above problems are found, you can correct them and recreate the task. If all the above checks are confirmed to be correct, please contact us for assistance.
View mapping results:
- Review the Acquisition Route
- View the Mapping Report
- Preview the Spatial Model
- View Block Information
Mapping Failed
When the task status shows Generation Failed, it means that the mapping has failed. It is recommended to troubleshoot the problem in the following ways:
- View the mapping report: View the Mapping Report and find solutions based on the report information.
- Refer to troubleshooting: Consult the Troubleshooting Guide for Mapping Failures to obtain solutions to common problems.
- Contact technical support: If the above methods do not solve the problem, please contact EasyAR staff and provide the
JobIDin the mapping report to quickly locate the problem.