Create Annotations for On-Site Operation Verification
This article describes how to use Mega Studio to create annotation data for on-site operation verification.
Note
The following content and tools are not applicable to the Unity application development process.
If you are developing a Unity application, please refer to Package a Unity Application for Effect Verification in the development guide.
Before You Start
Before creating annotation data, you need to prepare the following:
Install Mega Studio
If you have already downloaded and installed the EasyAR Sense Unity Plugin, you can skip this step.
Download the EasyAR Sense Unity Plugin
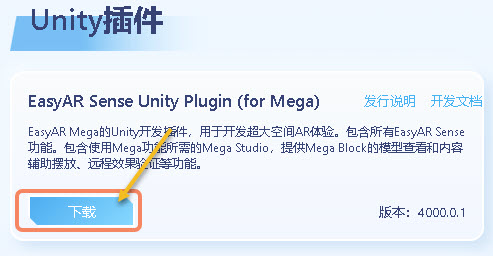
On the EasyAR Download Page, select “EasyAR Sense Unity Plugin (for Mega)” to download, as shown in the following figure:
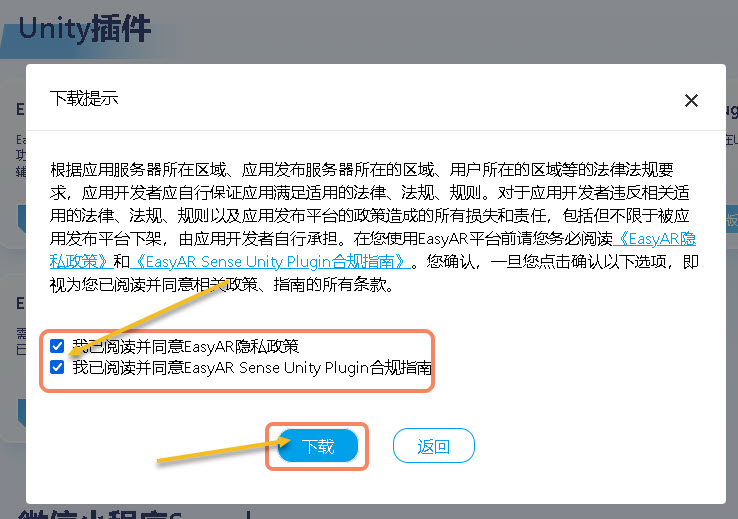
Unzip the file. Unzip the downloaded file into the structure shown in the following figure.


Create a Unity Project
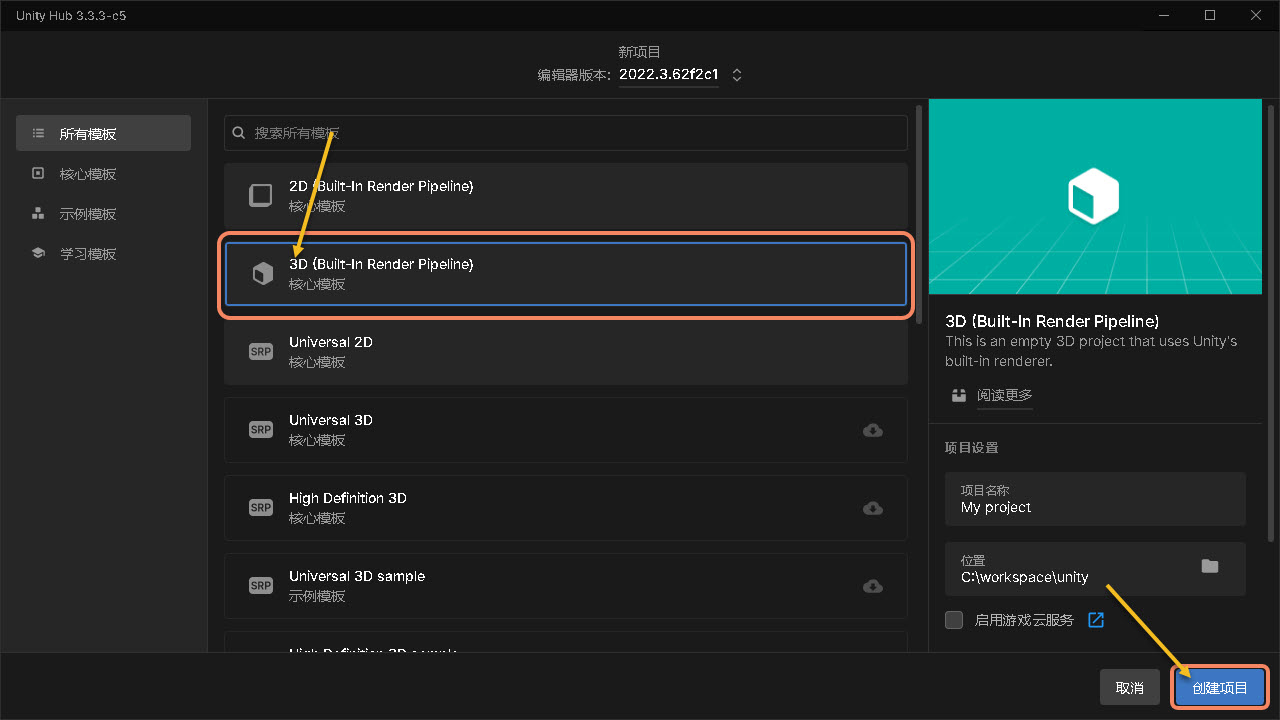
Run Unity and create a project.
Click “New Project”.
Select “3D (Built-In Render Pipeline)”.
Click “Create Project”.

Tip
For versions after Unity 6000, you need to download the 3D (Built-In Render Pipeline) component first.
Install Mega Studio
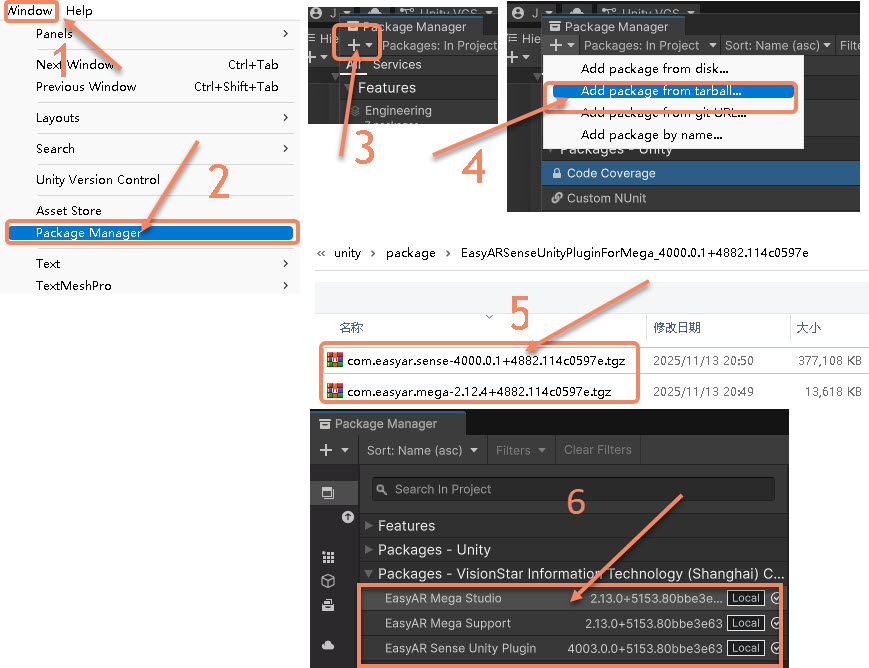
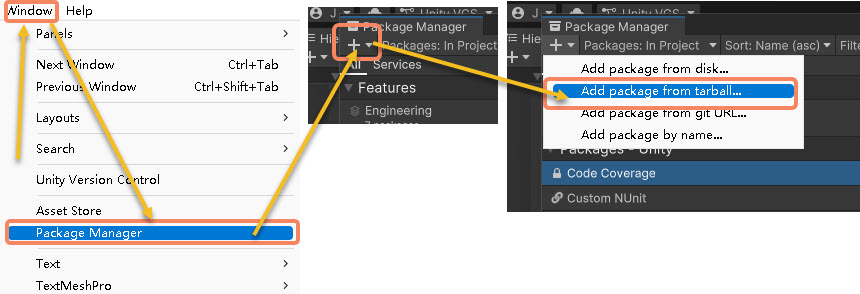
Click “Window” on the menu bar.
Select “Package Manager”.
In the pop-up window, click the “+” symbol in the upper left corner.
Select “Add package from tarball...”.
Install the three packages
com.easyar.sense,com.easyar.mega, andcom.easyar.mega.studioin sequence.After successful installation, it is shown as in the following figure.
Create Annotation Data
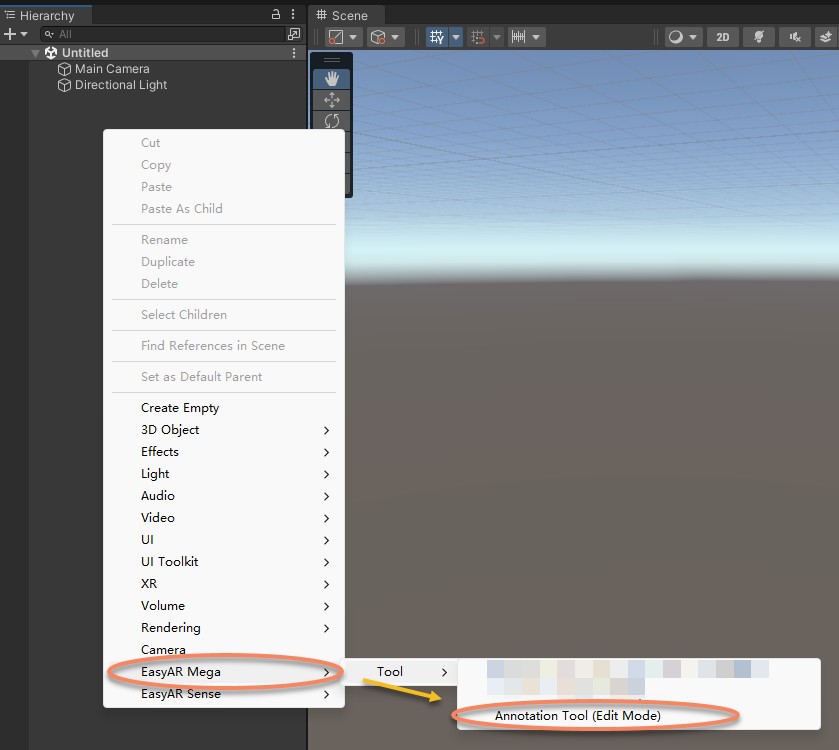
Right-click on the blank area of the “Hierarchy” panel on the left and import “Annotation Tool (Edit Mode)”.
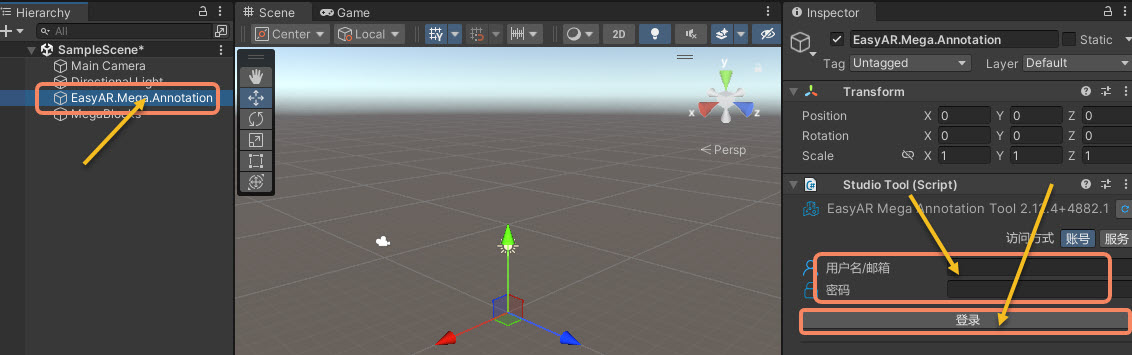
- Select “EasyAR.Mega.Annotation” in the “Hierarchy” panel on the left.
- Enter your EasyAR account name and password in the “Inspector” panel on the right.
- Click “Login”.
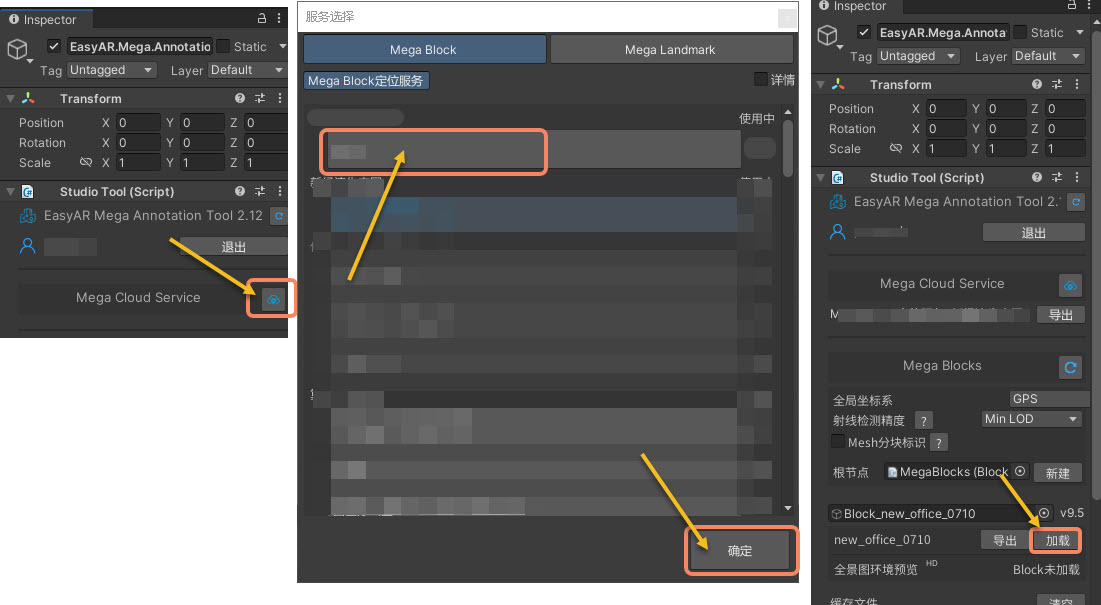
- Click the icon after “Mega Cloud Service” in the “Inspector” panel on the right.
- In the opened window, select a “Mega Block Positioning Service”.
- Click “OK”.
- Click “Load” in the “Inspector” panel on the right to add the map to the Unity project.
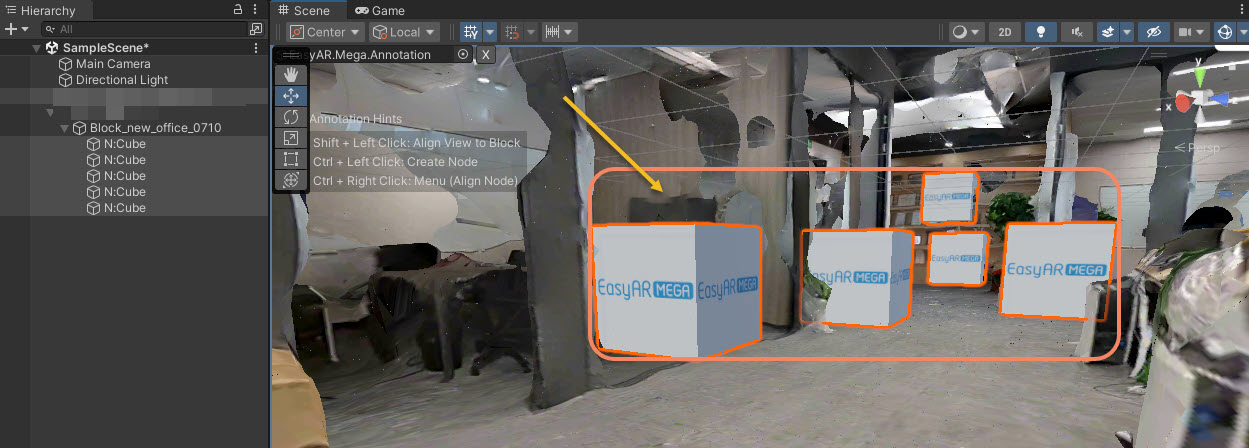
- Press Ctrl and the left mouse button simultaneously at the spatial position to be annotated to create an annotation cube.
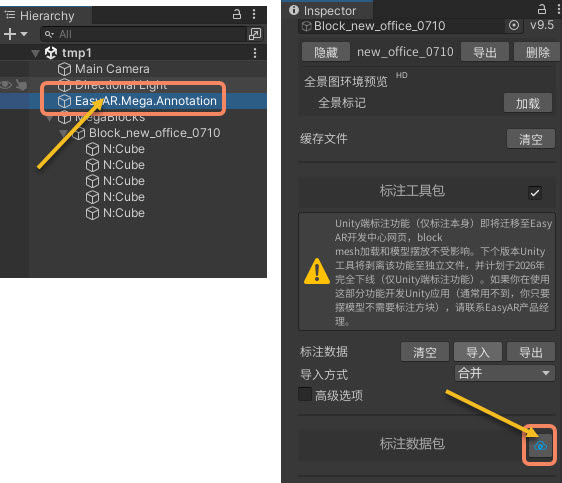
- Select “EasyAR.Mega.Annotation” in the “Inspector” panel on the left.
- Click the icon after the annotation data package in the “Inspector” panel on the right.
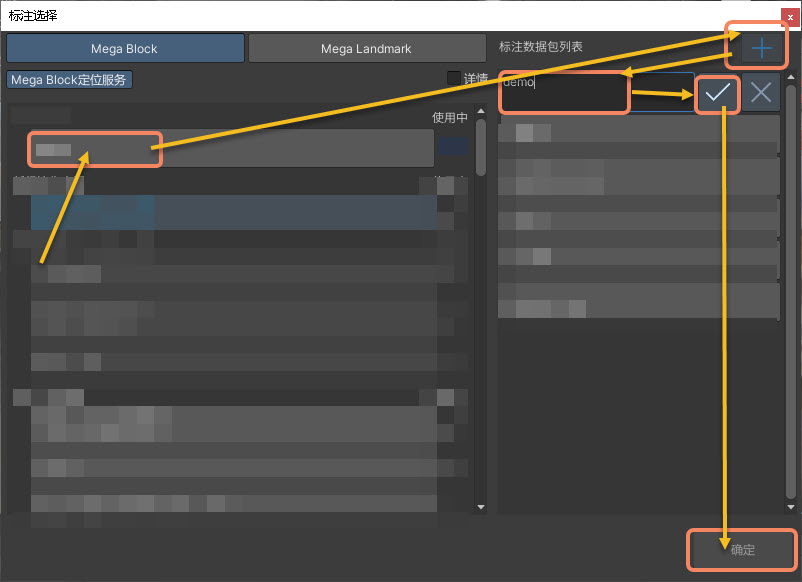
- In the opened window, select a “Mega Block Positioning Service” on the left.
- Click the “+” symbol in the upper right corner to create an annotation data package.
- Enter the name of the annotation data package.
- Click the “√” symbol to confirm.
- Click “OK” to save the annotation data package.
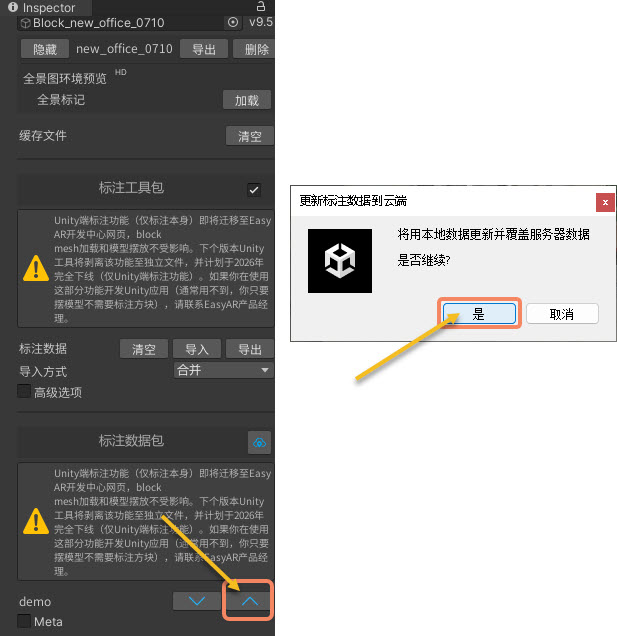
- Click below the annotation data package in the “Inspector” panel on the right and click the “∧” button.
- Finally, click “Yes” in the pop-up window to complete the saving of the annotation data package. You can view and delete the annotation data in the Block Cloud Positioning of the cloud service.