Target image management
Target images (Targets) can be managed in two ways:
- Visual management: Log in to the EasyAR Developer Portal for manual maintenance.
- API automated management: Integrate into your own business system or management backend by calling Web Service REST API.
Important
In the cloud recognition service, target image management and image recognition are two different requirements, corresponding to two different Cloud URL endpoints.
Data center region selection
The data center where the image library runs supports the following region choices:
- China-Shanghai
- US-Silicon Valley
Method 1: Managing target images in the EasyAR Developer Portal
Suitable for small-scale testing or quick manual uploads. Steps:
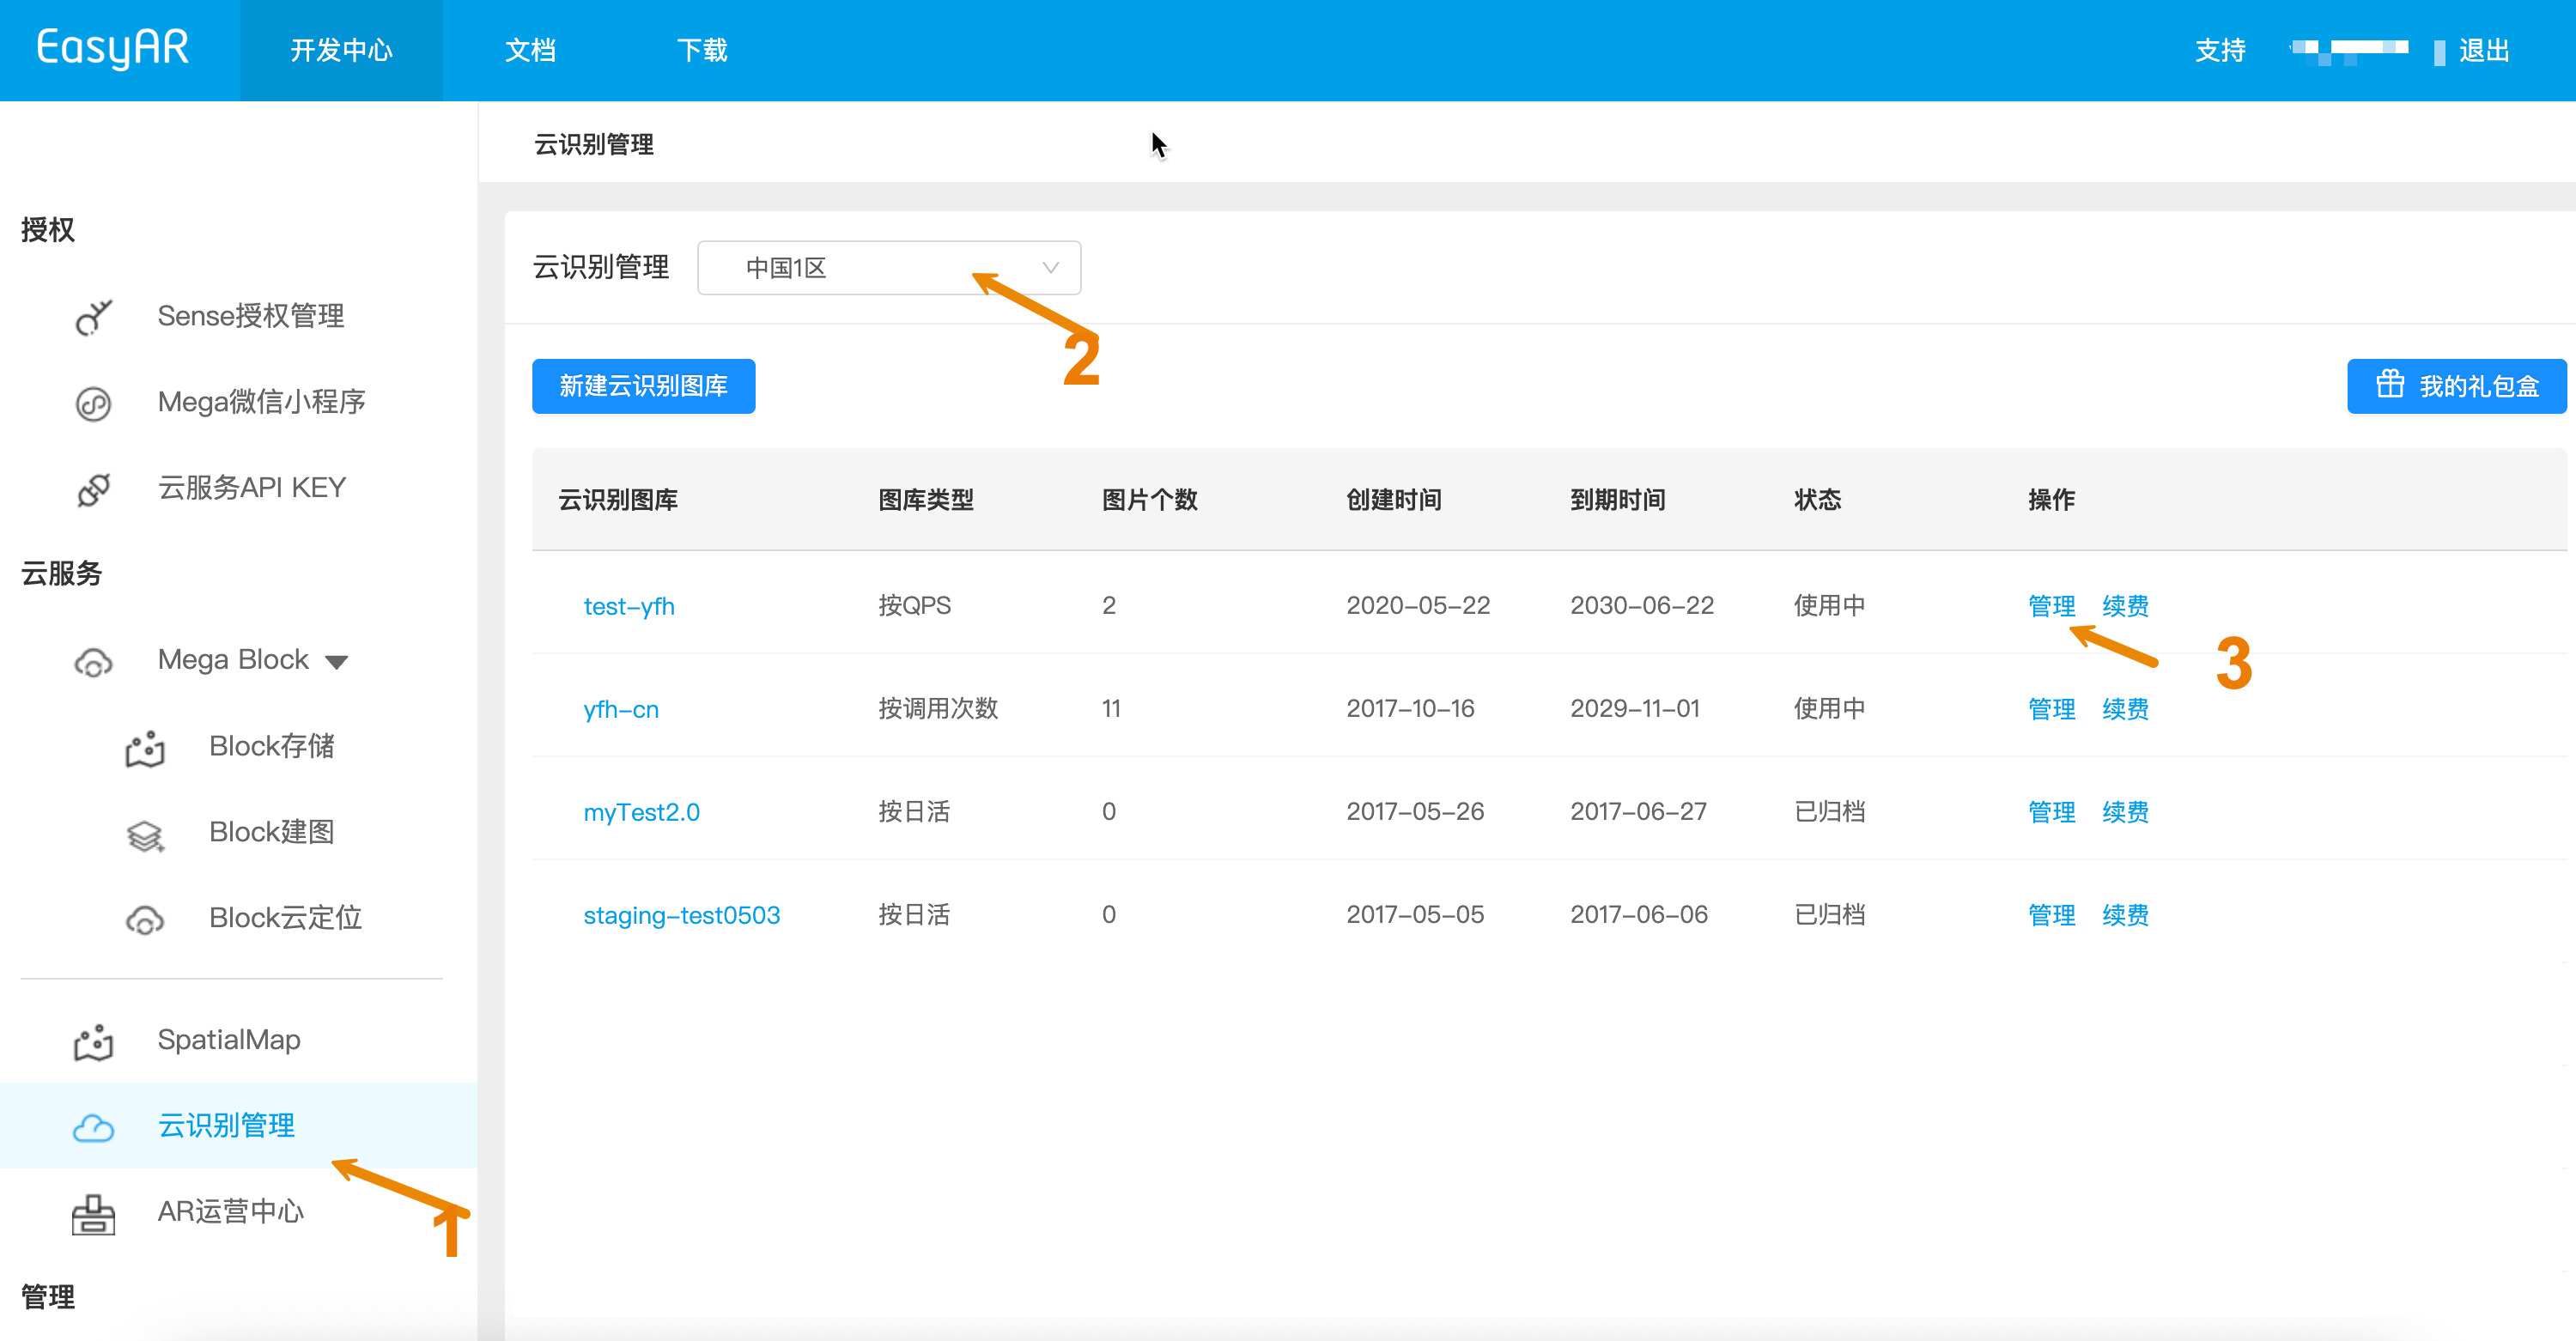
- Log in to the EasyAR Developer Portal and go to Cloud Recognition Management.
- Select the target region. If no image library has been created, create and activate a cloud recognition image library first.
- Click Manage in the image library list to enter the target image maintenance interface for upload, modification, or deletion.
Method 2: Using rest api for automated management
For applications requiring handling large volumes of target images, using Web Service REST API is recommended to enable automated workflows in your application or management backend.
Preparation checklist
Below is the preparation checklist. Before managing target images, you need to prepare a new cloud recognition database instance (Cloud Database)
- CRS AppId
- API Key / API Secret or Token
- Cloud URL
- Server-end URL: Target image management URL address, using port 443 for https
- Client-end URL: Image recognition service URL address, using port 8443 for https
Important
Port distinction note: The target management API endpoint (443) and the cloud recognition API endpoint (8443) for mobile/Unity are two different channels. Please distinguish them during configuration.
How to obtain checklist items
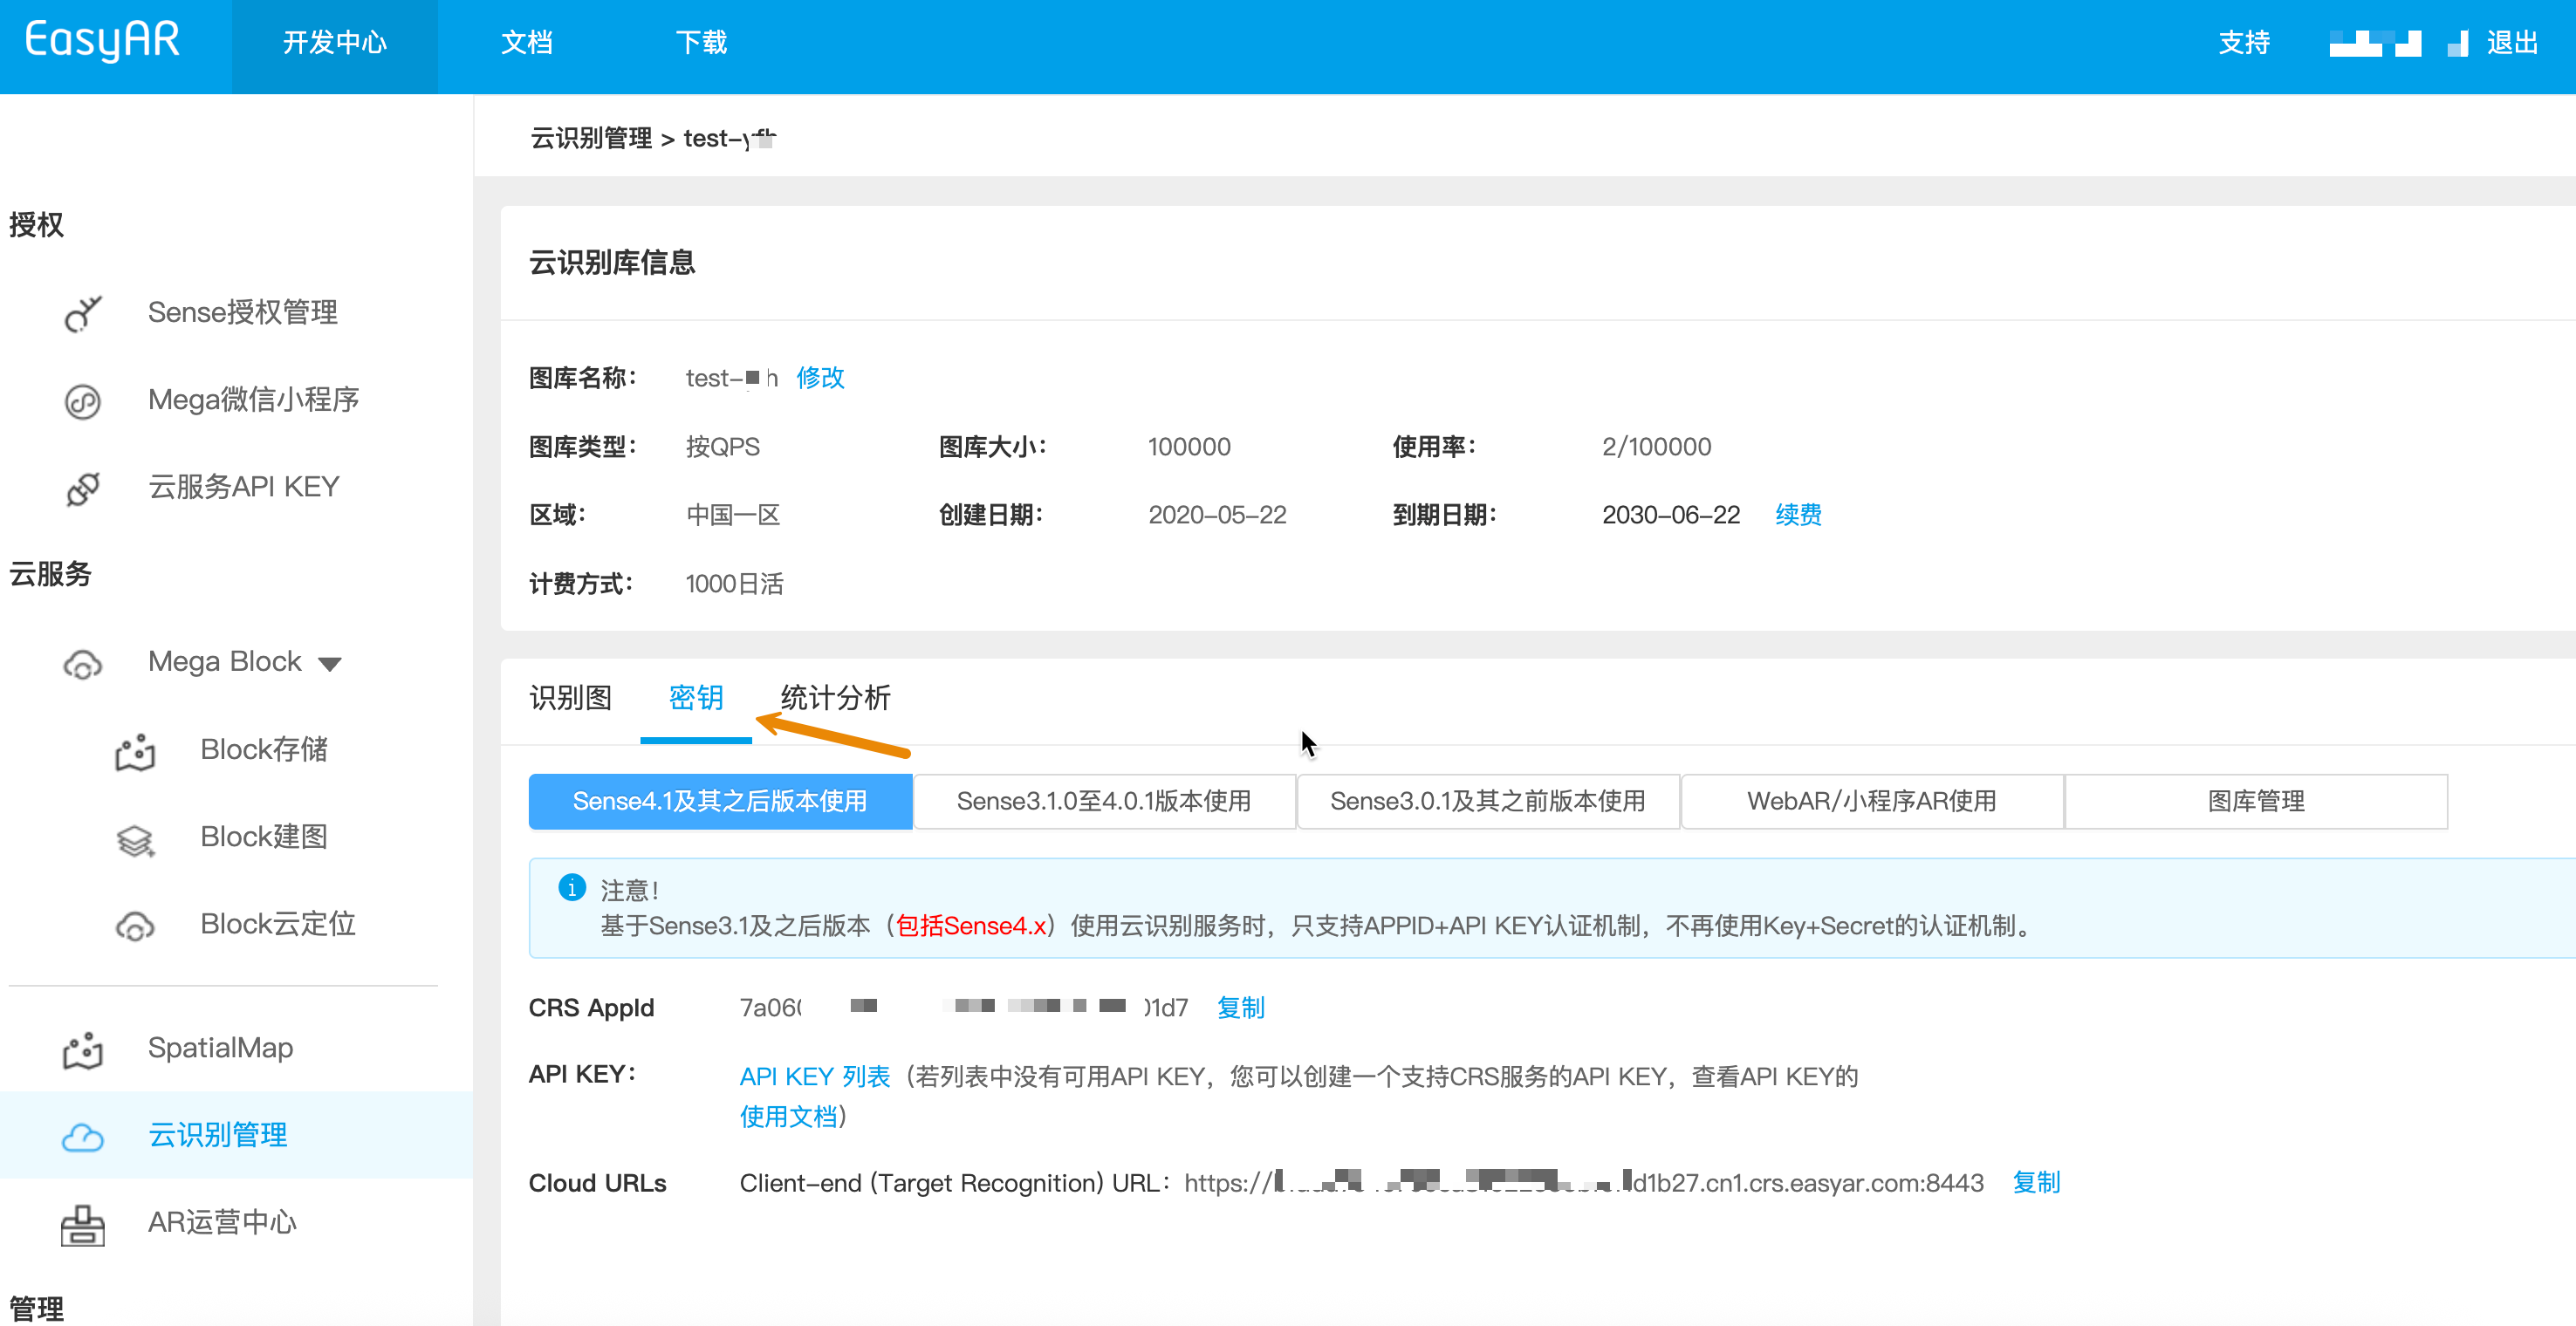
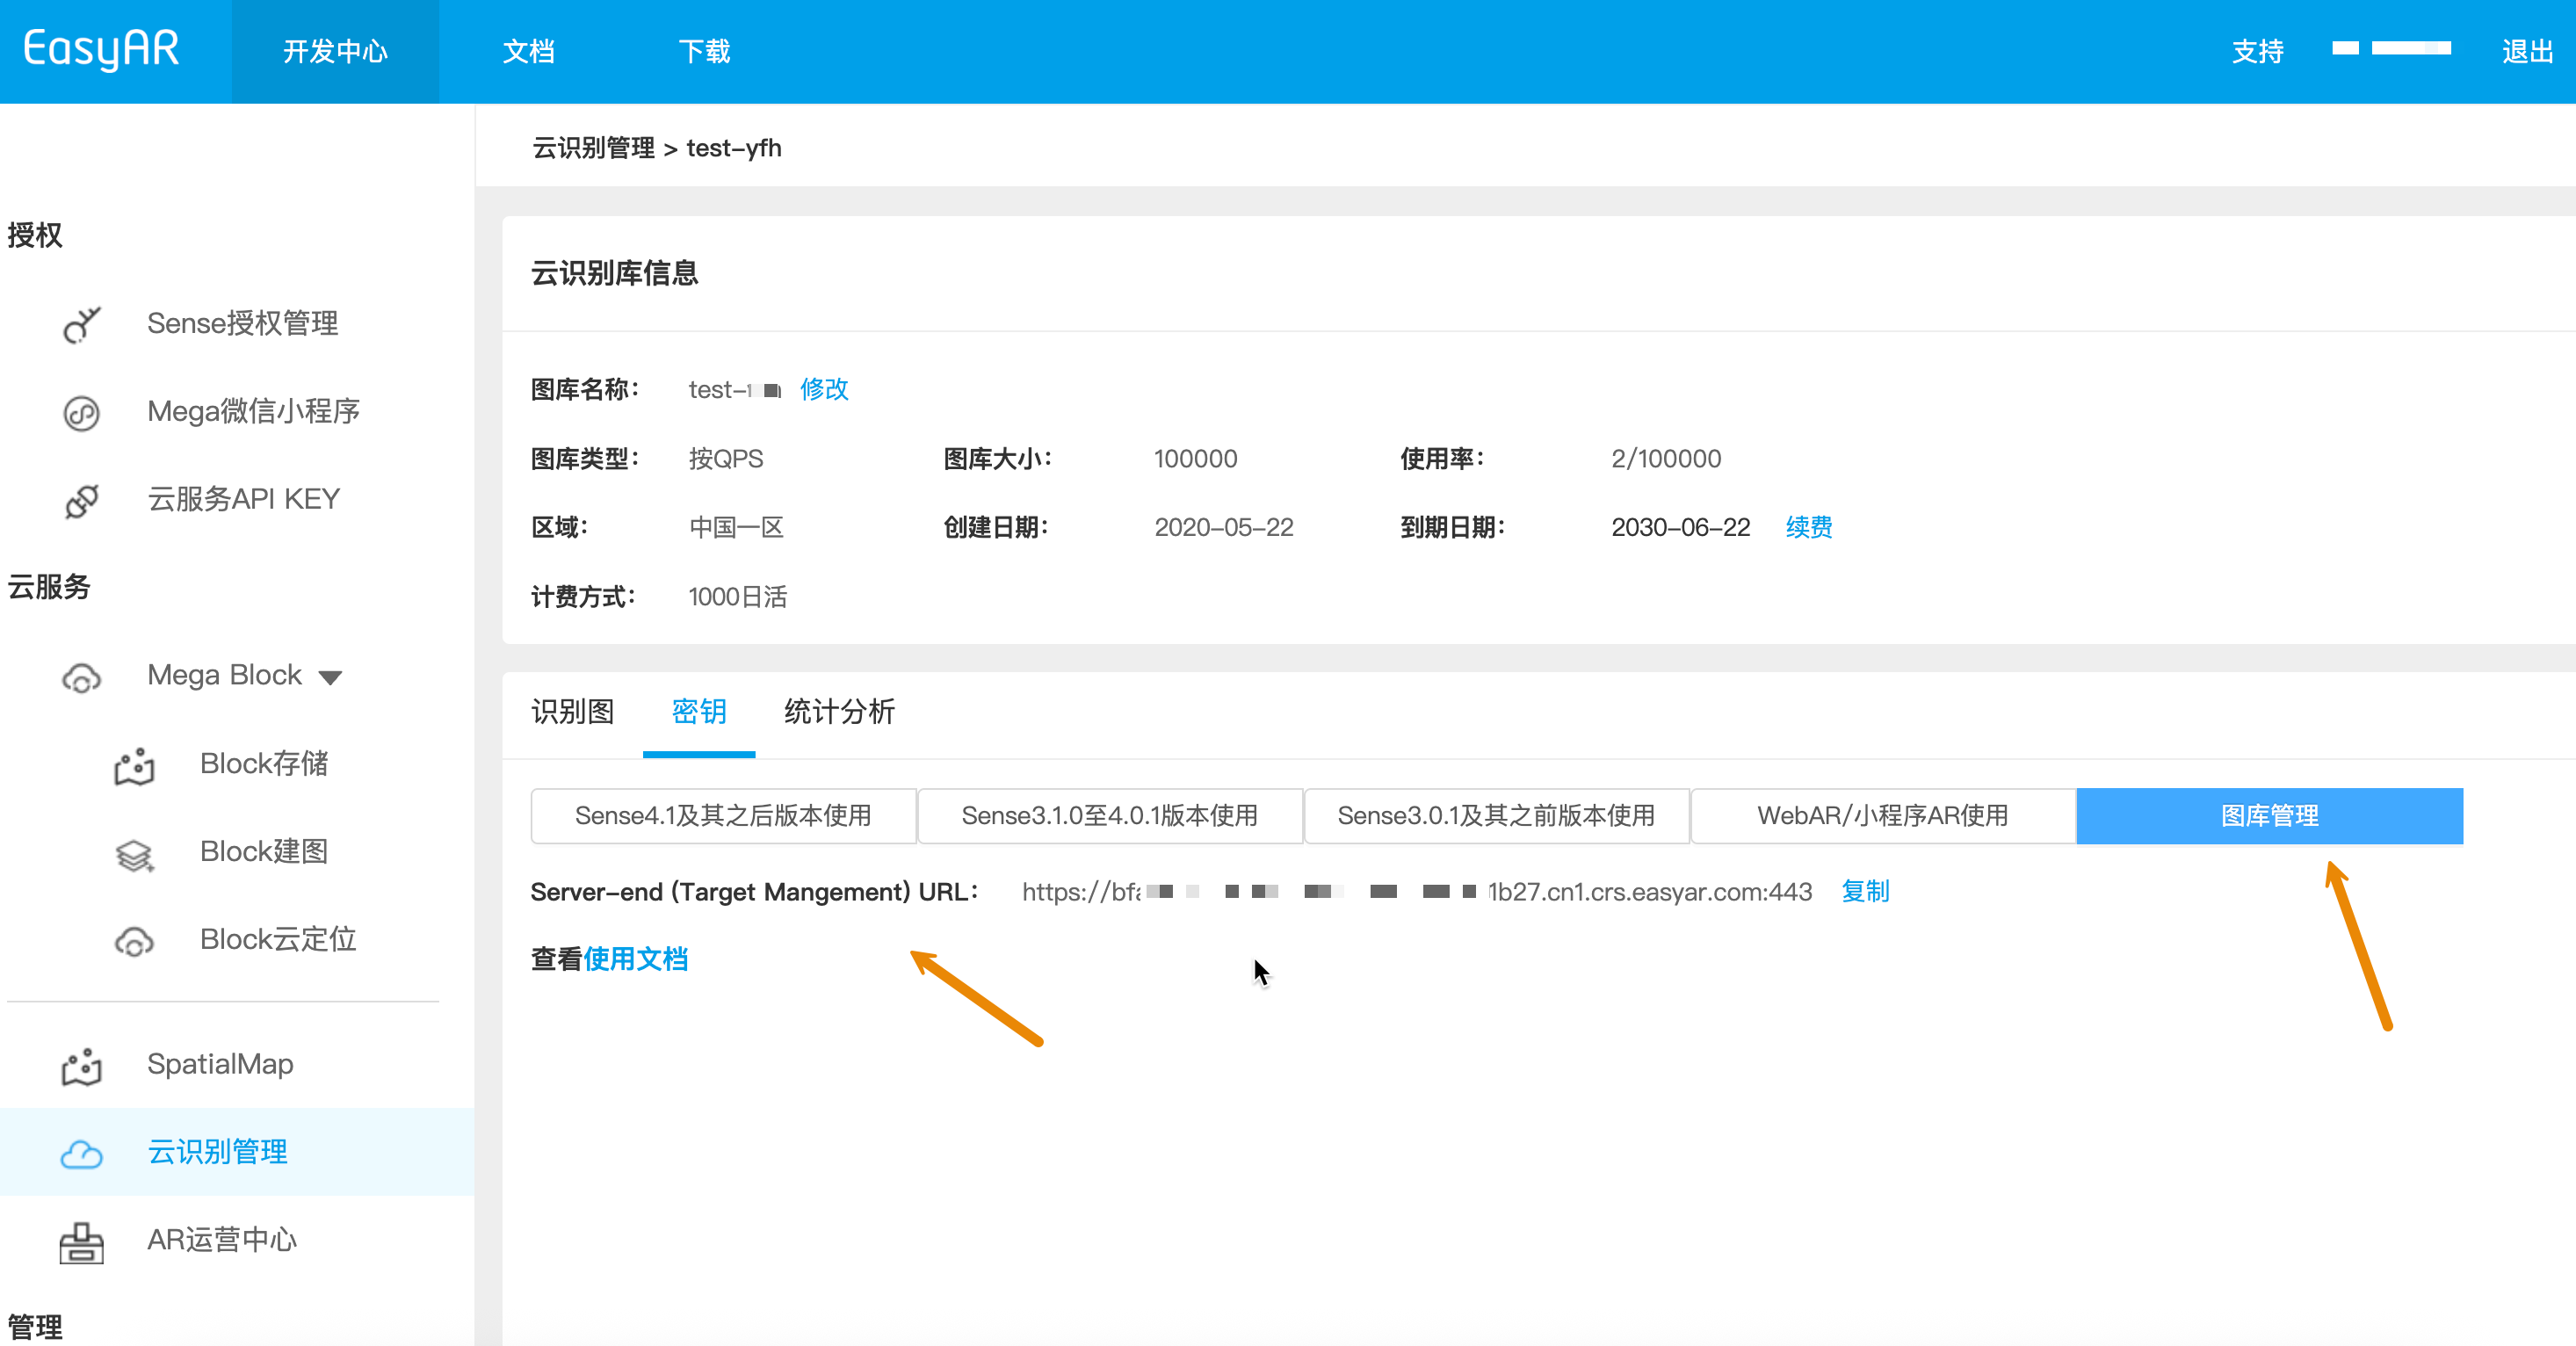
- Viewing CRS AppId:
Developer Portal -> Cloud Recognition Management -> Select image library -> Manage -> Keys
- Viewing API Key / API Secret:
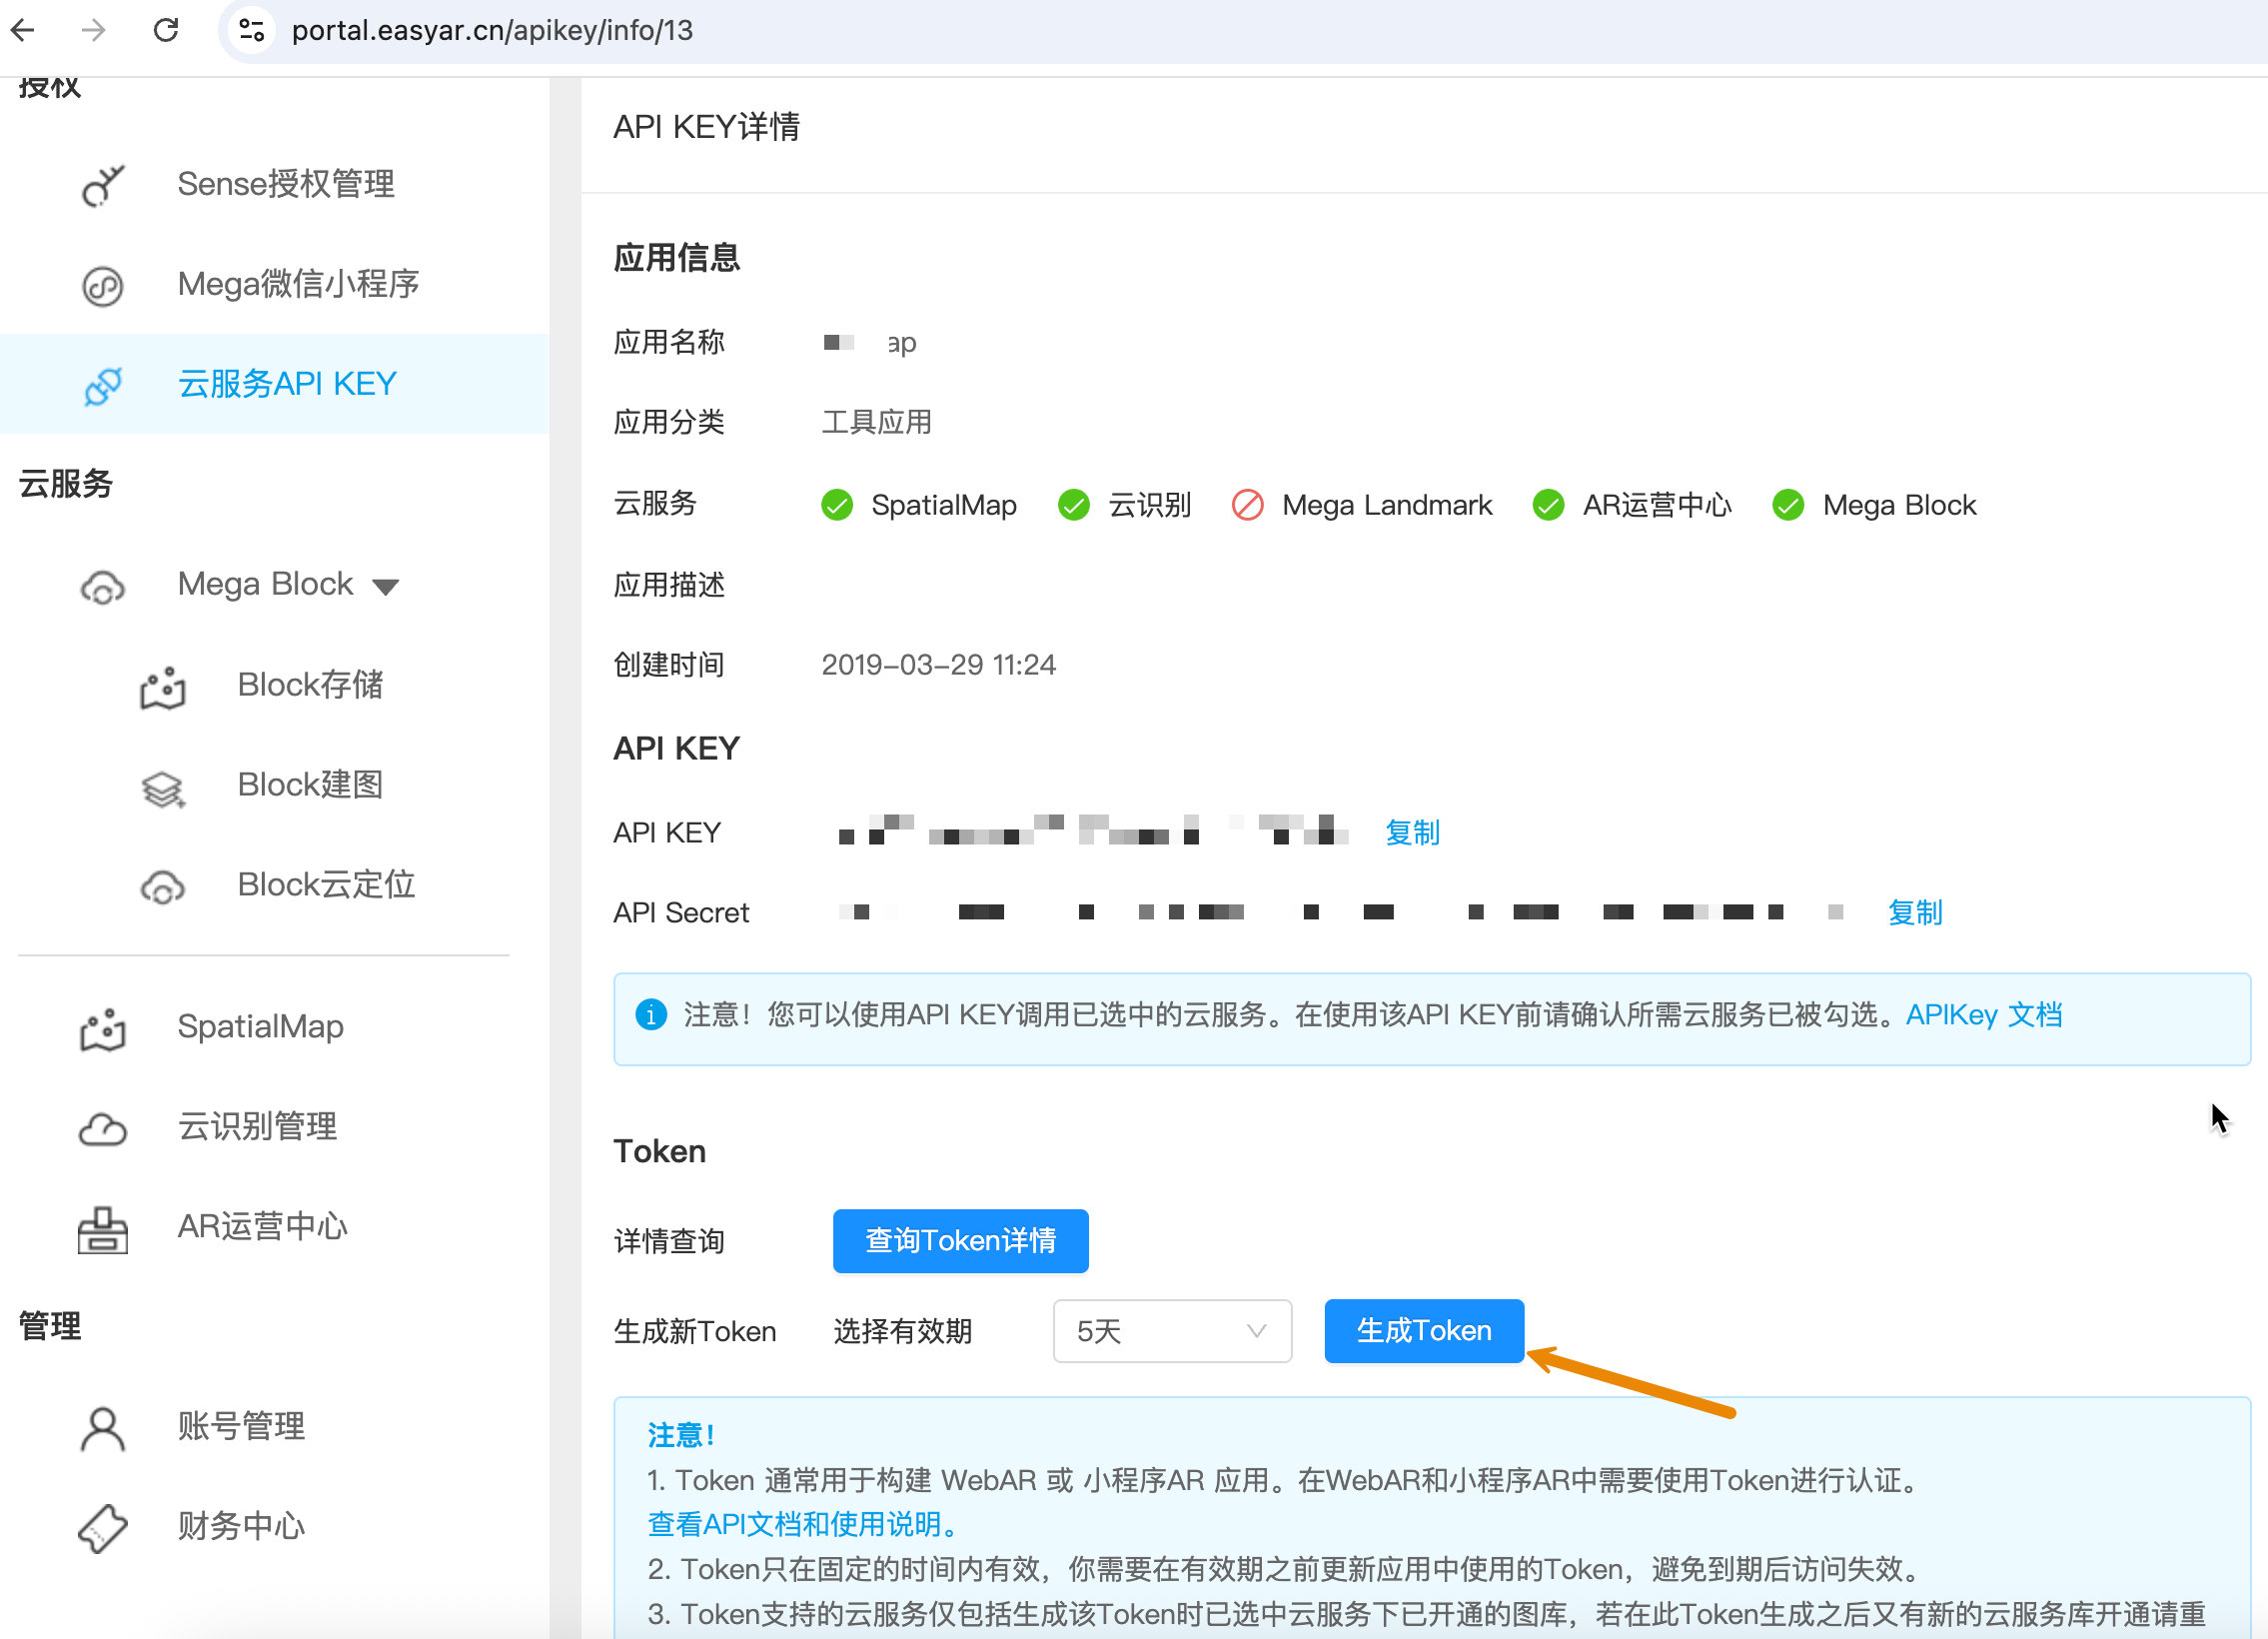
Developer Portal -> Cloud Service APIKey -> Copy
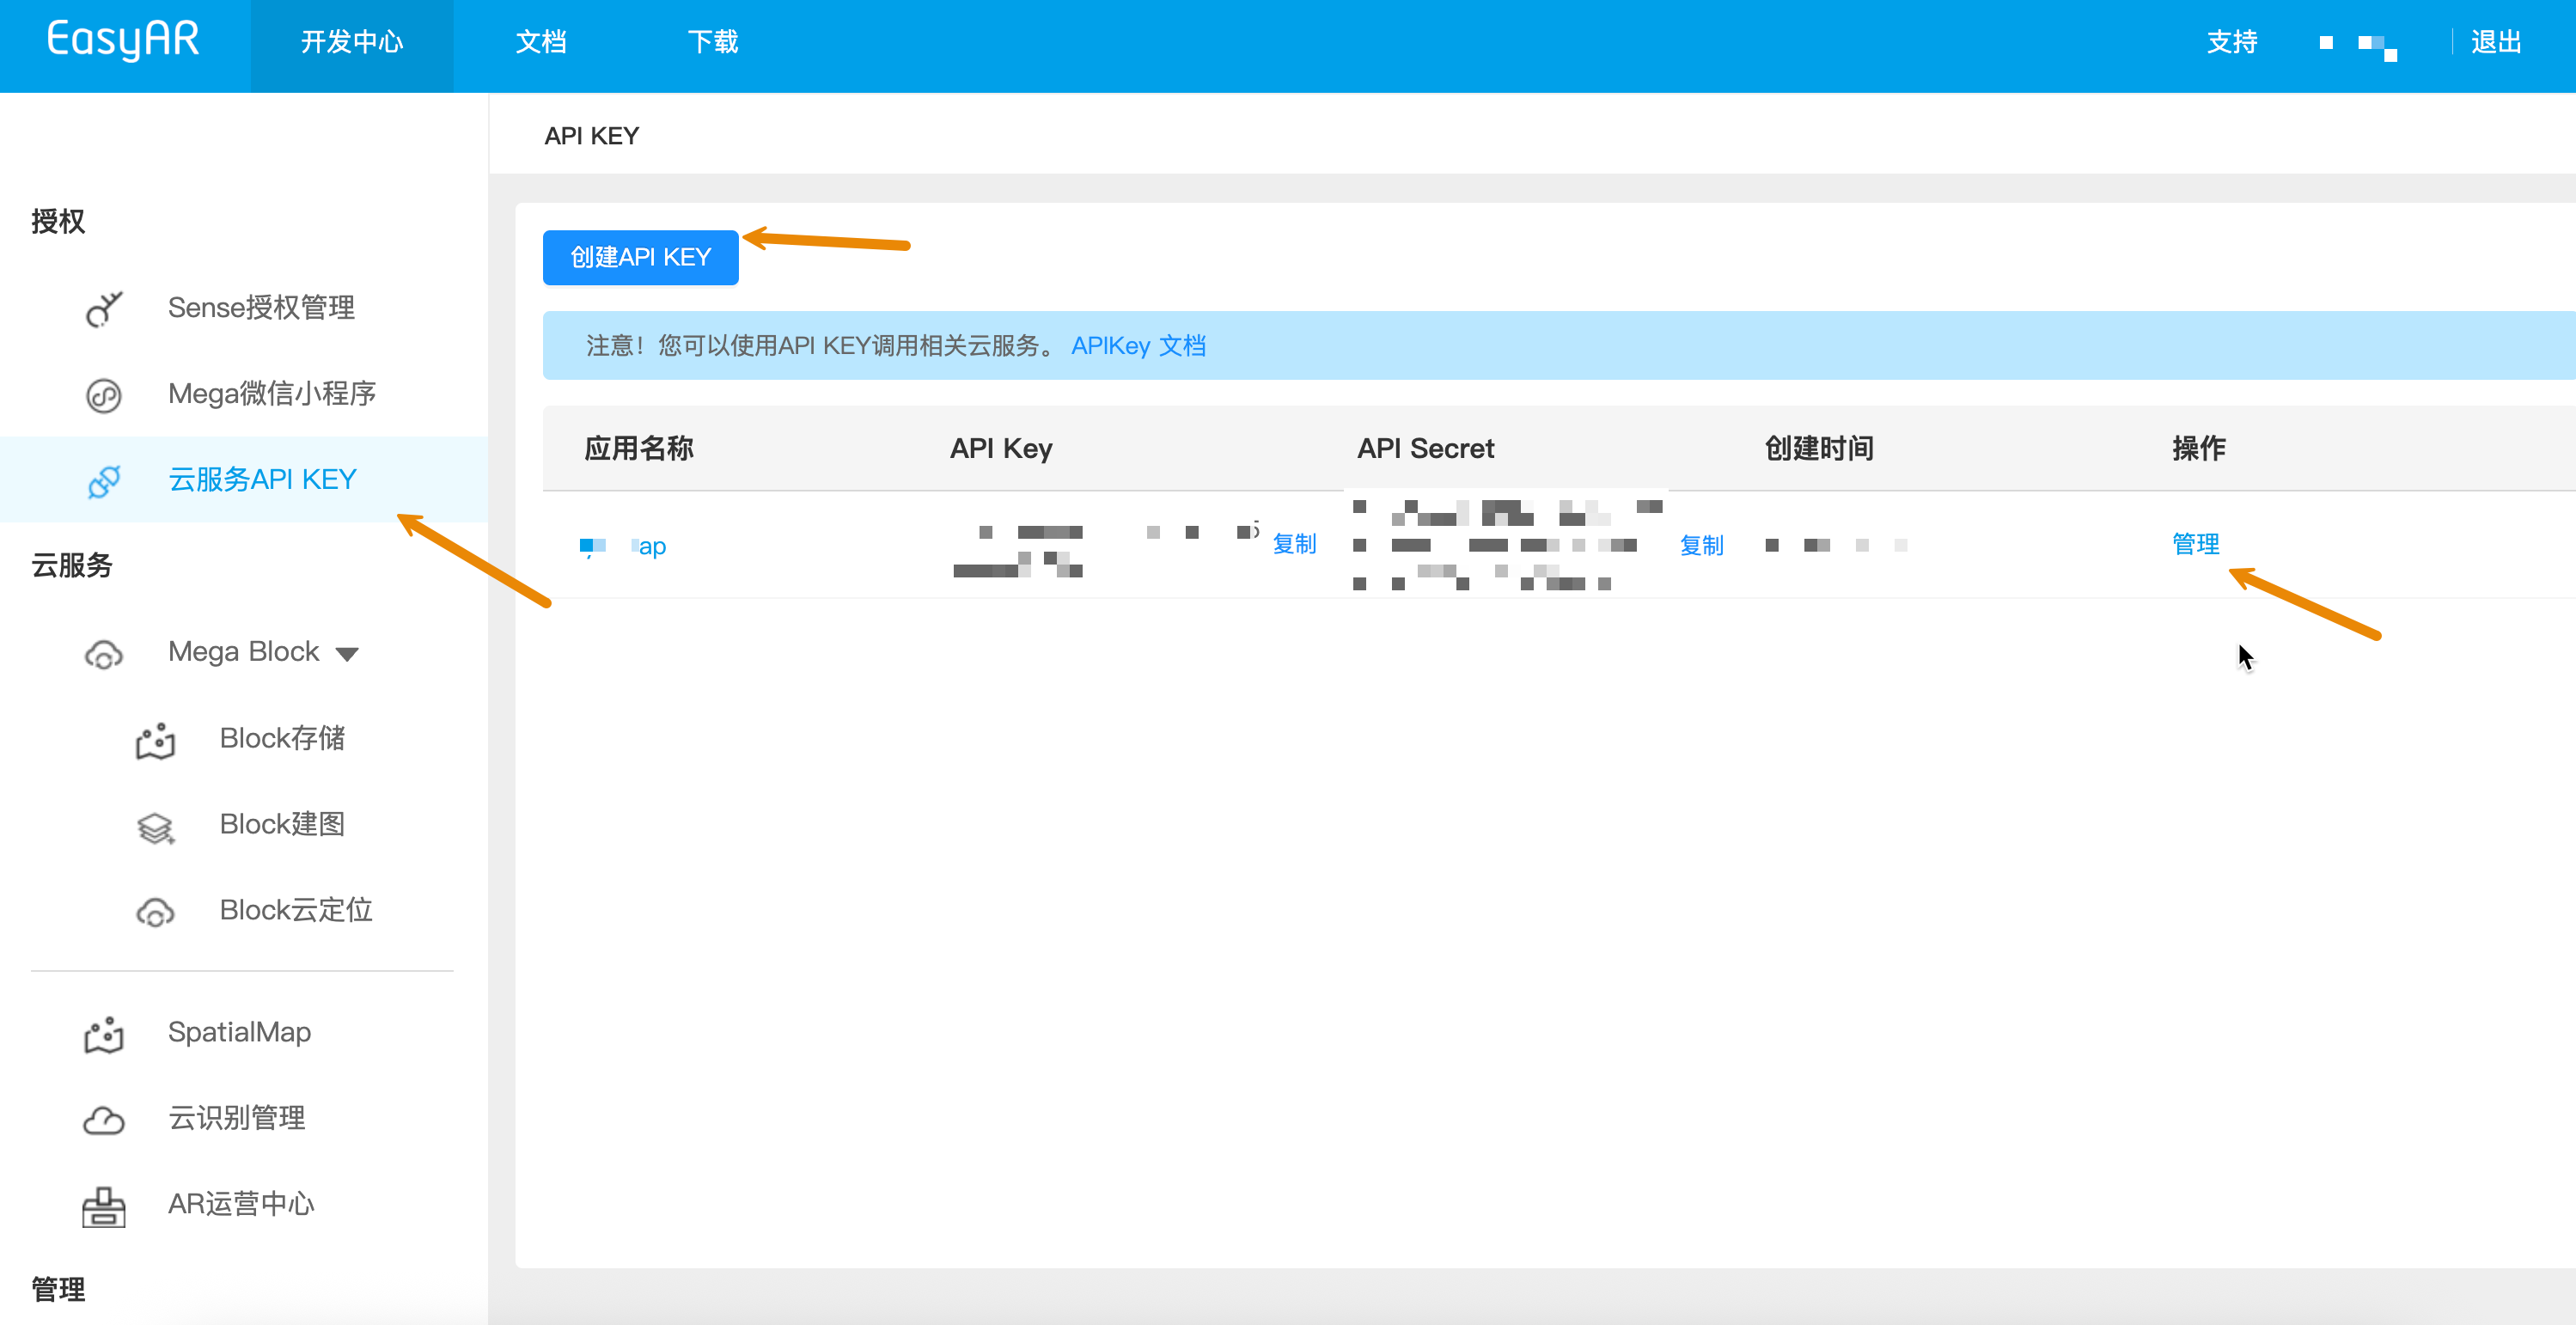
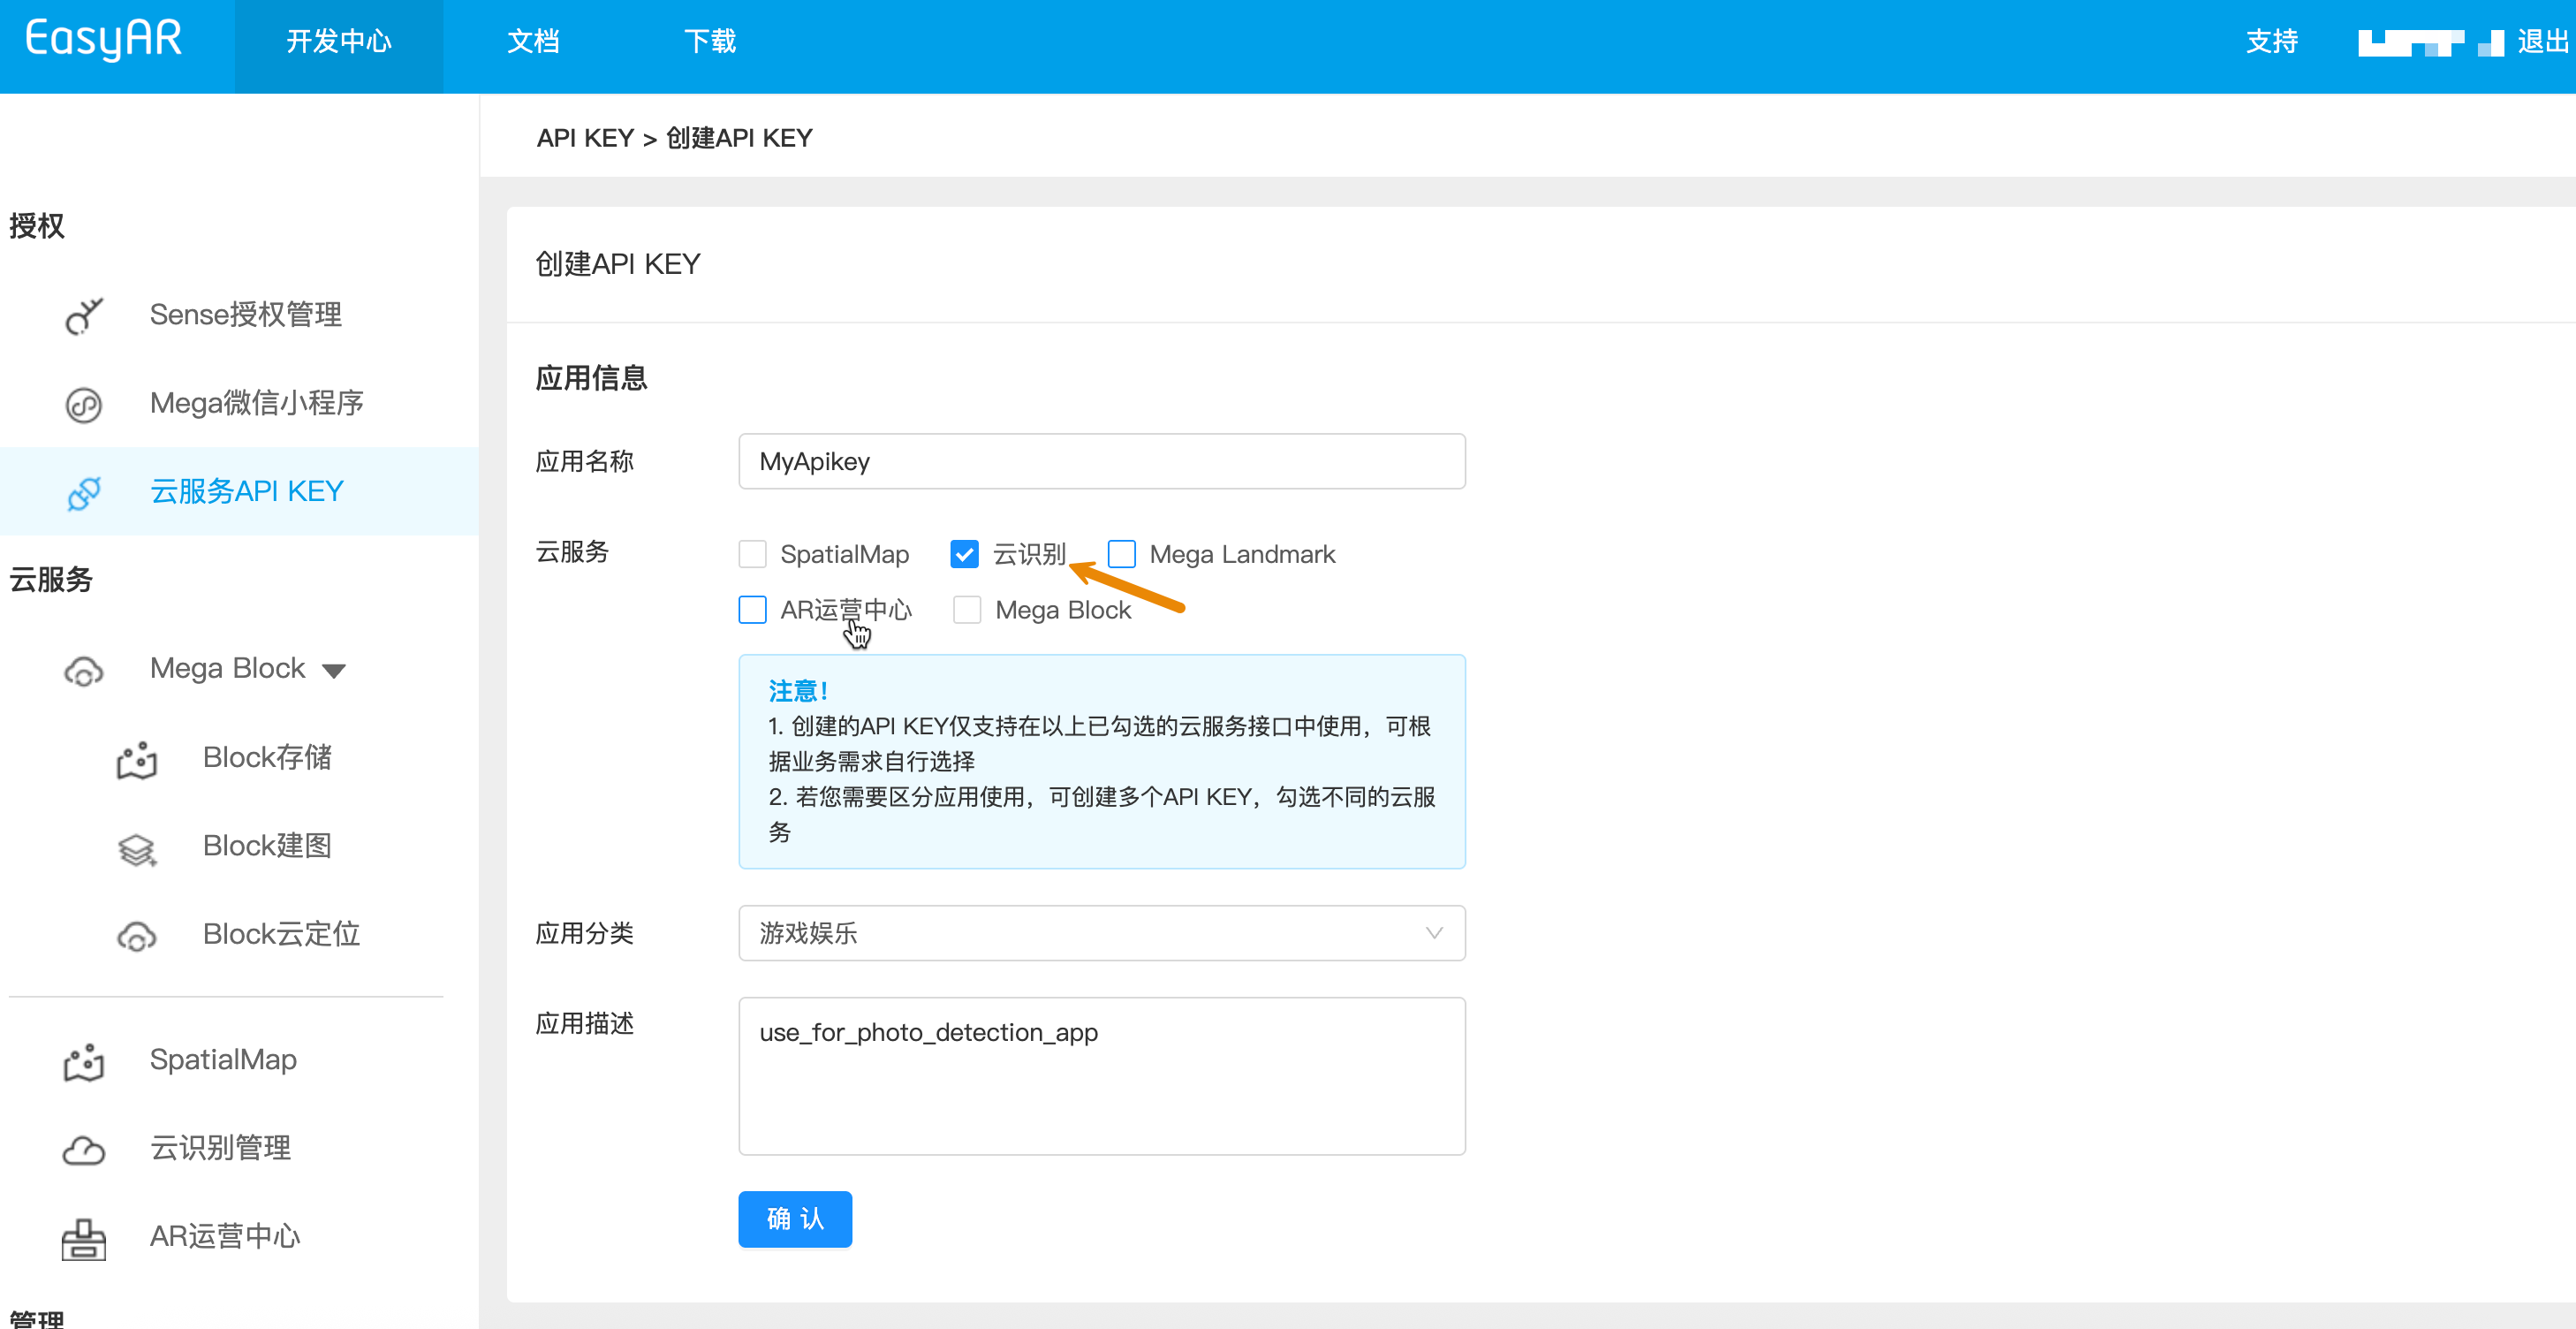
If you don't have an API Key yet, create one, and ensure Cloud Recognition (CRS) permission is selected. Learn more about API Key and permission control in the topic API Key Introduction
- Viewing Token:
Developer Portal -> Cloud Service APIKey -> Manage -> Select validity period -> Generate Token -> Copy
If you need to customize the Token's validity period, refer to the UAC API —— Create Token method, using the original APIKey and APISecret to create a Token
- Viewing Cloud URL:
Target image management in the image library uses Server-end URL port 443, Server-end URL
Developer Portal -> Cloud Recognition Management -> Select image library -> Manage -> Keys -> Image Library Management
Multi-end integration guidance
In actual workflows, target image management is typically integrated into the developer's business server, mobile end, or Unity:
Business service platform: Provides sample API calling code for common server development languages (Curl/Java/NodeJS/PHP) to help developers implement automatic uploads and metadata (Meta) updates of target images.
Mobile end (Unity/Mobile): Provides sample code for target image management based on Unity, allowing developers to implement their own methods for capturing and uploading target images.
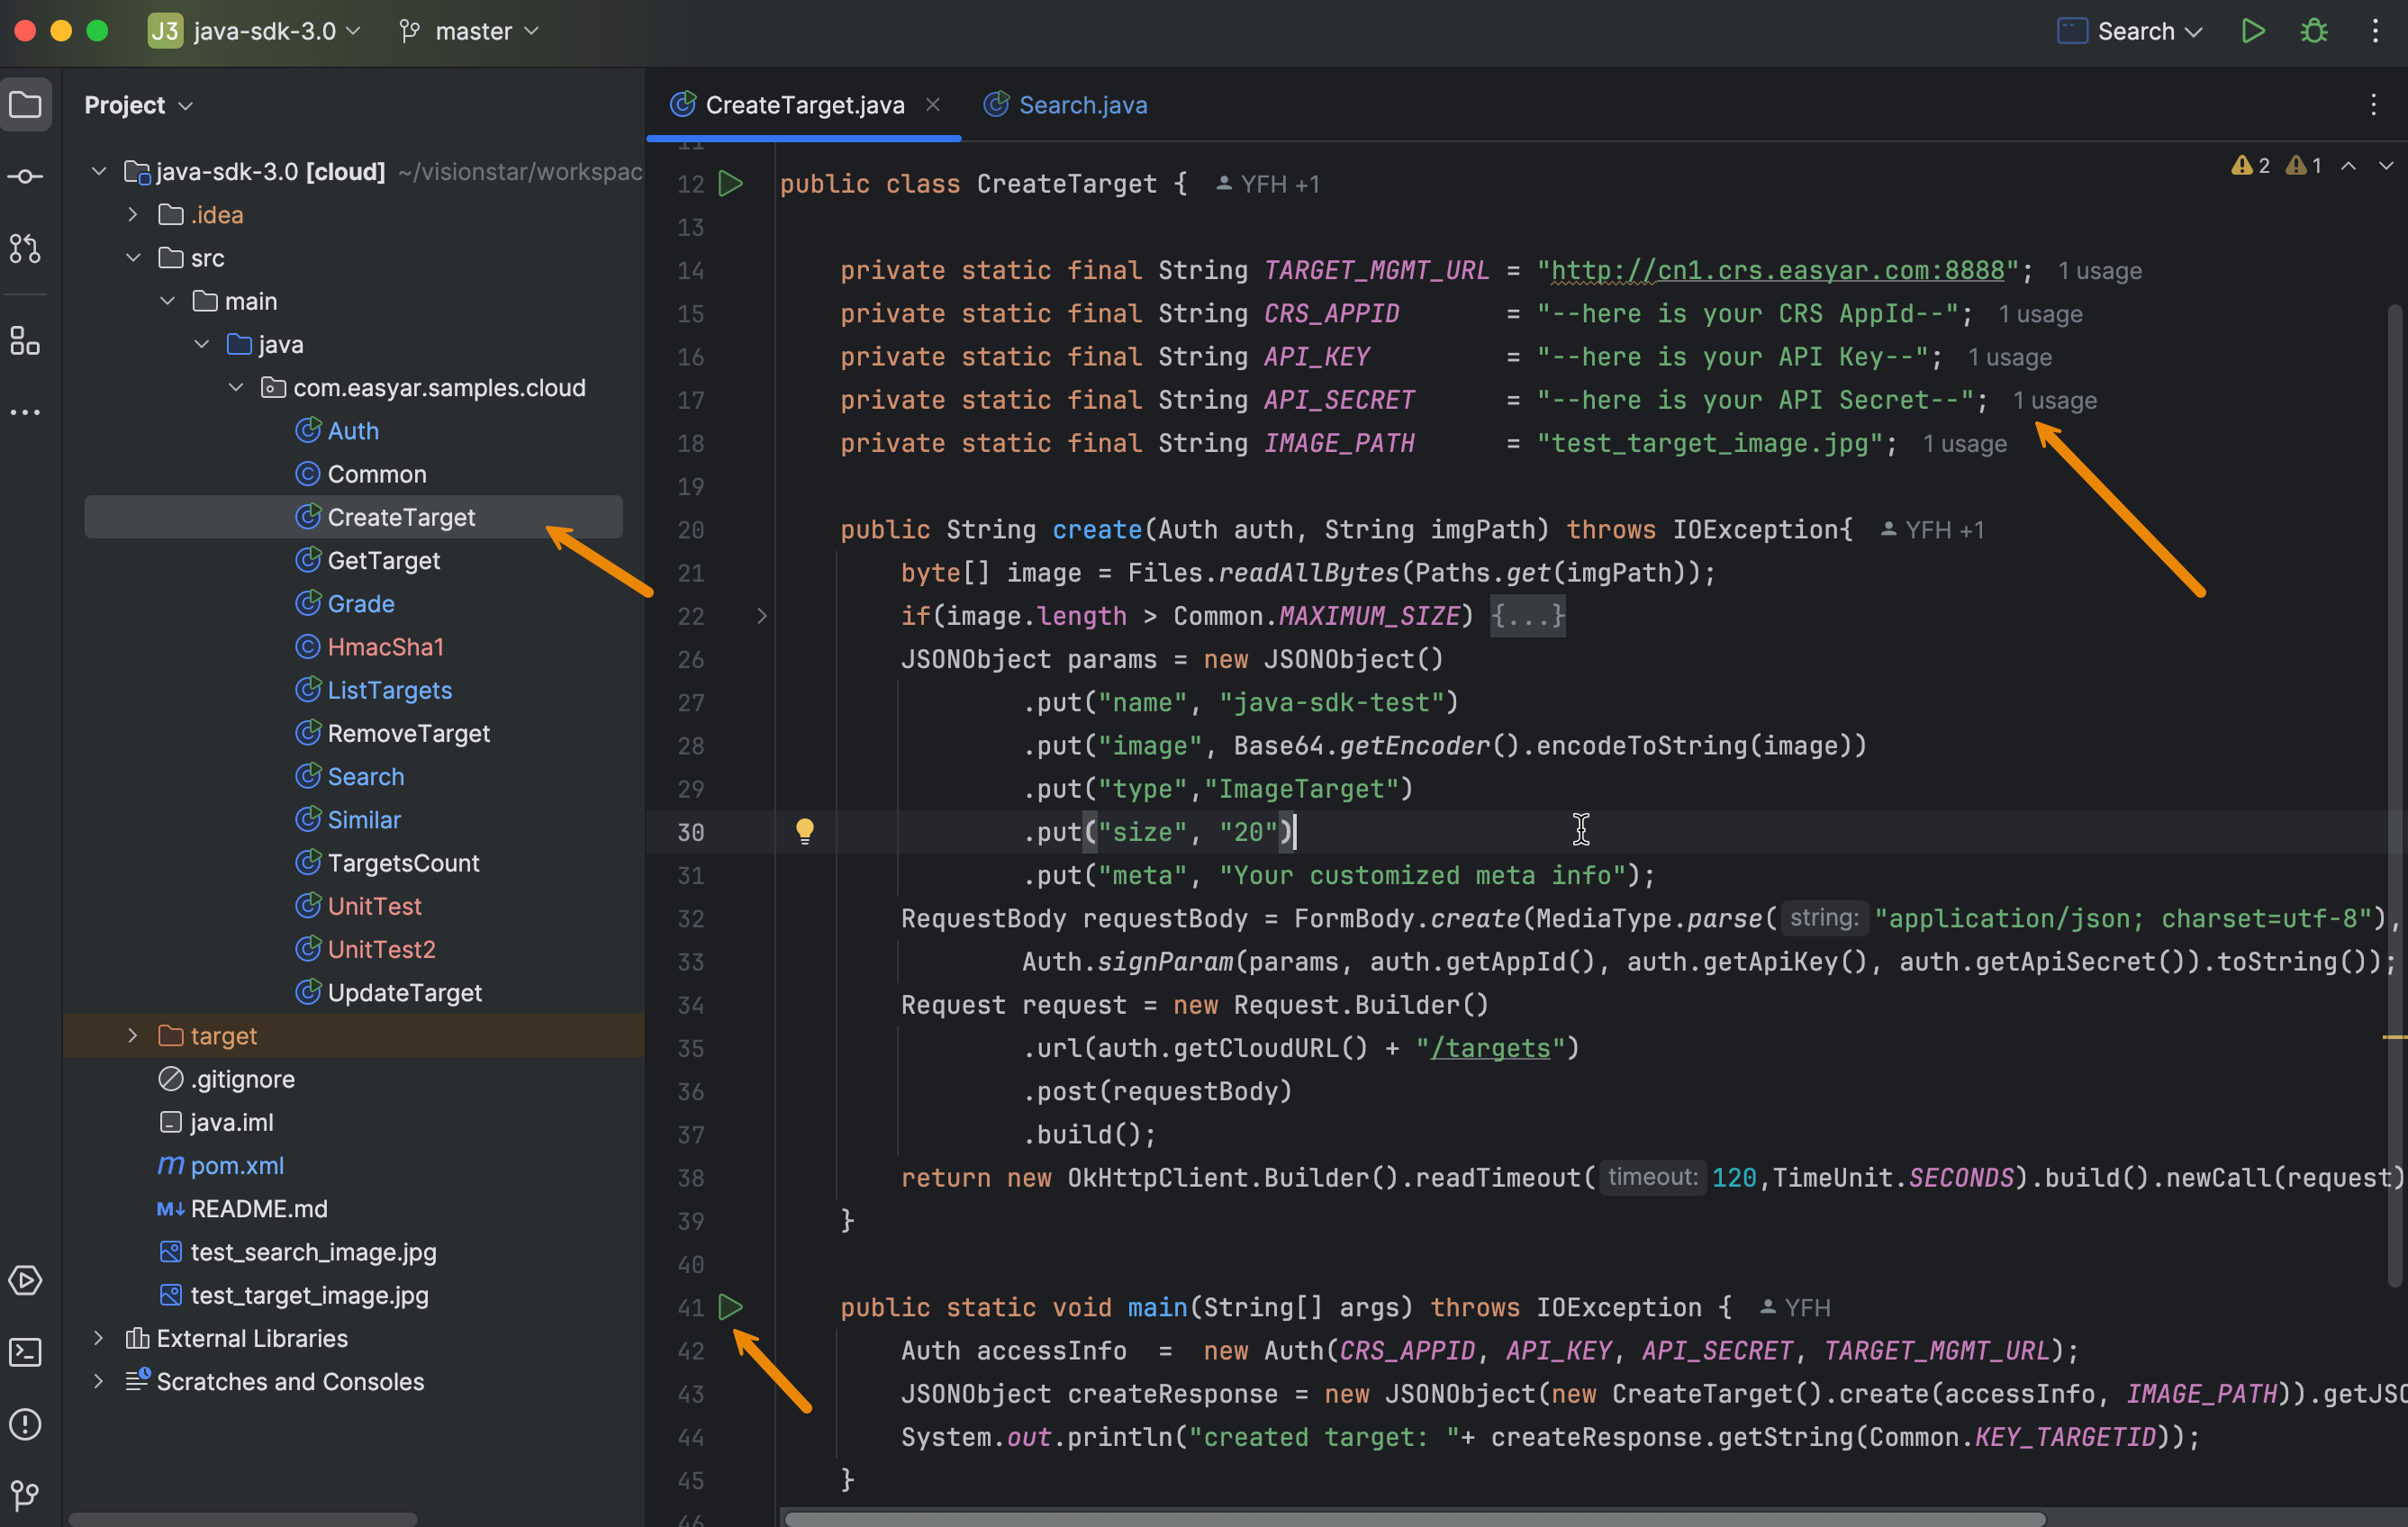
Running sample code
The image below shows a Java sample code usage. Fill in your own checklist items in the sample code, then run Main
Related topics:
Next topics:
Note
In actual workflows, creating target images is recommended to follow best practices. It is advised to read carefully.