Quick Start for Image Cloud Recognition Web Development
EasyAR WebAR implements AR functions based on Web technologies. Compared with native AR applications, it is lightweight, fast to deploy, and easy to distribute widely. It does not require installing an app and can run in mainstream browsers on Android, iOS, Windows, Mac, and other systems, providing true cross-platform support.
Before you begin
Before starting, make sure the following preparations are complete:
- An API Key that supports Cloud Recognition
- A running Cloud Recognition library
Upload Cloud Recognition images
Prepare a recognition image and upload it to the Cloud Recognition library. For the upload method, see Gallery management.
Download the sample
To help developers get started quickly, we provide sample code. Developers can download these samples and quickly experience WebAR functions.
Configure the sample
Configuration items are already reserved in the sample code. Configure them according to your actual environment.
- Edit the
config/application.txtfile - Replace
API Key,API Secret, andCRS AppIdin the configuration file
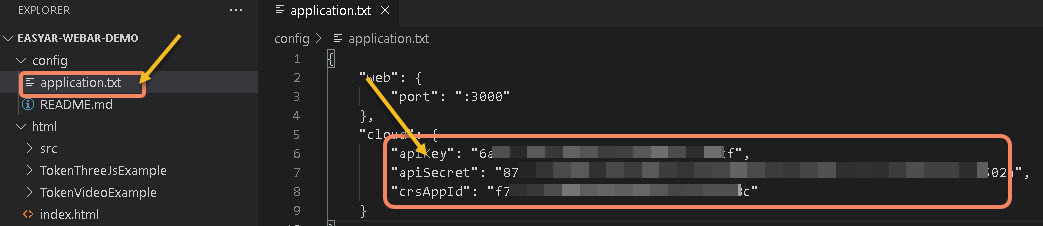
- Edit the
asset/js/app.jsfile under the sample directory - Replace the Cloud Recognition
Client-end (Target Recognition) URLinapp.js
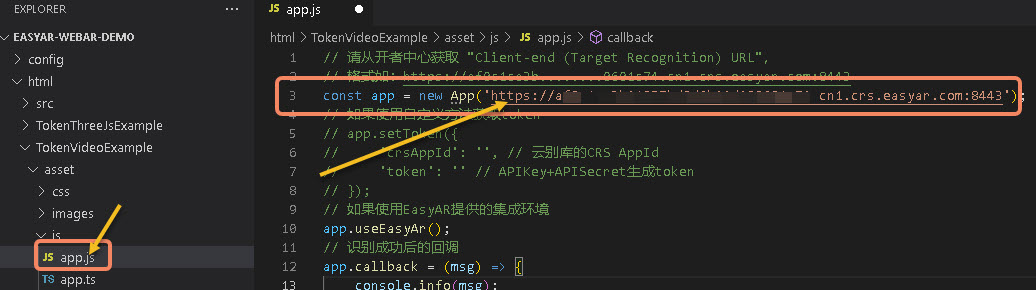
Run the sample
The EasyAR-WebAR_* files are the HTTP and token generation services. If startup succeeds, the listening port number is displayed. Start them as follows:
- Linux:
./EasyAR-WebAR_linux - macOS:
./EasyAR-WebAR_darwin - Windows:
// 鼠标双击或在 cmd 中运行
EasyAR-WebAR_windows.exe
Try the sample
Enter http://127.0.0.1:3000/ in a PC browser (camera required). Firefox is recommended. Point the camera at the recognition target and check the running effect of the sample.
Tip
To try it on a mobile phone, configure a domain name that supports HTTPS.