Image cloud recognition WeChat mini program sample description
This article will take you through an in-depth analysis of the sample code to help you understand and develop your own examples based on it.
For sample download and configuration instructions, please refer to Quick Start.
Target recognition settings
In cloud recognition management, upload a recognition image.
Recognition image name: Give the recognition target a name, such as "Panda".
Upload recognition image: Select and upload an image. The image used in this sample is:

Width: The width of the recognition image (cm). The height will be automatically calculated by the system based on your uploaded image. The size of the recognition image corresponds to the size of the virtual content, which is not used in this sample.
Meta: Additional information, usually used to store AR content information. The content used in this sample:
{"modelUrl": "https://sightp-assets.sightp.com/crs-mini/xiaoxiongmao.glb", "scale": 0.4}

Recognition target acquisition
After calling the cloud recognition API and recognizing the target, target information will be returned with the following structure:
{
  "statusCode" : 0,
  "result" : {
    "target" : {
      "targetId" : "375a4c2e********915ebc93c400",
      "meta" : "eyJtb2RlbFVybCI6ICJhc3NldC9tb2RlbC90cmV4X3YzLmZieCIsICJzY2FsZSI6IDAuMDJ9",
      "name" : "demo",
      "trackingImage": "/9j/4AAQSkZJRgABAQ************/9k=",
      "modified" : 1746609056804
    }
  },
  "date" : "2026-01-05T05:50:36.484Z",
  "timestamp" : 1767592236484
}
Tip
View complete field information in API Reference
Decode the meta using base64 to obtain the original meta information.
// data is the returned data
const meta = data.result.target.meta;
const modelInfo = JSON.parse(atob(meta));
Note
There is no atob method in WeChat mini programs, so it needs to be implemented yourself.
The implementation method is in the libs/atob.js file in the sample directory.
Main code description
components/easyar-cloud/easyar-cloud.js
Methods for using
wx.createCameraContextto open the camera, capture images, and access cloud recognition.components/easyar-ar/easyar-ar.js
Methods for using xr-frame to open the camera, capture images, access cloud recognition, play videos, and render templates.
components/libs/crs-client.js
Methods for Token generation and cloud recognition access.
Warning
Do not directly use the API Key and API Secret on client applications (such as Web, WeChat mini programs, etc.).
This is for demonstration purposes only. For production environments, generate the Token on the server side.
Deep understanding of the code
If you wish to learn more deeply about cloud recognition development, it is highly recommended that you read the sample source code. Based on this, you can try modifying and extending the source code.
Tip
The following explanation assumes you have a certain level of HTML and JavaScript development skills. If you have not yet mastered these basics, it is recommended to systematically learn related knowledge to better understand the subsequent content.
The XR/3D engine used on WeChat mini programs is XR-FRAME. If you are unfamiliar with it, it is recommended to refer to the documentation first.
We will take rendering a 3D model as an example to introduce the main source code explanations in the sample.
UI and scene processing
File components\easyar-ar\easyar-ar.wxml description.
XR scene and Marker settings.
<xr-scene ar-system="modes:Marker" id="xr-scene" bind:ready="handleReady" bind:ar-ready="handleARReady" bind:tick="handleTick">
    <xr-node>
        <xr-ar-tracker wx:if="{{markerImg != ''}}" mode="Marker" src="{{markerImg}}" id="arTracker"></xr-ar-tracker>
        <xr-camera id="camera" node-id="camera" position="0.8 2.2 -5" clear-color="0.925 0.925 0.925 1" background="ar" is-ar-camera></xr-camera>
    </xr-node>
    <xr-shadow id="shadow-root"></xr-shadow>
    <xr-node node-id="lights">
        <xr-light type="ambient" color="1 1 1" intensity="2" />
        <xr-light type="directional" rotation="180 0 0" color="1 1 1" intensity="1" />
    </xr-node>
</xr-scene>
Tip
markerImg is the address of the recognition image, which is returned when the cloud recognition identifies a target.
Business processing
Main code explanation of file components\easyar-ar\easyar-ar.js.
handleTick() {
    // Capture screenshot and send to cloud recognition service
    this.capture().then(base64 => this.crsClient.searchByBase64(base64.split('base64,').pop())).then(res => {
        // Result returned by cloud recognition
        console.info(res)

        // Return 0 means no target recognized
        if (res.statusCode != 0) {
            return;
        }

        const target = res.result.target;

        // Set marker
        this.loadTrackingImage(target.trackingImage.replace(/[\r\n]/g, ''));

        // Detect from meta information whether it is a model or video
        try {
            const setting = JSON.parse(atob(target.meta));
            if (setting.modelUrl) {
                this.loadModel(target.targetId, setting);
            } else if (setting.videoUrl) {
                this.loadVideo(target.targetId, setting);
            }
        } catch (e) {
            console.error(e);

        }
    }).catch(err => {
        console.info(err)
    });
},

capture() {
    // Get camera image
    const opt = { type: 'jpg', quality: this.properties.config.jpegQuality };
    if (this.scene.share.captureToDataURLAsync) {
        return this.scene.share.captureToDataURLAsync(opt);
    }

    return Promise.resolve(this.scene.share.captureToDataURL(opt));
},
Tip
Please refer to the sample source file for the complete code.
Cloud recognition processing
Main method description of file components/libs/crs-client.js.
Send image base64 data to the cloud recognition service API.
searchByBase64(img) {
    const params = {
        image: img,
        notracking: 'false',
        appId: this.config.crsAppId,
    };

    return this.queryToken().then(token => {
        return new Promise((resolve, reject) => {
            wx.request({
                url: `${this.config.clientEndUrl}/search`,
                method: 'POST',
                data: params,
                header: {
                    'Authorization': token,
                    'content-type': 'application/json'
                },
                success: res => resolve(res.data),
                fail: err => reject(err),
            });
        });
    });
}
Expected effect
- Sample home page
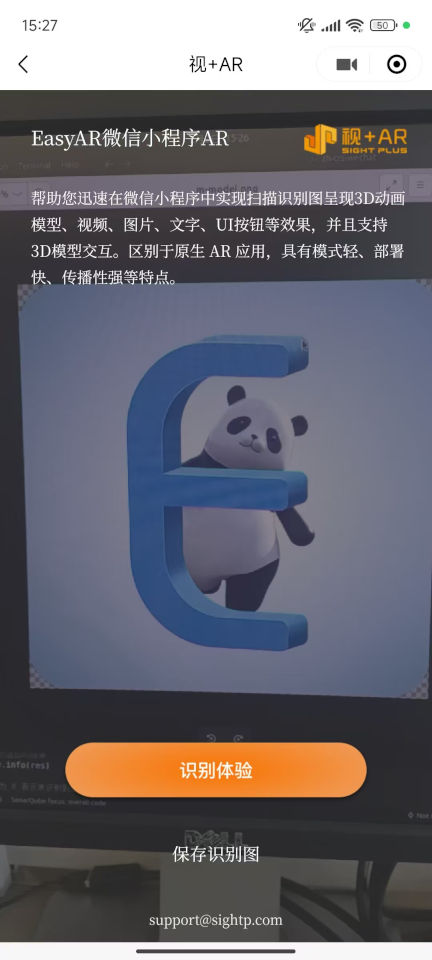
- Model rendering effect