Mobile Mapping Data Collection Tool
Developers can use this tool to quickly complete mobile mapping data collection.
Mobile Mapping Data Collection Entry
Click the Mapping Data Collection Tool button to start mobile data collection.

Collection File Management
After entering the collection file management interface, click the blue + button at the bottom to enter the collection page.
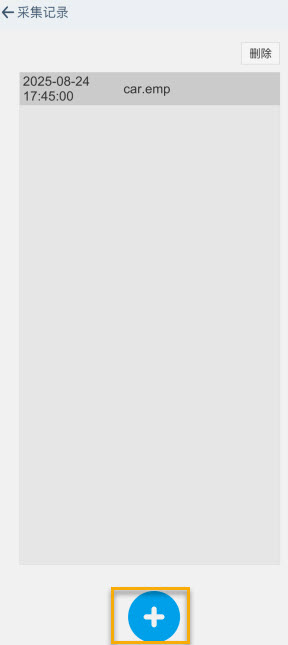
Image Collection for Mapping Data
Perform initialization: Before clicking the
red circlebutton at the bottom, aim the camera at a nearby area with rich textures (e.g., a wall with patterns).Status confirmation: Observe the "Tracking Status" parameter in the data panel:
When the value changes from
Not TrackingtoTracking, it indicates successful initialization. At this time, you can lift the phone, click thered circlebutton at the bottom, and aim at the target area for data collection.

Collection Status Monitoring
To ensure the quality of data collection, the Tracking status must be maintained throughout the entire collection process.

Abnormal interruption: If the tracking is lost during the collection process (the status changes to Not Tracking), the system will automatically terminate the current collection task and pop up an error prompt.
Note
- The
Trackingstatus must be maintained throughout the entire collection process. - The collection duration cannot exceed 15 minutes. If it exceeds 15 minutes, the collection will be forcibly ended, and you will enter the save page.
- Switching to the background will cause the collection to fail.
Visual Auxiliary Feedback
During the collection process, the system will generate the camera frustum and motion trajectory line in real-time in space.
Frustum Feedback
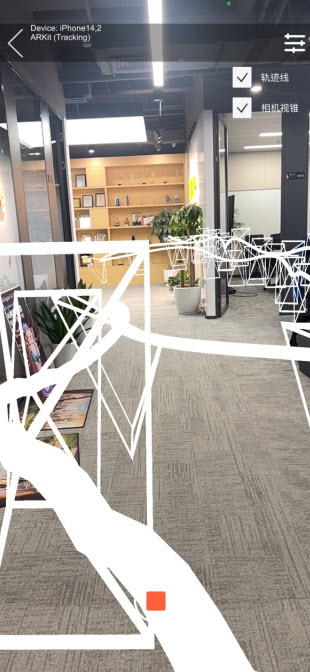
Frustum: Represents the camera position and orientation of the current and historical key frames.
Trajectory line: Records and displays the moving path of the collector.
Through these visual feedbacks, users can intuitively evaluate the coverage integrity of the collection area and ensure the quality of the mapping data.
Turn Off Frustum Feedback
If you need to turn off the auxiliary tool, click the switch in the upper right corner and uncheck Trajectory Line and/or Camera Frustum.

End Collection and Save Results
Click the red square button to end the recording.
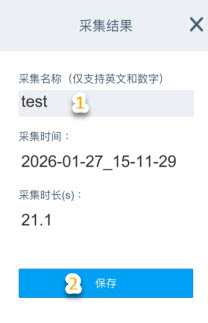
Enter a name: Enter the name of the current collection data on the save interface.
Naming convention: Only English letters and numbers are supported (do not use Chinese characters, spaces, or special characters).
Perform saving: Click the [Save] button.
Local storage: After confirmation, the system will write the collected data file to the local storage space of the mobile phone.
Record Management and Deletion
Users can delete redundant or no longer used collection records as needed to keep the list tidy and free up storage space.
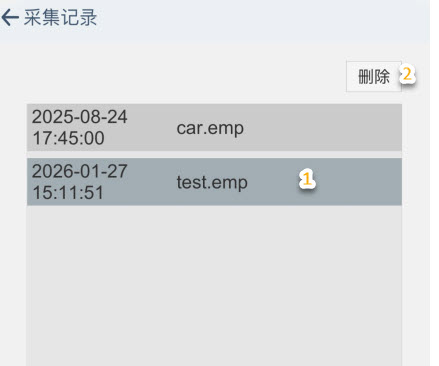
Select a record: Click the target record in the management list. After selection, the background color of the entry will darken as a reminder.
Perform deletion: After confirming the selected status, click the [Delete] button.
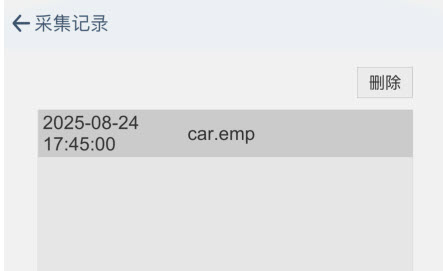
- Complete the operation: The record will be permanently removed from the list and local storage.
Data Export
For data export reference, see EIF Data Export.