Simulation data recording tool
The EIF test data recording tool is a core component in Mega Toolbox for remote development. It records the original on-site camera image stream and IMU sensor data to generate simulation files that can be replayed in the Unity Editor.
EIF data recording workflow
Enter the EIF recording screen

Name the EIF file
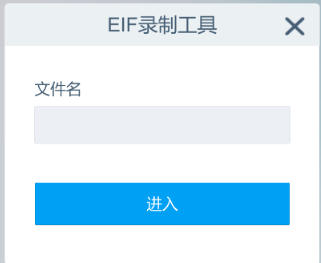
Enter the file name
Example: entering meiluocheng2 represents data from the 2nd floor of Metro City.
Confirm entry: Click the Enter button to jump to the subsequent recording screen.
Note
Follow the naming convention: names can only use combinations of English letters and numbers. Do not include Chinese characters or special characters.
Record EIF
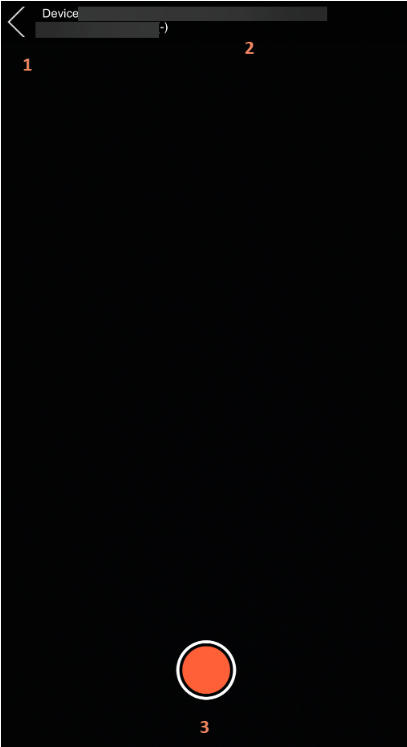
Exit the current page. If EIF is being recorded, make sure to tap the stop button first.
Key device information, displayed as: input source (tracking status)
Record/stop recording EIF data
Note
After completing file naming and entering the camera startup screen, do not tap the Start Recording button at the bottom yet.
First point the camera at a nearby area with rich texture to complete system initialization calibration.
After the tracking status in the panel parameters shows Tracking, lift the phone and point it at the test target area to be recorded, then tap the Start Recording button.
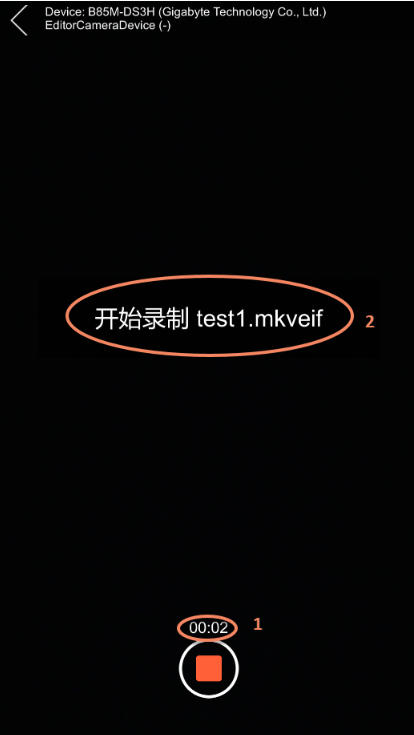
After recording starts, the screen is as shown above:
Recording duration
Recorded file name
Note
Recording range: limit it to the earlier map acquisition area, with emphasis on covering recognition effect verification points. Viewing angle requirement: simulate the user's viewpoint. Avoid large sudden turns and long periods facing textureless areas. Duration limit: each recording segment must be less than 10 minutes. End operation: after recording is complete, tap the stop button at the bottom.
Stop recording EIF
Tap the red square button to end recording.

Data export
For data export, refer to EIF data export.