Enable headset support in easyar projects
This document describes how to enable headset support in an existing EasyAR Unity scene.
Before you begin
- Read EasyAR headset support to learn about headset types supported by EasyAR and EasyAR features that can run on headsets.
- Read EasyAR headset support in unity to understand the overall architecture of EasyAR headset support in Unity.
This article assumes you already have a scene that works with EasyAR. If you need to create such a scene or add EasyAR components to a headset scene, refer to the following documents:
Add headset components to the scene
Before adding headset components to the scene, you usually need to remove the existing Camera and XR Origin.
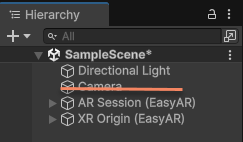
Remove camera and XR origin
Delete the existing Camera in the scene.
If the scene already contains an XR Origin, whether it comes from EasyAR or the Unity XR framework, in most cases it needs to be deleted.
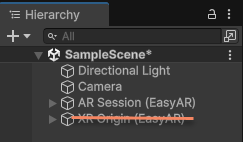
Tip
In some advanced usage, you can decide whether to delete it based on your needs.
Add headset components
Follow the headset's official instructions to add headset components. Here we take the Pico headset as an example. If there is any conflict with the official instructions, follow the official instructions.
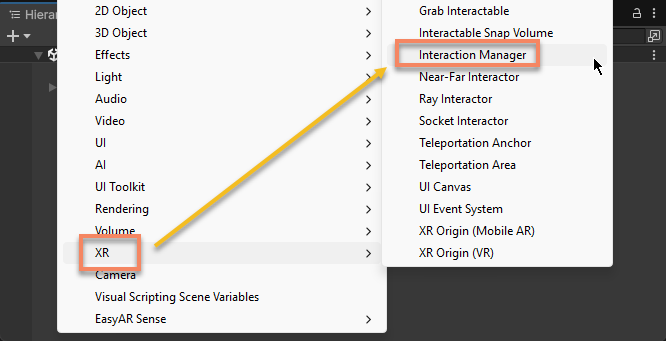
Use the menu to add an XR Interaction Manager:
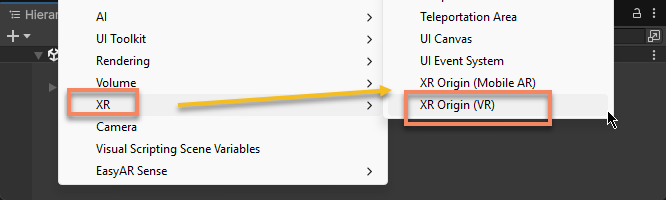
Use the menu to add an XR Origin:
Before running, make sure to read the headset's official instructions to understand how a scene with a headset SDK should be configured and run.
Configure frame source
Built-in supported devices
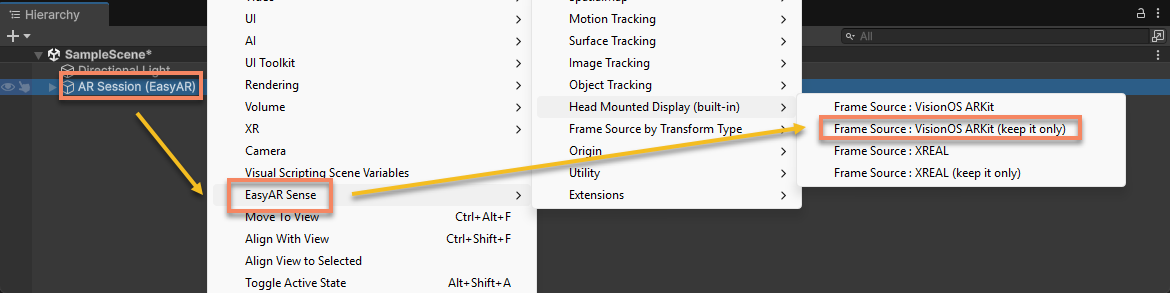
Select AR Session (EasyAR) and right-click, then create the [Name] frame source and keep only it through the menu EasyAR Sense > Head-mounted display (Built-in) > Frame Source : [Name] (keep it only).
For example, configure the frame source for Apple Vision Pro:
After the operation, the frame source in the session will look like this:
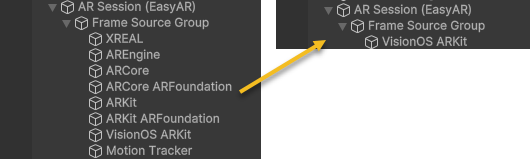
Tip
If the session contains the frame source corresponding to the device and it is the first available frame source on the device (for example, in the above image, VisionOS ARKit is the first available frame source in the visionOS system), you may not need to modify it. Some default sessions created by menus fall into this category.
Extended supported devices
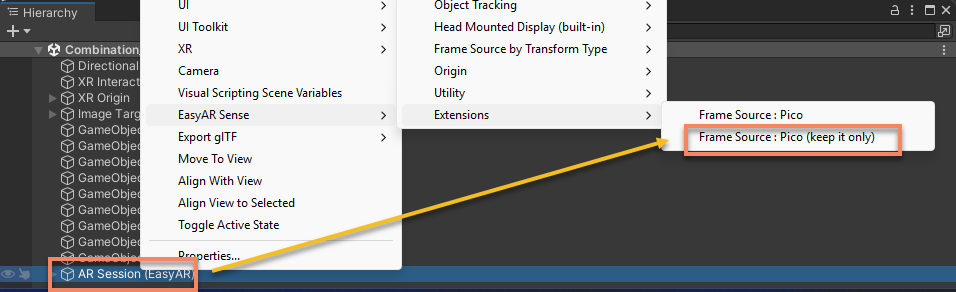
Select AR Session (EasyAR) and right-click, then create the [Name] frame source and keep only it through the menu EasyAR Sense > Extensions > Frame Source : [Name] (keep it only).
For example, configure the frame source for the Pico headset:
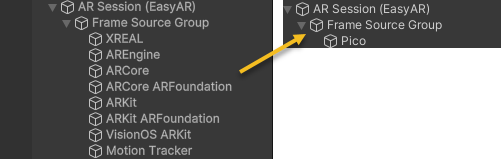
After the operation, the frame source in the session will look like this:
Cross-device support
If the scene needs to run on different devices, you need to keep other frame sources and ensure that the current frame source can be selected on the device.
Use menu items without (keep it only) to add frame sources without deleting other frame sources. For example, EasyAR Sense > Extensions > Frame Source : Pico will create a frame source suitable for Pico at the end of all frame sources in the session. Generally, after adding the frame source this way, you also need to move it to an appropriate position.
Tip
In some advanced usage, you can adjust the position of the frame source according to your needs, or modify it in code.
Next steps
- Vision Pro project configuration
- XREAL project configuration
- Other Android device project configuration