Lossless full update mapping
This article details the complete operation process for lossless full update mapping of single and multi-graphs, including task creation, data upload, mapping operations, and result viewing, helping users complete scene updates while keeping the original coordinate system unchanged.
Single graph lossless update mapping
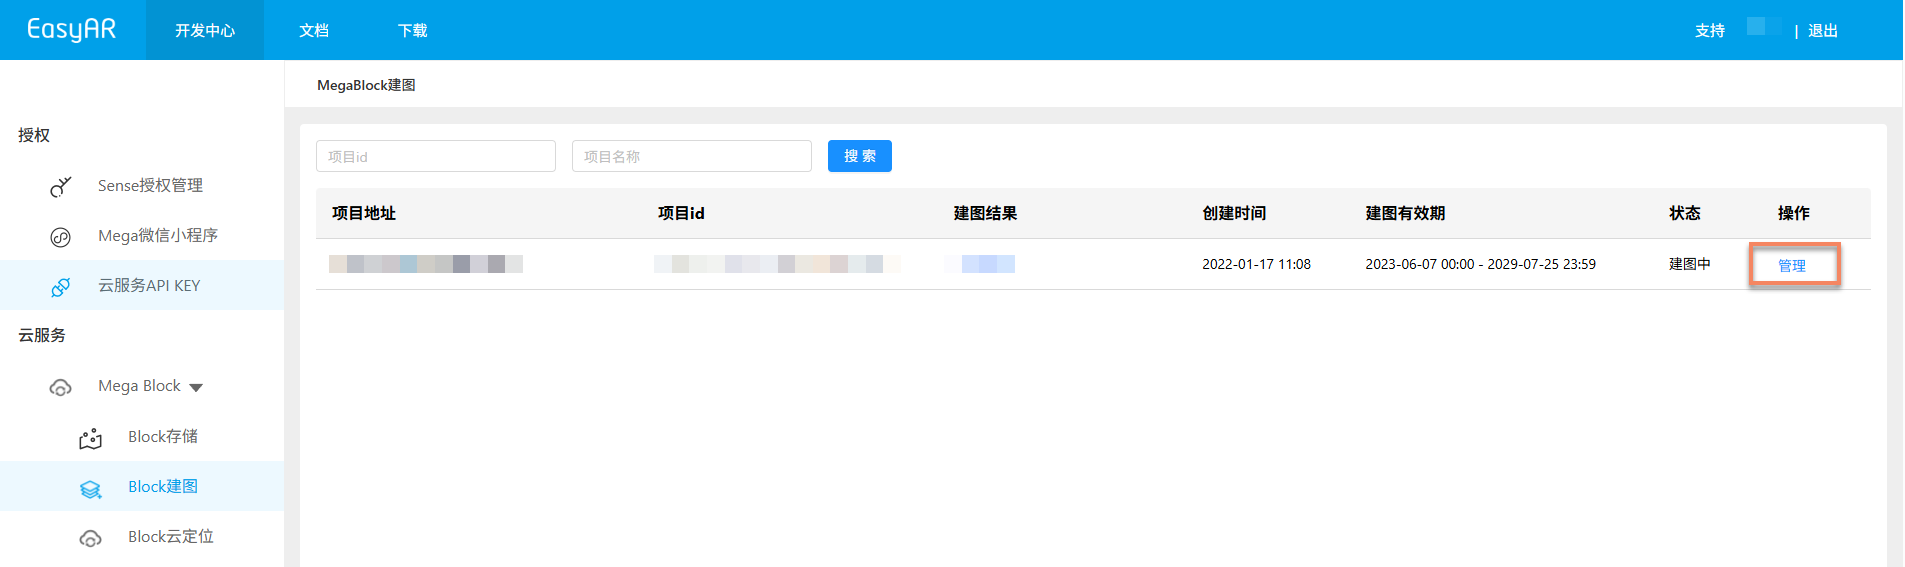
Log in to EasyAR Development Center, select Mega Block -> Block mapping from the left menu bar, choose the corresponding project address, and click the Manage button to enter the mapping task interface.
Create single graph lossless update task and upload data
Select the single graph task that requires lossless update, click the
Lossless point cloud upgradebutton.

Fill in the following information in the pop-up window:
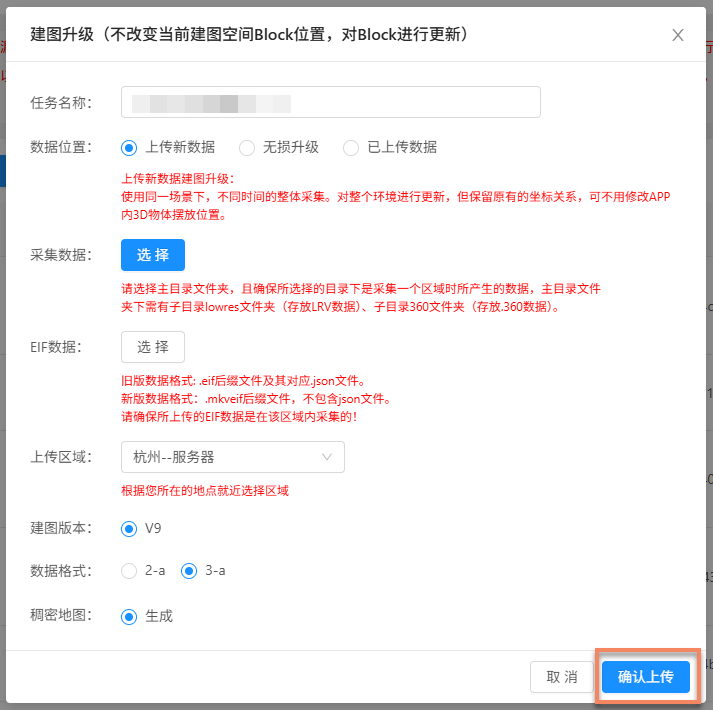
- Task name: Enter the name for this lossless full update task.
- Data preparation: Please refer to regular single graph task data preparation.
- Data location: Select
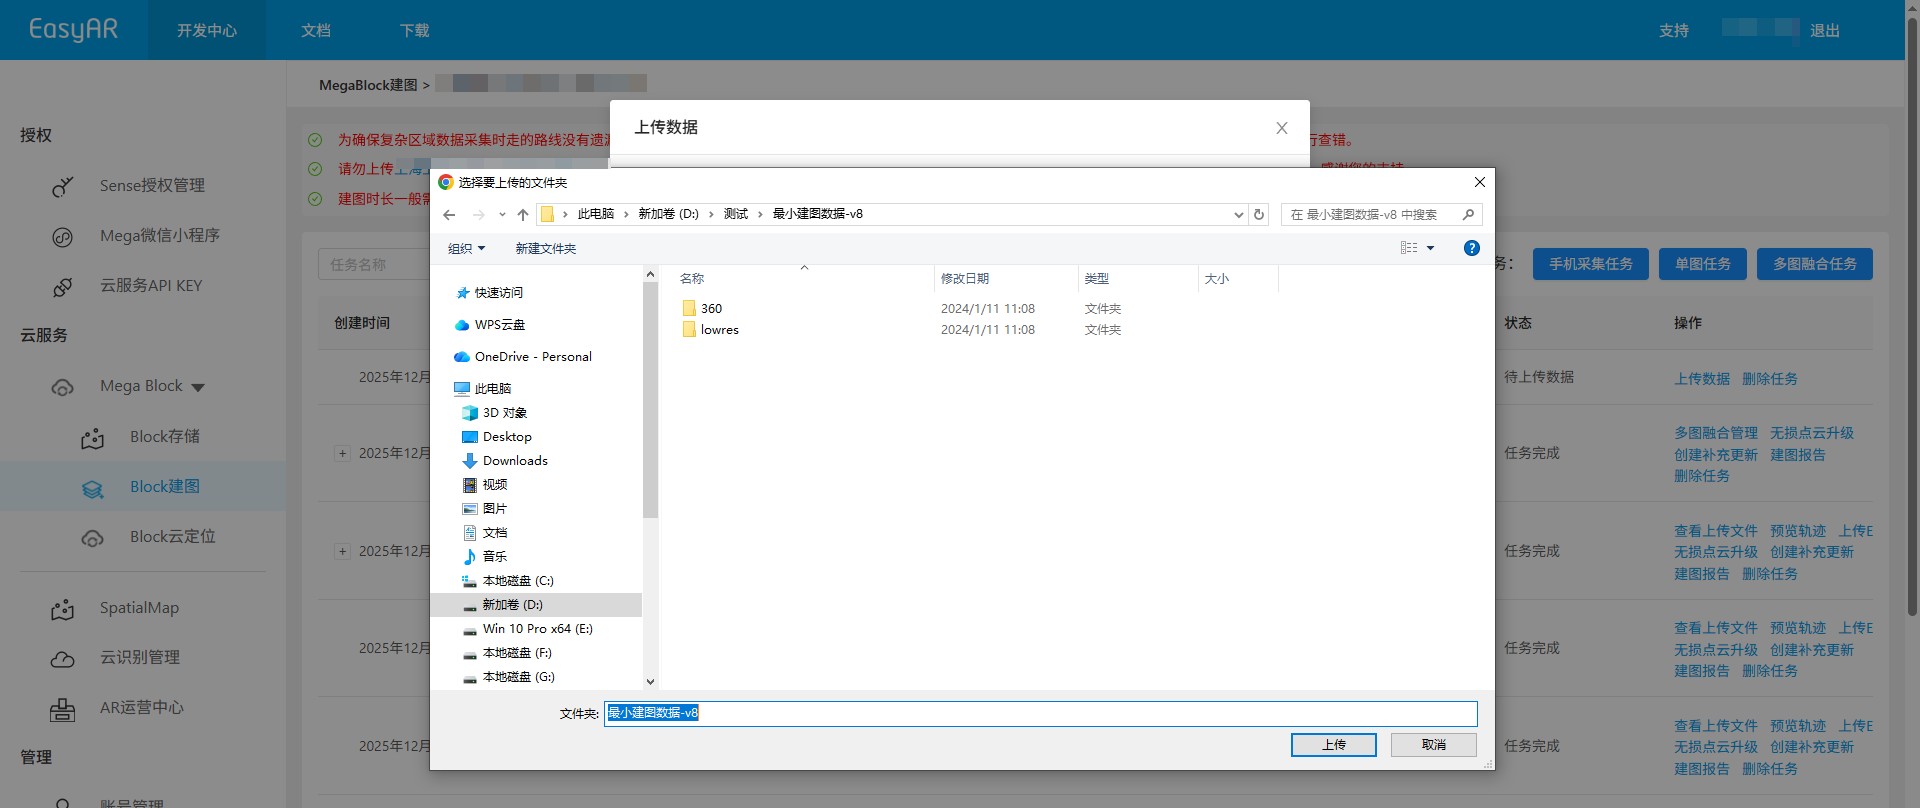
Upload new data. - Collection data: Click
Choose, select the main directory folder of the data, then clickUpload.
- EIF data: Optional, click the
Choosebutton to upload the corresponding EIF data file. Supports supplemental EIF data upload after mapping starts. - Upload region: Select the nearest location based on the operator's location.
- Mapping version: Default uses the latest version V9.
- Data format: Recommended to use the latest version 3-a.
After confirming all information is correct, click the
Confirm uploadbutton to submit the task. The list will display upload progress and status.
During data upload, keep the computer powered on and network stable. Do not close the browser, refresh the page, or click other menus, otherwise the upload will be interrupted and require restarting.
Start mapping
After upload completes, the task automatically enters Under review, as shown below.

After approval, the task automatically enters the mapping process, with status showing Queued or Generating, as shown below. Please wait patiently for mapping to complete.

Confirm mapping results
After the task enters the mapping process, check the Task status to determine if mapping is complete. When status shows Task completed or Generation failed, the mapping task has ended.
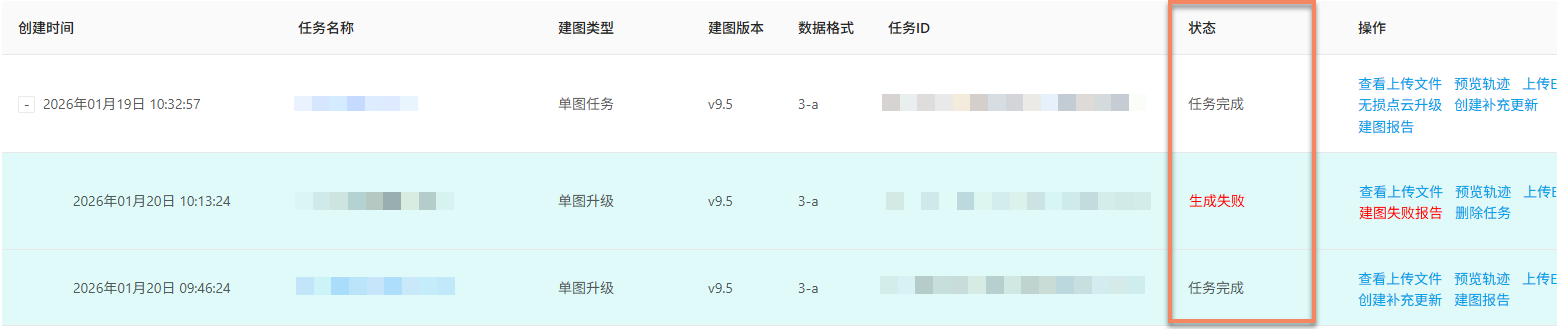
Mapping success
When task status shows Task completed, mapping succeeded and results are generated. You can now view mapping results to confirm if they meet expectations.
View mapping results:
Mapping failure
When task status shows Generation failed, mapping failed. Recommended troubleshooting steps:
- View mapping report: View mapping report, find solutions based on report information.
- Reference troubleshooting: Consult mapping failure troubleshooting guide for common solutions.
- Contact technical support: If above methods don't resolve the issue, contact EasyAR staff and provide the
JobIDfrom the mapping report for quick problem identification.
Multi-graph lossless update mapping
Log in to EasyAR Development Center, select Mega Block -> Block mapping from the left menu bar, choose the corresponding project address, and click the Manage button to enter the mapping task interface.
Create multi-graph lossless update task
Select the multi-graph task requiring lossless update, click the
Lossless point cloud upgradebutton.
In the pop-up dialog, enter the task name, select mapping version and data format (recommend latest version), then click
Confirm addto create the multi-graph point cloud lossless update task.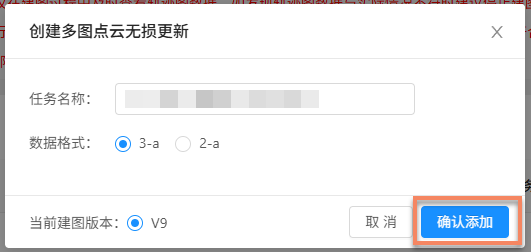
Add sub-mappings
After creating the multi-graph lossless update task, add sub-mapping tasks for each independent collection area.
Click
Multi-graph fusion managementto enter the corresponding management interface.
Click
Add sub-mapping, enter task name and clickConfirmto create a sub-graph. Note: Each independent collection area requires a separate sub-mapping task.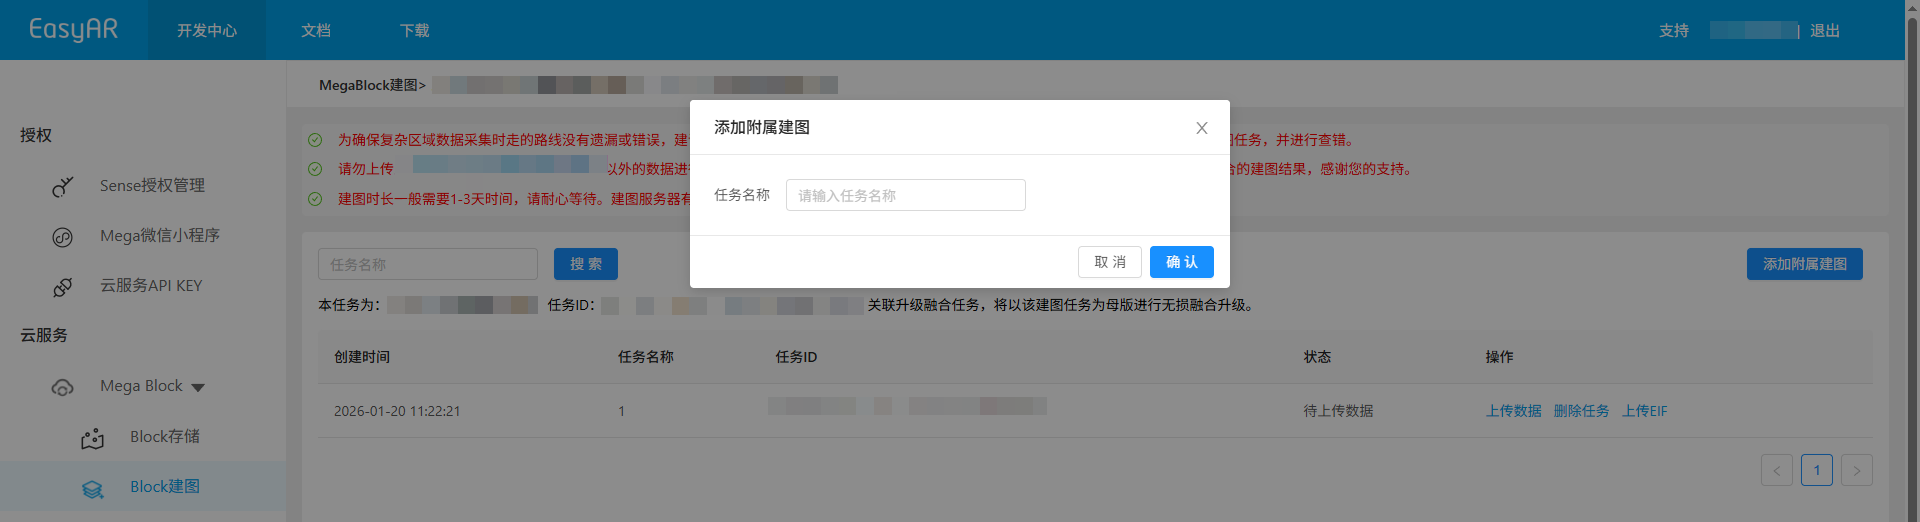
Data preparation
Before uploading data, ensure collected spatial data meets requirements and is organized/stored according to specifications. Below details naming, storage, and structure specifications for data collection devices and files.
- Data collection and export
- Data folder naming
- Data storage location
- Data file structure specifications
- Data file naming specifications
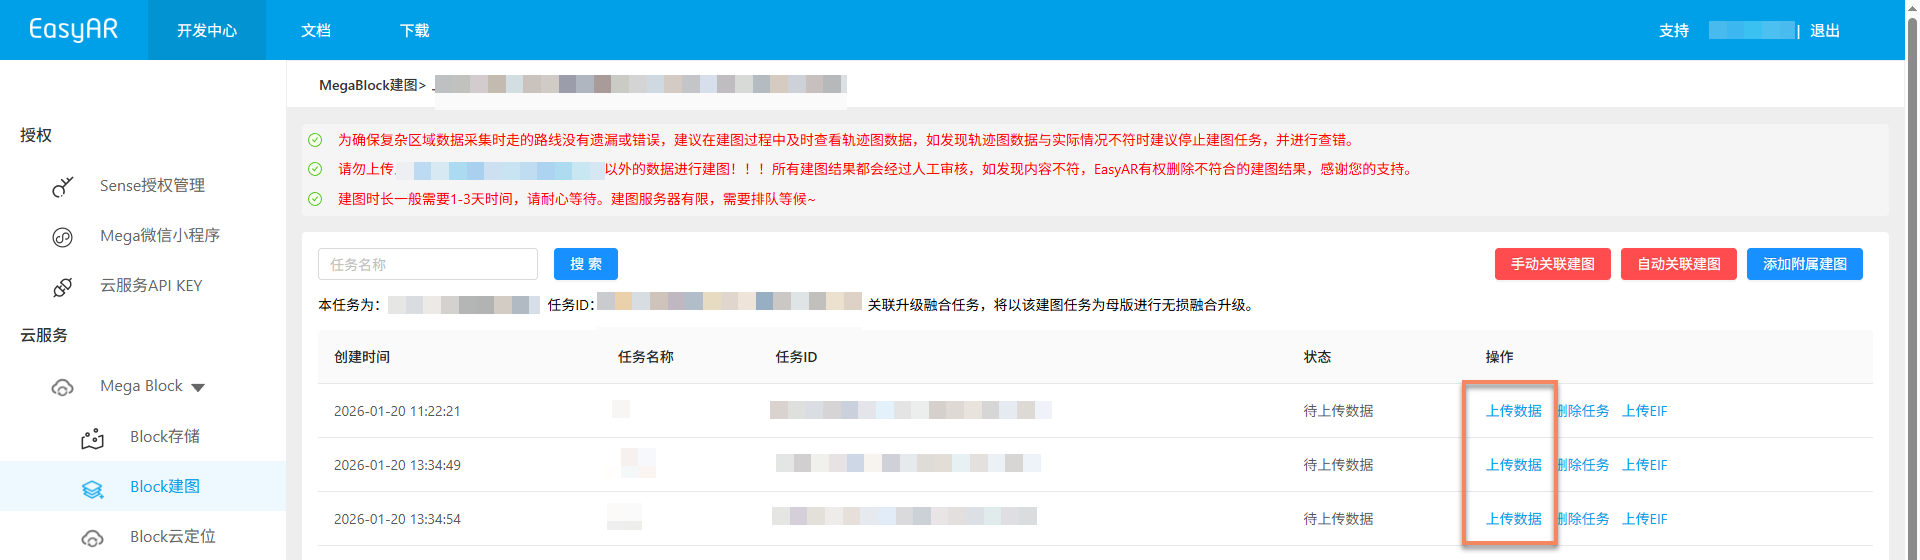
Upload data
Upload rules are identical to single graph tasks. Upload data under corresponding tasks. Refer to single graph task data upload for details.
Data upload location explanation: Choose Local new data or Alibaba Cloud link upload method.
Start multi-graph lossless update mapping
Multi-graph lossless update mapping follows the same workflow as multi-graph fusion mapping. Specific steps refer to starting multi-graph fusion mapping chapter.
Confirm mapping results
After the task enters mapping process, check Task status to determine completion. When multi-graph lossless update task status shows Task completed, Mapping results unsatisfactory or Generation failed, the mapping task has ended.

Mapping success
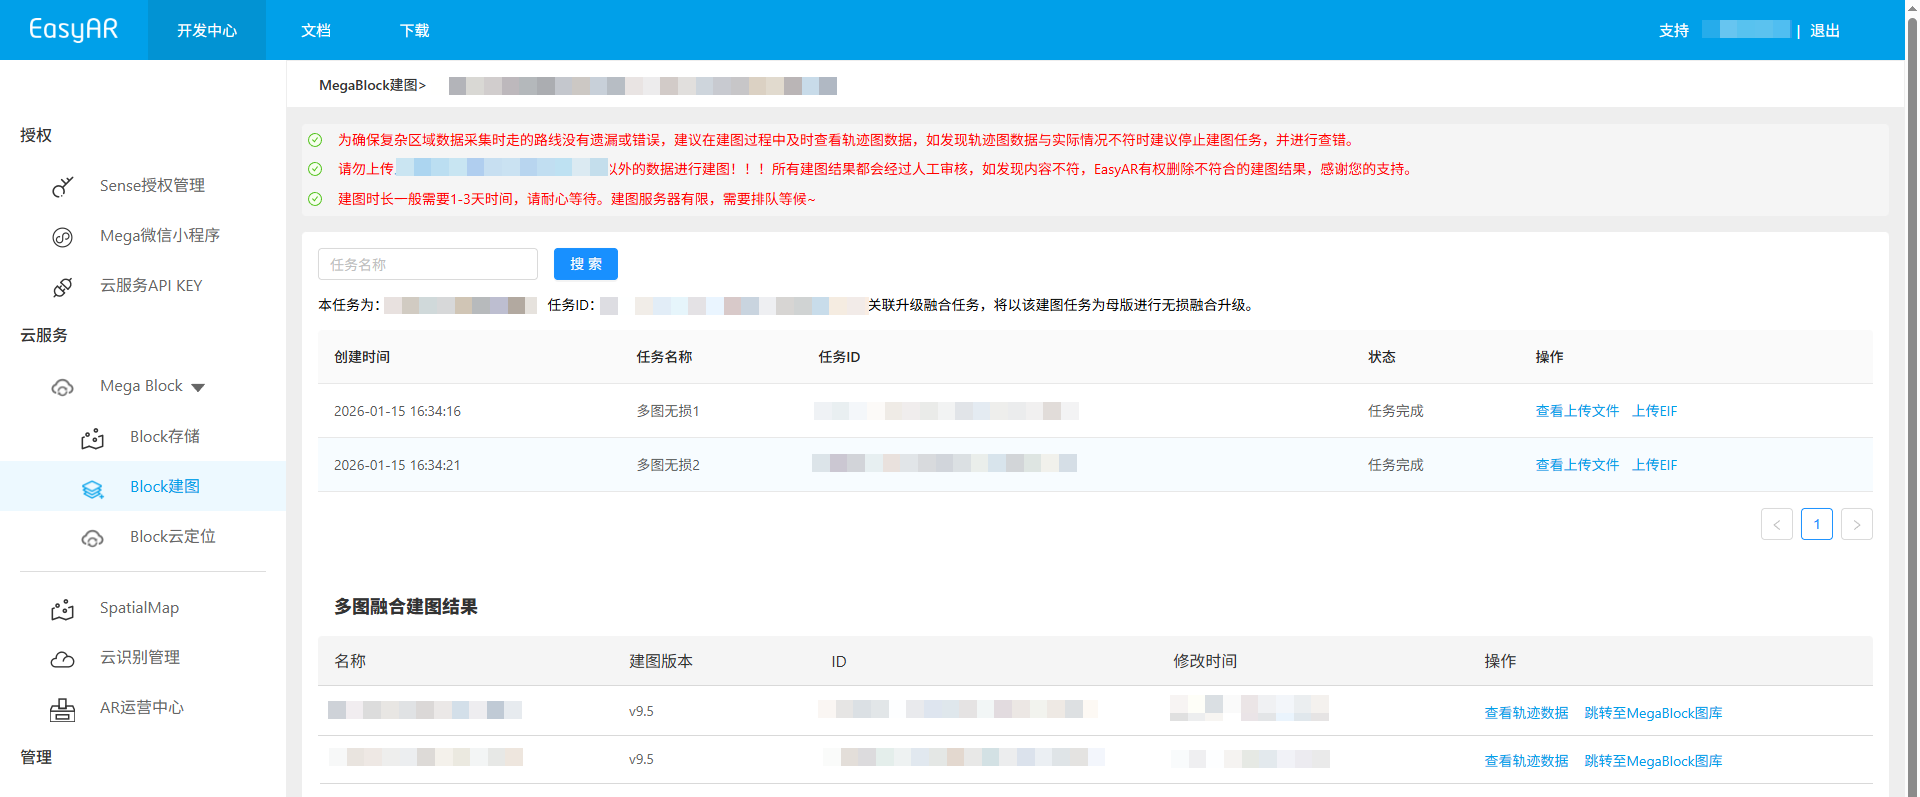
When task status shows Task completed or Mapping results unsatisfactory, mapping succeeded and results are generated. After multi-graph mapping completes, results display in the multi-graph fusion management interface.
Mapping result explanation:
Task completed: Mapping completed and fusion succeeded, resulting in a complete Mega Block.
Mapping results unsatisfactory: Mapping completed but fusion poor, resulting in multiple Mega Blocks.
When
Mapping results unsatisfactoryappears, recommend checking:- Collection route specifications: Ensure routes meet specifications with sufficient overlap between sub-graphs. (Reference: collection specifications)
- File upload completeness: Confirm all files uploaded without omission. (Reference: preview uploaded files)
- Collection area coverage: Verify areas cover all requirements without missed collections. (Reference: review collection routes)
- Manual association accuracy: If manual association mapping performed, ensure accurate sub-graph relationships. (Reference: manual association mapping)
If any issues found, correct and recreate tasks. If all checks pass, contact us for assistance.
View mapping results:
Mapping failure
When task status shows Generation failed, mapping failed. Recommended troubleshooting steps:
- View mapping report: View mapping report, find solutions based on report information.
- Reference troubleshooting: Consult mapping failure troubleshooting guide for common solutions.
- Contact technical support: If above methods don't resolve the issue, contact EasyAR staff and provide the
JobIDfrom the mapping report for quick problem identification.