Supplemental update mapping
This article details the complete workflow for supplemental update mapping in the EasyAR development center, including steps such as creating supplemental update tasks, adding supplemental data, data collection and organization specifications, data upload, and initiating the mapping process. It helps users efficiently complete supplemental update mapping for their scenes.
Creating a supplemental update task
Log in to the EasyAR development center, select
Mega Block->Block mappingfrom the left menu bar, choose the corresponding project location, and clickManage.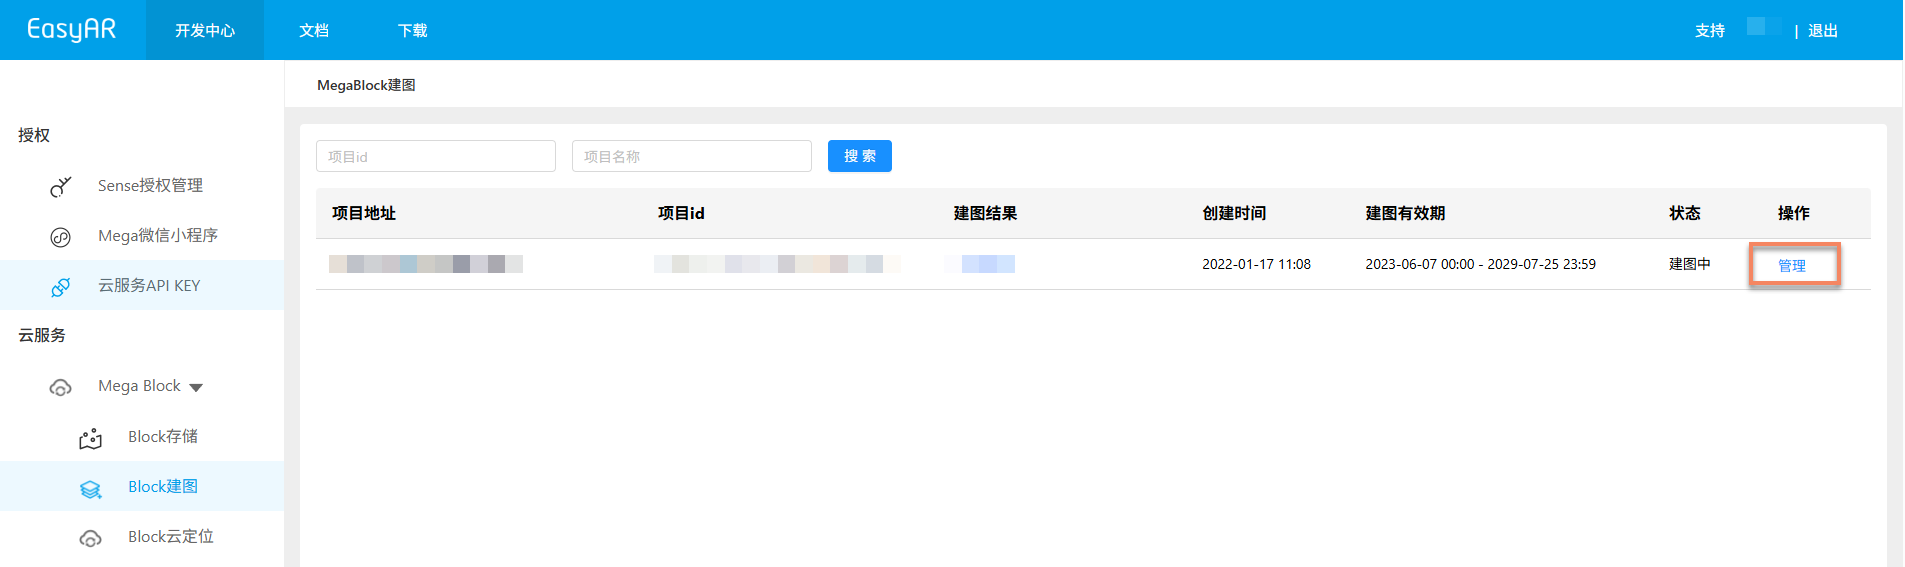
Select the mapping task that requires supplemental updates and click the
Create supplemental updatebutton.
In the pop-up dialog, fill in the supplemental update task name and remarks, then click
Confirm add.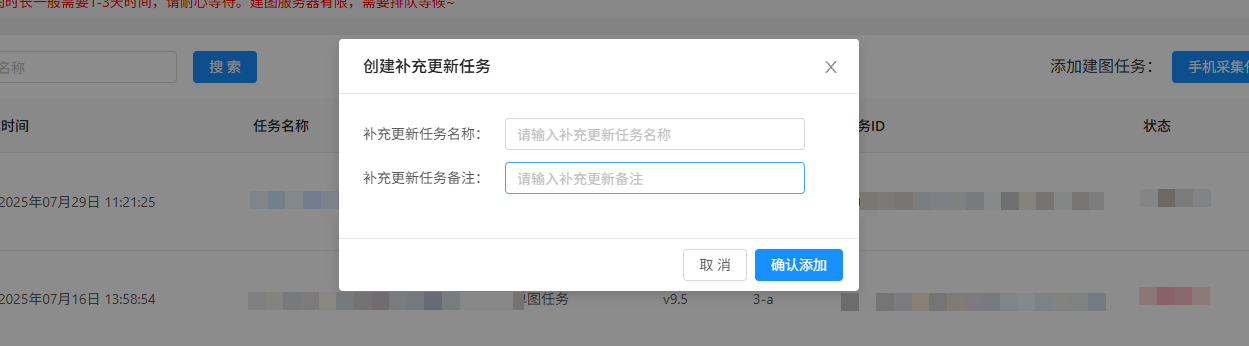
Click the
+before the mapping task that requires supplemental updates to see the newly created supplemental update task. Click theSupplemental data managementbutton in the operation column of the supplemental update task to enter the supplemental data management interface.
Data preparation
Before starting the mapping task, ensure that the spatial data collected by the panoramic camera meets requirements and is organized and stored according to specifications. For specific collection methods, refer to: Collecting changed area data.
Relevant data specifications
- Data folder naming
- Data storage location
- Data file structure specifications
- Data file naming specifications
Adding supplemental data
After entering the supplemental data management interface, create corresponding supplemental data based on the number of supplemental update areas. If there are multiple supplemental updates, multiple supplemental data entries should be created.
Adding new supplemental data
Applicable scenario: Used to add recently collected data that needs to be updated to the scene.
Operation steps:
Click the
Add supplemental databutton, fill in the supplemental update data name and remarks in the pop-up dialog, then clickConfirm add.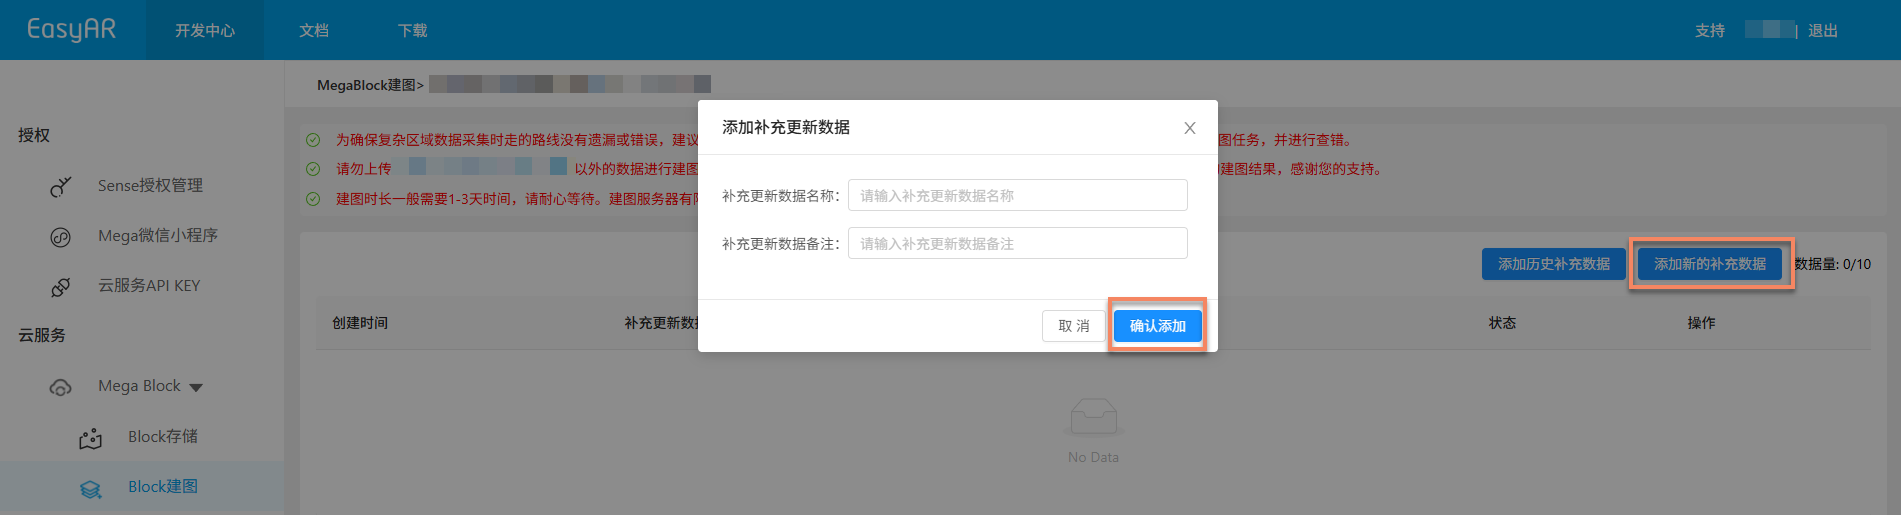
Click the
Upload databutton, then click theSelectbutton in the pop-up dialog to choose the folder containing the main data directory for upload. Select the nearest region for upload. After selection, click theConfirm uploadbutton. The upload progress and status will be displayed in the list.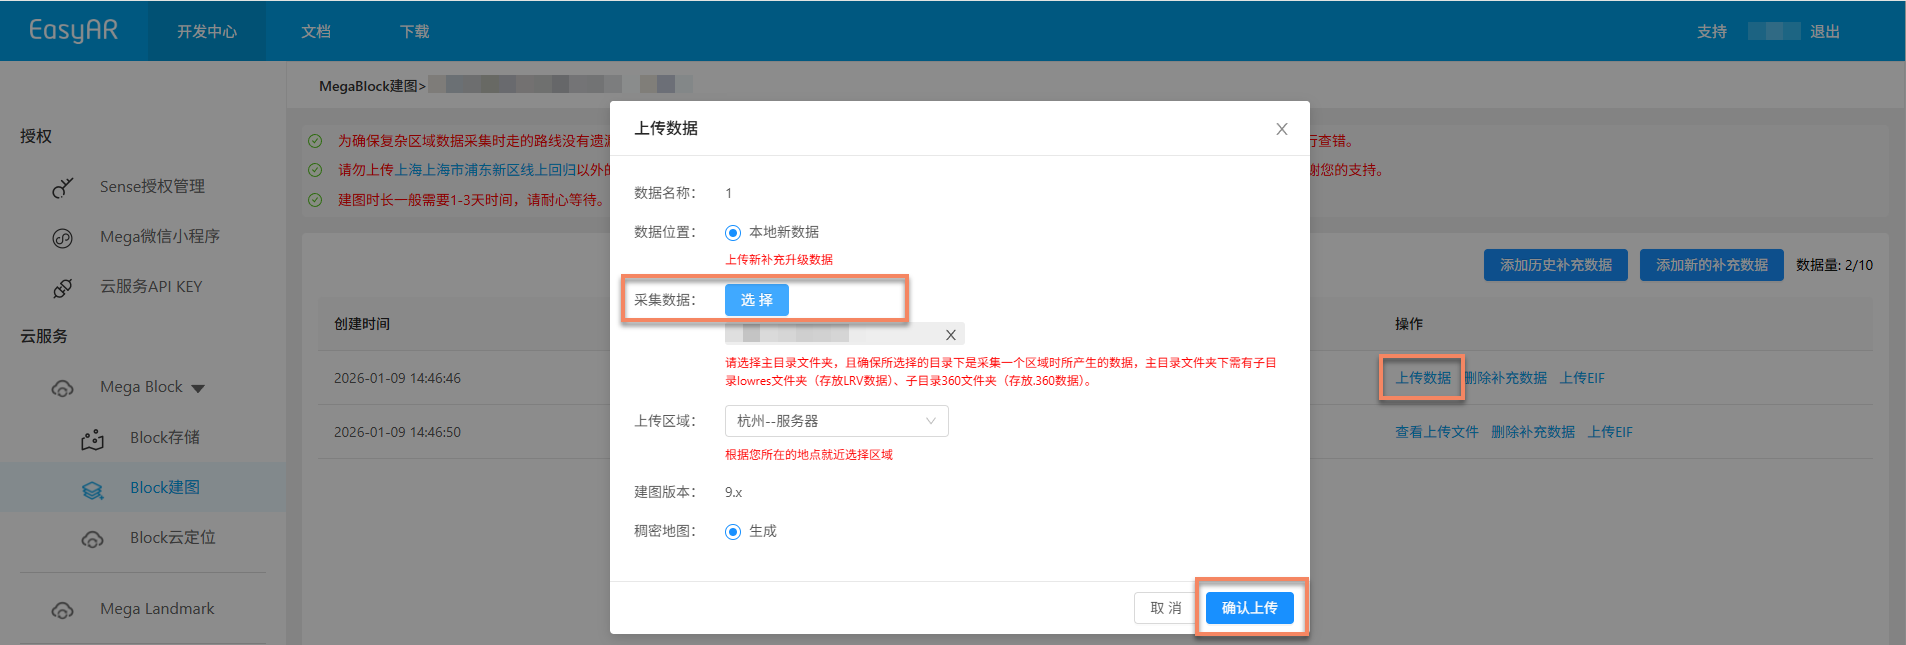
Tip
A single supplemental data entry supports uploading up to 2 segments of 360 video data.
Adding historical supplemental data
- Applicable scenario: When the current supplemental update task needs to merge previously added supplemental data.
- Operation steps: Click the
Add historical supplemental databutton, select the required data in the pop-up dialog. You can preview the LRV file in the uploaded files. After confirming the data is correct, click theConfirmbutton.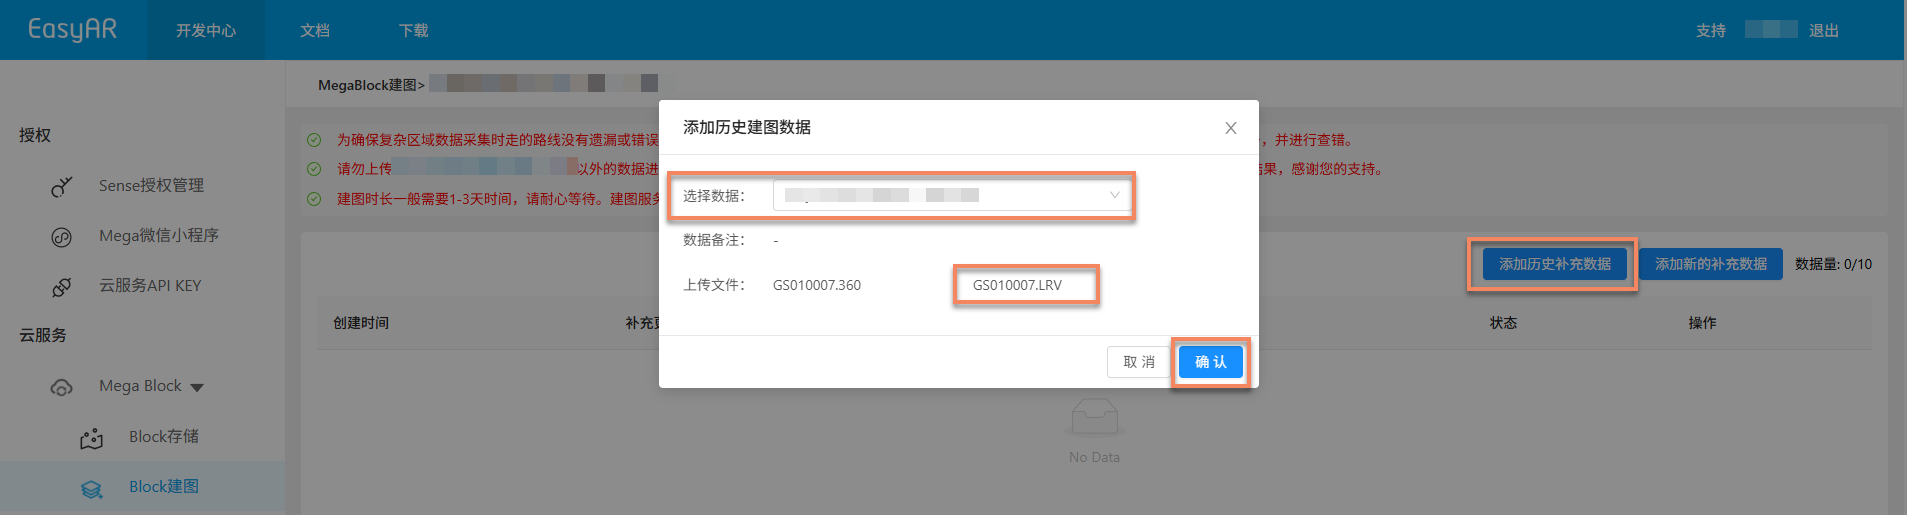
Starting mapping
After the supplemental update data is uploaded, the
Start mappingbutton will appear on the page. Click the button to begin mapping.
After starting mapping, the task will automatically enter the
Under reviewstatus. Once approved, the task will automatically enter the mapping process, with the status displayed asQueuedorGenerating, as shown below. Please wait patiently for the mapping to complete.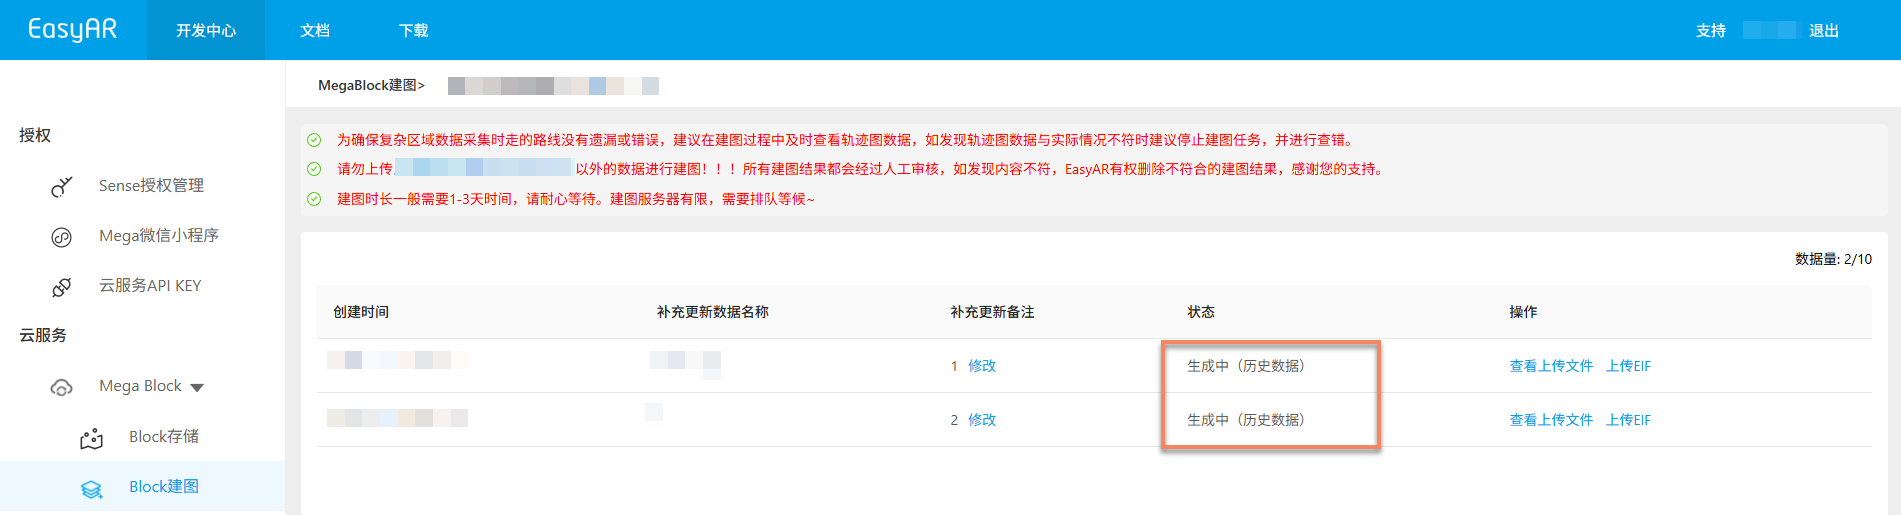
Confirming mapping results
After the task enters the mapping process, you can determine whether the mapping task is completed by the Task status. When the status shows Task completed or Generation failed, it indicates the mapping task has ended.
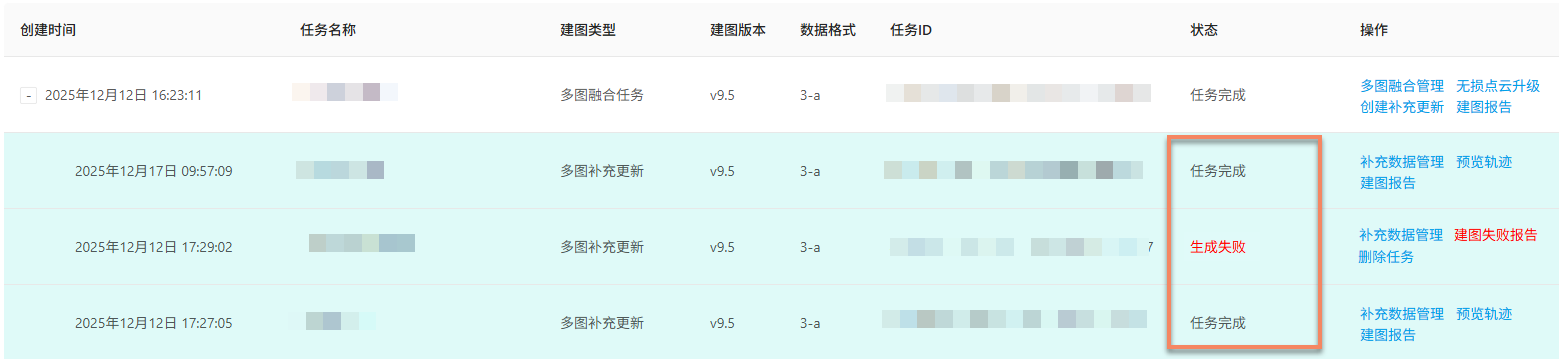
Successful mapping
When the task status shows Task completed, it indicates successful mapping, and the mapping results have been generated. You can then view the mapping results to confirm if they meet the expected requirements.
Viewing mapping results:
- Reviewing collection routes
- Viewing mapping reports
- Previewing spatial models
- Viewing Block information
Mapping failure
When the task status shows Generation failed, it indicates mapping failure. It is recommended to troubleshoot in the following ways:
- View mapping report: View the mapping report and find solutions based on the information in the report.
- Refer to troubleshooting guide: Consult the Mapping failure troubleshooting guide for solutions to common issues.
- Contact technical support: If the above methods do not resolve the issue, contact EasyAR staff and provide the
JobIDfrom the mapping report for quick problem identification.